Chocolate Orange Strudel

What to do with the leftovers from a filo pastry packet!

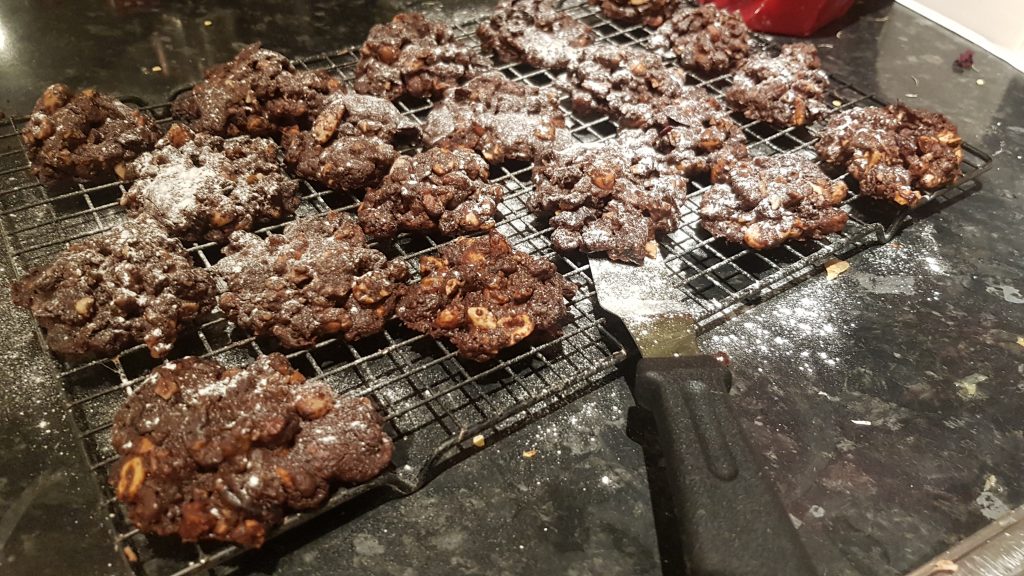
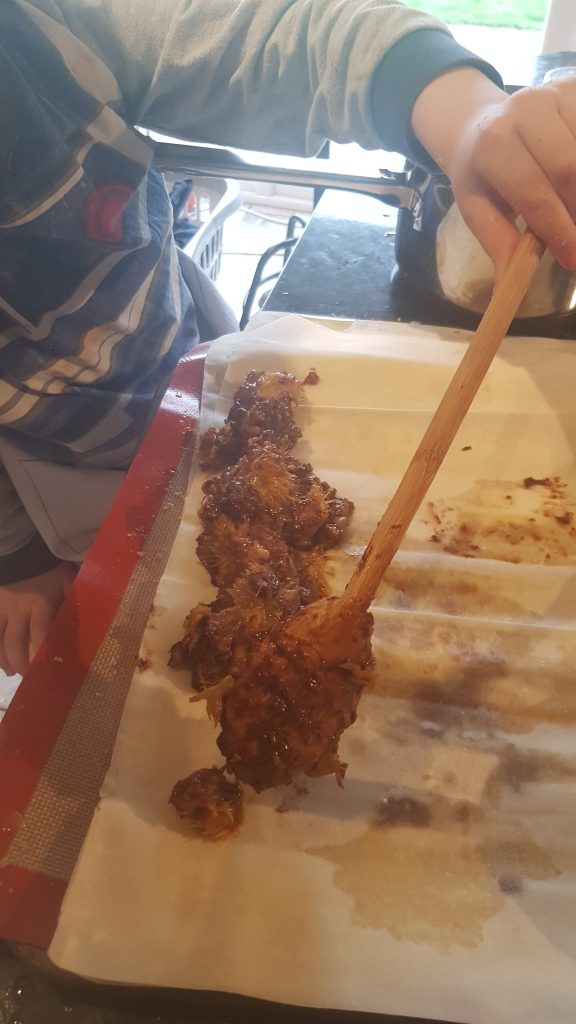
Do you ever buy a packet of Filo pastry and use only a small amount of it only to be left what you are going to do with the rest of the packet?! Maybe it is just me. I made a Slimming World friendly pie for Simon and my mum and it only called for one sheet of Filo pastry. So I decided the kids and I would use the rest in a sweet recipe. As they are often reluctant to try crumble and recipes with stewed fruit (please read here, wouldn’t touch stewed fruit with a barge pole) I decided to try and alter the texture of the cooked fruit with masses of crushed bourbon biscuits, and a couple of tablespoons of Sweet Freedom Spiced Orange Choc Shot. The kitchen smelt amazing while we had this on the stove! I would have happily eaten the oranges, crushed biscuits and Choc Shot mixture straight from the pan. I was instead on my best behaviour as Seb was in charge of the pan and I didn’t want to be admonished by a six year old!

Orange slicing in full swing.

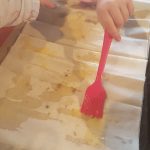
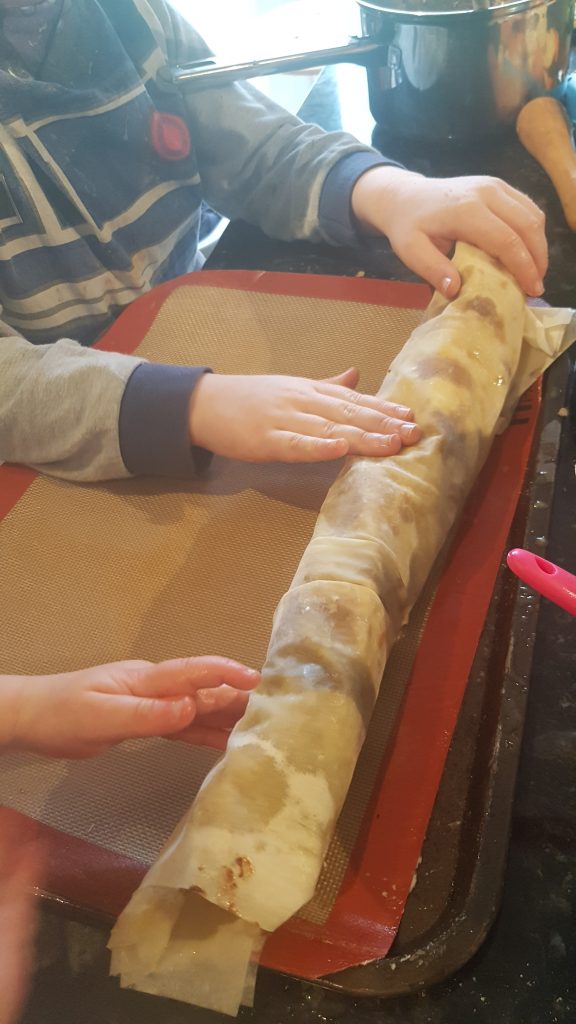
This recipe was so much fun to make; the kids had fun crushing biscuits and painting the filo pastry with melted butter. It’s true that the filo pasty sheets are fragile and they did need help moving single sheets before painting them, but we didn’t have any major mishaps! Also we put the melted butter in a wider based bowl than the last time we worked with filo pastry so I didn’t have any melted butter to clear up!

Dollop it on!
Roll it up!

Ingredients

  • 100g melted butter
  • 3 oranges, peeled
  • 4-5tbsp of light muscovado sugar
  • 100g bourbon biscuits (or any other chocolatey biscuits)
  • 100g walnuts
  • 2 tbsp. Sweet Freedom Spiced Orange Choc Shot
  • 50g chocolate chips
  • 1 pack of filo pastry
  • Icing sugar for dusting

Method

  1. Preheat the oven to 200°c and put a silicone baking sheet on a baking tray.
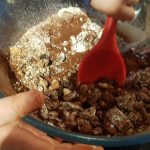
  2. Slice the oranges into bite-sized pieces, bash the walnuts and crush the chocolate biscuits.
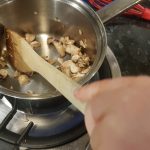
  3. Put a couple of tbsp. of melted butter into a saucepan and add the oranges over a low heat.
  4. Add the walnuts, crushed biscuits and the Choc Shot and mix all well. You should have a sticky chocolatey mess. It should be thick and not runny.
  5. Lay a single sheet of filo pastry on the silicone baking mat and paint with melted butter and add a sprinkling of the muscovado sugar.
  6. Add another sheet of filo pastry and repeat step five. Continue until you have used all the sheets of filo pastry.
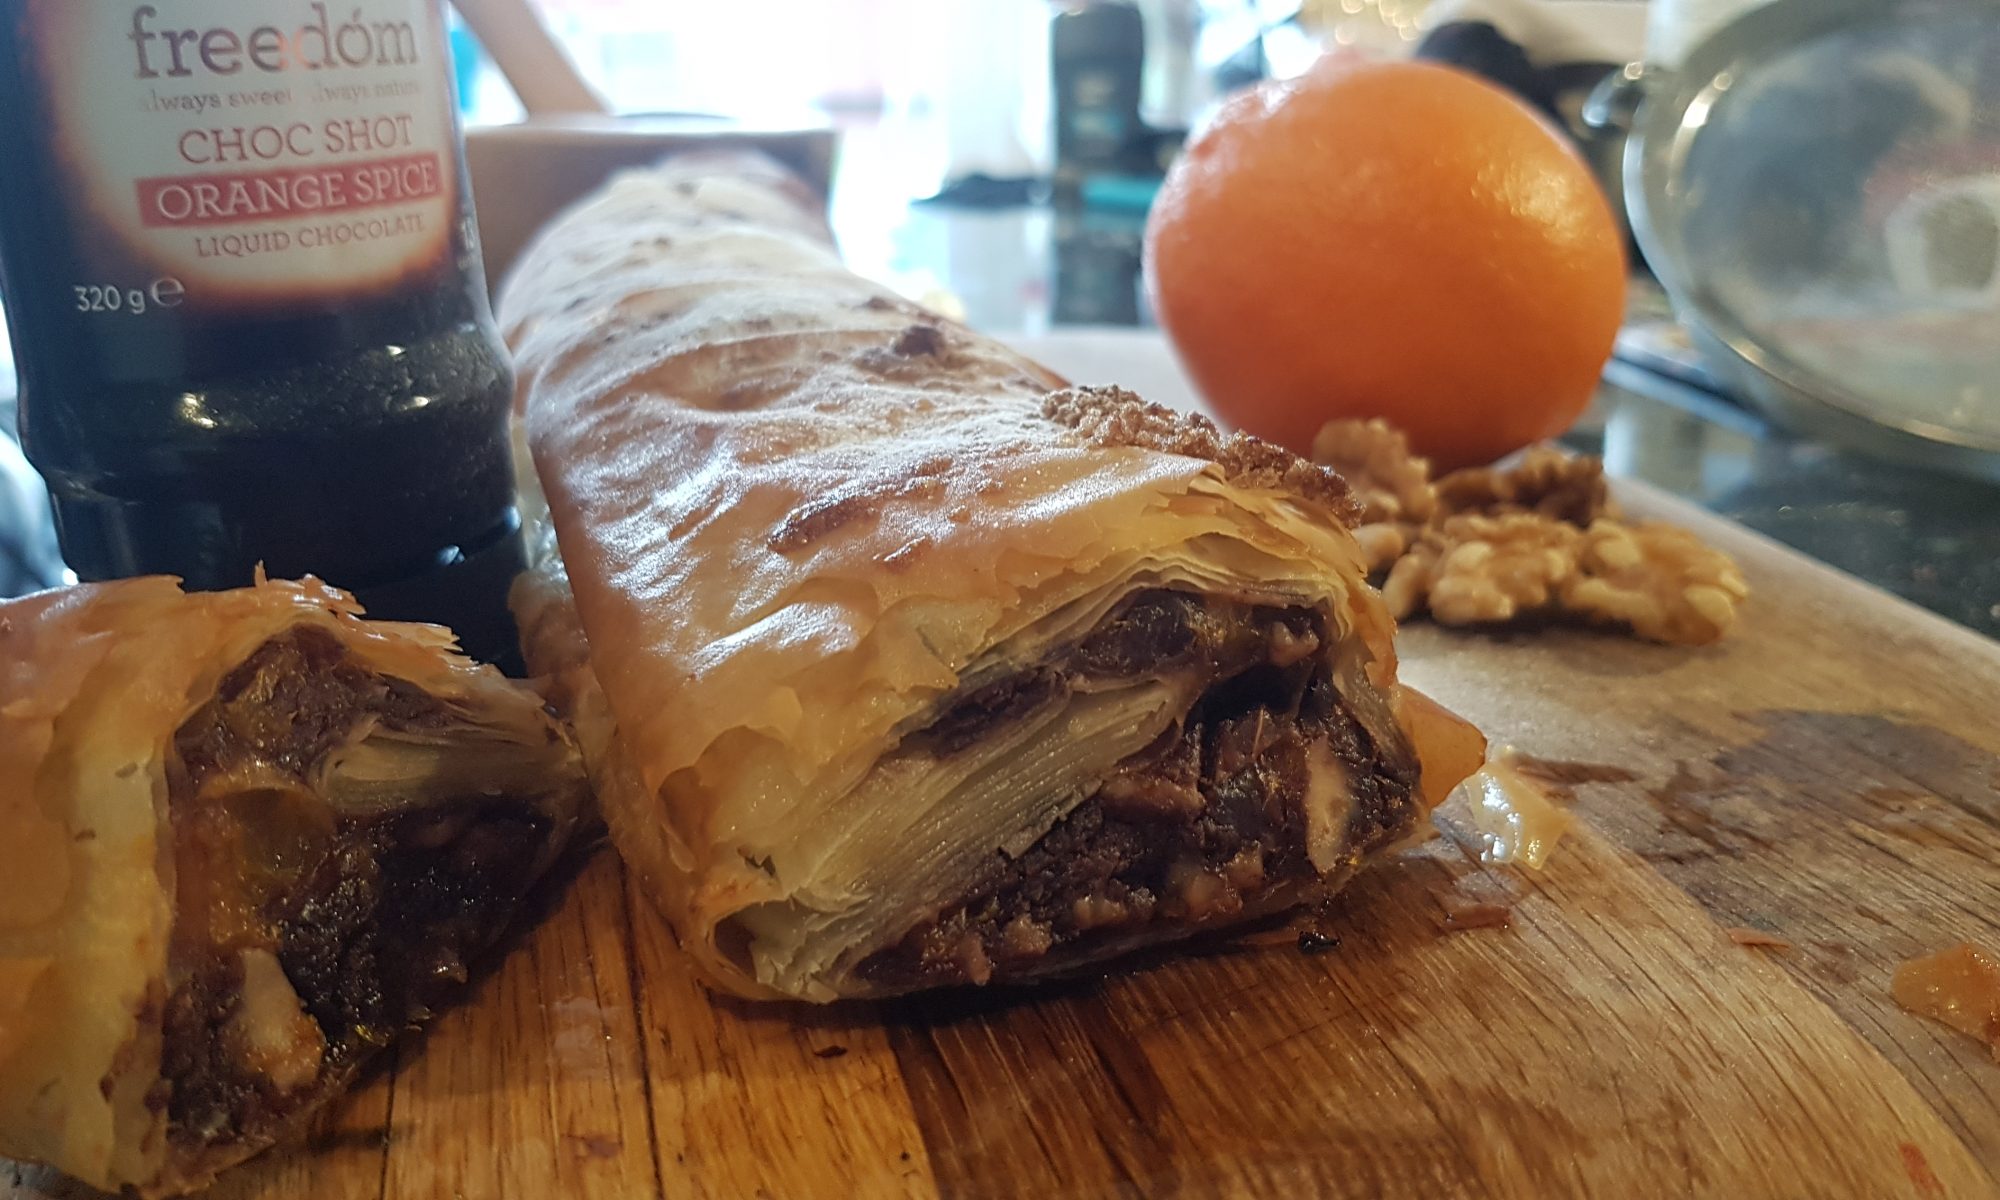
  7. Place the filling down one long side of the pastry and roll it up to make a long sausage, tucking the ends in as you role (I did this bit).
  8. Ensure the strudel is seam-side down and brush with melted butter and the remaining muscovado sugar.
  9. Bake in the oven for 35-40 minutes until golden and crisp and the pastry is cooked through. Leave to cool for 10-15 minutes before sprinkling with icing sugar and serving with ice cream and/or more Choc Shot.
Oh yum!

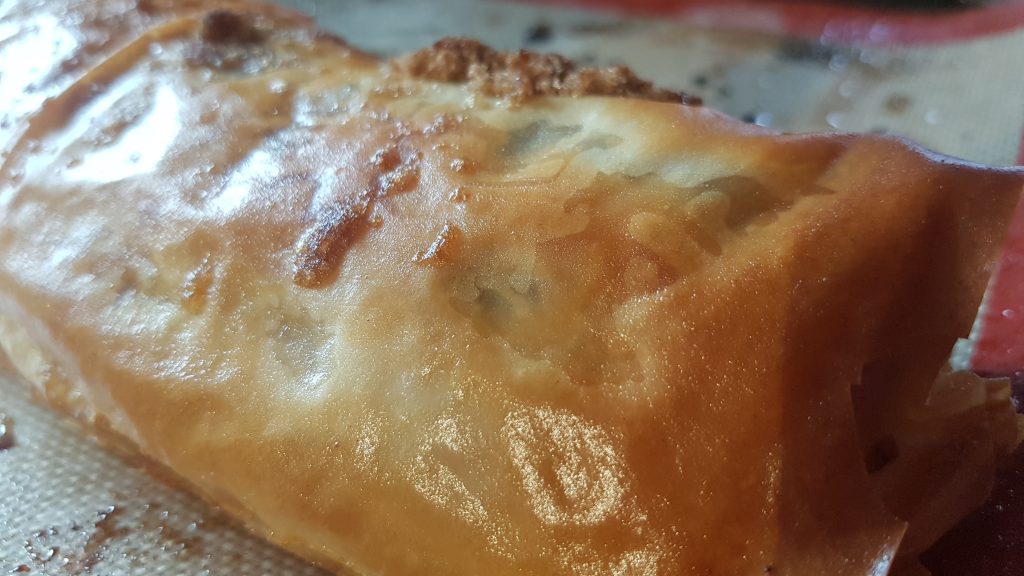
Two out of the three kids loved this recipe so I am counting it as a win. I thought it was yummy and would have happily scoffed the whole strudel all by myself. The only thing that stopped me is that I had had quite a cake-heavy day and I really thought I should lay off more sweet treats or I would have had a sugar rush all night!

Salmon and Soy Sauce Bake

Slicing hard boiled eggs and taking about fractions.

I am sure I have already said so before, but if there is a request to help in the kitchen, it is always granted no matter how inconvenient it may be at the time. This does mean that some evenings dinner is ready a lot later than originally planned or even the latter – too early as they didn’t want to help! It has to be said though, sometimes asking them for help can lead to them not wanting to. I have learnt that if I start making the food using their colourful knives and doing things they like such as chopping vegetables, cracking eggs, whisking and mixing they become eager to help and argue over whose turn it is next!

Measuring out the soy sauce. There was an intense look of concentration on his face as he completed this task!

We didn’t have any such scenario for this time around. This is because Seb has recently been invested into our local Beaver colony. He will tell anyone who will listen (including complete strangers) that he is a Beaver with a necker and woggle. This statement is sometimes met with looks of confusion, but most people who have had some contact with the Scouting or Guiding movement will show what he deems to be an appropriate response. I quickly realised that there is a cooks badge and I asked him if he wanted to make some items towards it. He was even more eager than I could have anticipated!

This meal was eaten by the whole family and was entirely put together by Seb. There is a small amount of adult preparation. You could use tinned potatoes if you want to reduce the amount of adult preparation. We used tinned salmon, but you could cook some pieces of salmon instead. We also were able to use this activity to reinforce Seb’s understanding of whole, half and quarter as he quartered the boiled eggs. I completely love it when cooking can help with multiple areas of the curriculum!

Time to mix it all around!

Ingredients

  • 500g new potatoes (or other small potatoes)
  • 4 medium eggs
  • 2 tins of skinless and boneless salmon (170g each) or 4 salmon fillets
  • 150g sugar snap peas
  • 150g sweetcorn (tinned or frozen)
  • 2 salad tomatoes
  • 8tbsp reduced salt soy sauce
  • 1 inch piece of fresh ginger, grated
  • 3 cloves of garlic
  • Seasoning

Adult preparation

  1. Boil the new potatoes for 15-20 minutes, drain and leave cool.
  2. Gentle lower the eggs into boiling water and simmer for 8-10 minutes. Run under cold water and remove shells.
  3. Grate the ginger

Older children could do all of the above, but as Seb was making this after school I did the three above steps for him.

Method

  1. Preheat the oven to 170°c and spray a large oven proof (we used Pyrex) dish with Frylight.
  2. Cut the potatoes, sugar snap peas and tomatoes into small pieces and add the large oven proof dish.
  3. Cut the eggs into quarters and add to the dish.
  4. Add the sweetcorn.
  5. Remove the salmon from the tins and gently squish with a fork to separate and add to the dish.
  6. In a small bowl, measure out the 8tbsp of soy sauce.
  7. Add the grated ginger.
  8. Gently bash the garlic cloves with a rolling pin and remove the skin and then crush with a garlic press. Add to the soy sauce.
  9. Mix the ginger and garlic into the soy sauce and pour over the dish with the rest of the ingredients and gently mix.
  10. Place in the oven for 20 minutes. Remove from the oven and serve immediately.

Simon and I really enjoyed this dish. Seb wasn’t keen on the tomatoes, but in fairness he never is. Our little potato-hater managed to eat at least one new potato, but was adamant that he would not eat any more. As usual Ophelia managed to eat pretty much her whole portion. It was a nice family meal and one I am eager to repeat. Do get in contact if you make this as we would love to hear from you!

Rugby Wraps

My family has never had a particular tradition or connection to one particular sport. When growing up, my dad would always, I mean without fail, watch the Grand Prix. But it was never a family activity. I believe it was a source of mild frustration for my dad that neither of his daughters showed any interest in watching the motor racing with him. As a teenager, I remember looking forward to Grand Prix weekends as it meant I could have a Sunday afternoon to myself as long as dad wasn’t disturbed!

I always knew that my husband was a rugby fan; when I first met him he was wearing a Leicester Tigers rugby shirt. Although, if truth be told, I would have been hard pushed to tell you that! Before we were married, it was very easy for me to avoid watching the rugby with him and make other plans. However, when we married, I realised that I wouldn’t be able to avoid the game my entire life. So I set about trying to understand the rules. I asked many, many questions. It may have actually been the same question over and over again and after over 10 years of marriage I am somewhat ashamed to admit my understanding of the rules hasn’t progressed!

Ready to fill the wraps.
Seb with his wrap shortly before it was demolished!

My interest in understanding rugby was dwindling and then Simon told me that the 2011 Rugby World Cup was taking place in New Zealand. He asked me if I would like to watch the matches with him. I was rather reluctant as they would all be taking place rather early and although I am an early bird, I like my time to myself in the mornings. He promised me he would make me breakfast and a deal was struck. This was when what were initially called Rugby Sandwiches were created. In their original form, we used partially baked baguettes filled with a combination of scrambled eggs, bacon and sausage and mushrooms. I had mine with vegetarian sausages. Fast forward to the present day (and the airing of the Six Nations 2019) and we are still making these. We have exchanged the partially baked baguettes for wraps as the kids eat them better and they work well if you are following Slimming World! Isn’t it funny how life changes?!

and cooking mushrooms.
Seb scrambling eggs

I was really impressed with my six year old during this process as he scrambled the eggs himself and kept an eye on the mushrooms and mixing them around while I sorted the bacon. He was so very proud of his efforts, and proudly told his dad how he cooked the eggs and the mushrooms! The kids demolished a couple of mini wraps each and the grown ups had these with potato wedges. Everyone was rather happy!

Ingredients

  • Wraps (in our house the grown ups used normal-sized wraps and the children had a couple of mini wraps each)
  • Eggs (we used one for each person)
  • Mushrooms (we used about 50-60g as not everyone likes them in this house)
  • Bacon (we allowed 2 pieces per adult and 1 piece per child) or vegetarian sausages
  • Butter Frylight or margarine

Method

  1. Chop the mushrooms and put to one side.
  2. Crack the eggs into a bowl and whisk (Seb called it this the ‘whizz mix’ which made me chuckle! Seb shows you how it is done in the video below.)
  3. Put the bacon onto grill.
  4. Spray a small saucepan with Butter Frylight and add the mushrooms to fry. Mix every so often to stop them sticking.
  5. Spray another small saucepan or frying pan with Butter Frylight and pour the beaten eggs into it. As the egg starts to set, mix it all around until the egg is fully cooked.
  6. Put the cooked mushrooms and scrambled eggs into individual little bowls with spoons to serve.
  7. Cut up the grilled bacon and place in another bowl.
  8. Give everyone a wrap on a plate and allow them to spoon in the fillings they want and roll up. If you are not eating them immediately, putting a cocktail stick in the keeps them wrapped.
  9. Enjoy in front of the rugby!

Squirrel Poo Biscuits

The winning jump at long jump.

Last week, Atticus’s homework was about measuring. The instruction sheet came with a couple of ideas and baking was one of them. In all fairness, I do not need any encouragement to bake with the kids. I will quite happily turn pretty much any homework, assignment or gift into something I can make with the kids. However, my husband suggested it might be nice if I planned to do something else with him as their extracurricular activities are rather saturated with cooking. After my initial reaction of how dare he ruin my fun? I began to see that he may well have a point. For once, I am really hoping that he doesn’t decide to read this article as I find it very difficult to admit to him in person that he was right! So to have material for Atticus’s homework the kids had a game of long jump in the hallway. It was loud and jumpy and thoroughly enjoyable until Seb and I collided heads. I tell you the truth, my head hurt for a good 3 days after that bump. Seb told me he was fine not long after the bump and insisted everyday when I asked him if his head hurt that it didn’t. Mine, however, was throbbing… It must be that I just don’t bounce back the way I used to in my younger years…

Measuring out a tablespoon of golden syrup.

Despite having enough material for the homework, I really couldn’t pass up an opportunity to cook with Atticus alone. When asked, he said he wanted to make some chocolate biscuits with raisins. So I was racking my brain and focused on these biscuits. When I was thinking about them and the ingredients, chocolate, dried fruit and nuts and it reminded me of when my dad told me he always used to call Topic Bars squirrel poo bars. I mentioned to Atticus as a joke that they could be called Squirrel Poo Biscuits because they were brown and contained fruit and nuts which would all likely be present in a squirrel’s poo. This was clearly the funniest thing I had said in along time and I should have guessed that he would be unwilling to call them Chocolate Fruit and Nut Clusters after that! Please don’t let the name of these put you off making them though, they are really yummy!

Ingredients

  • 100g dark chocolate
  • 100g milk chocolate
  • 60g butter or margarine
  • 1tbsp golden syrup
  • 200g nuts (we used a mixture of peanuts, walnuts and almonds). If you want you can toast the nuts before you start, but it isn’t absolutely necessary, it just adds a bit of depth to the flavour.
  • 150g dried fruit (we used half raisins and half dried cranberries)
  • 40g plain flour
  • 2tbsp unsweetened cocoa
  • Icing sugar for dusting

Method

Stir it all around!
Bashing the chocolate
  1. Preheat the oven to 170°c or 150°c fan and line two baking sheets with silicone baking mats or greaseproof paper.
  2. Put half of the chocolate (we put the milk in, but you could do the dark or half and half) in a heatproof bowl with the butter and golden syrup and put on a pan on gently simmering water until it has all melted and is smooth.
  3. Chop or bash (we bashed with the end of the rolling pin in a large bowl) the rest of the chocolate and place in a large bowl
  4. Bash the nuts into smaller pieces. You can do this in small batches with a pestle and mortar or in a bag or large sturdy bowl with the end of a rolling pin.
  5. Put the nuts into the same bowl as the chocolate and sieve the flour and cocoa into that bowl too and mix to combine.
  6. Add the melted chocolate mixture to the bowl and mix so that the flour mixture is completely coated with the melted chocolate.
  7. Take tablespoons of the mixture and put them onto the baking sheets ensuring there is a gap of at least 3cm between each one.
  8. Bake for 15 minutes and remove from the oven. Don’t be tempted to move these when they are warm as they will be very fragile. Allow them to cool for 30 minutes or so before transferring to a cooling rack and sprinkling with icing sugar.
All ready to eat!

These biscuits will last for 2-3 days in an airtight container. Ours lasted about half that time and were enjoyed by kids, parents and grandparents alike. My note to myself from this baking experience is that baking with just one of the kids is a thoroughly enjoyable activity as they get to do everything and I get to talk to just them and hear more about their day without a sibling interrupting them. This was so very precious to me in a busy week where I nearly missed out on the opportunity of hearing his perspective on life.