Red Pepper and Cannellini Bean Fritters

Patience is an important commodity when dealing with children. It’s mere presence bolsters success in the kitchen with children. I mean it isn’t as if you need a kilo of it or anything – a sprinkling is just fine. That said, my stockpiles of patience have been dwindling this week. I should have known it was going to be a hard week when I hurt my leg running and my favourite outlet for solitary time vanished. This was further impacted, when I ended up late to collect Seb from a school club because I lost track of time and a last minute pre-schooler toilet trip.

Contrary children have certainly greatly contributed to this feeling of frustration. Allow me to provide an example: Ophelia loved making this recipe. She ate copious amounts of the individual ingredients, but barely countenanced the idea of eating the end product. I won’t lie, I had to take some deep breaths and think of the fact that our shipment has arrived and we now have all our stuff except our car. Once I had found these happy thoughts, I realised that this meant all the more for me to gobble up!

Not hugely photogenic, but totally delicious!
Sticky fingers warning!
Chopping with a table knife

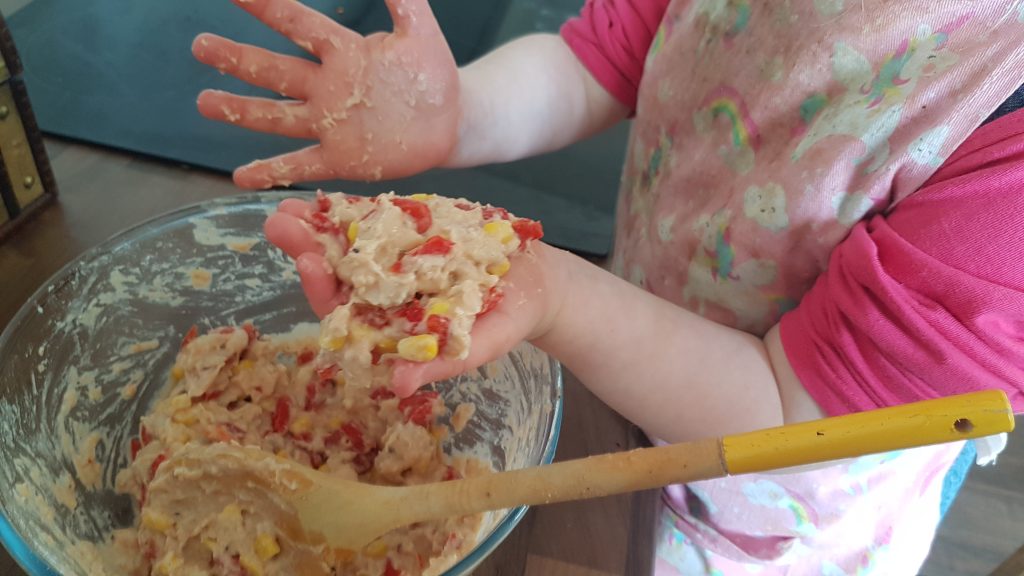
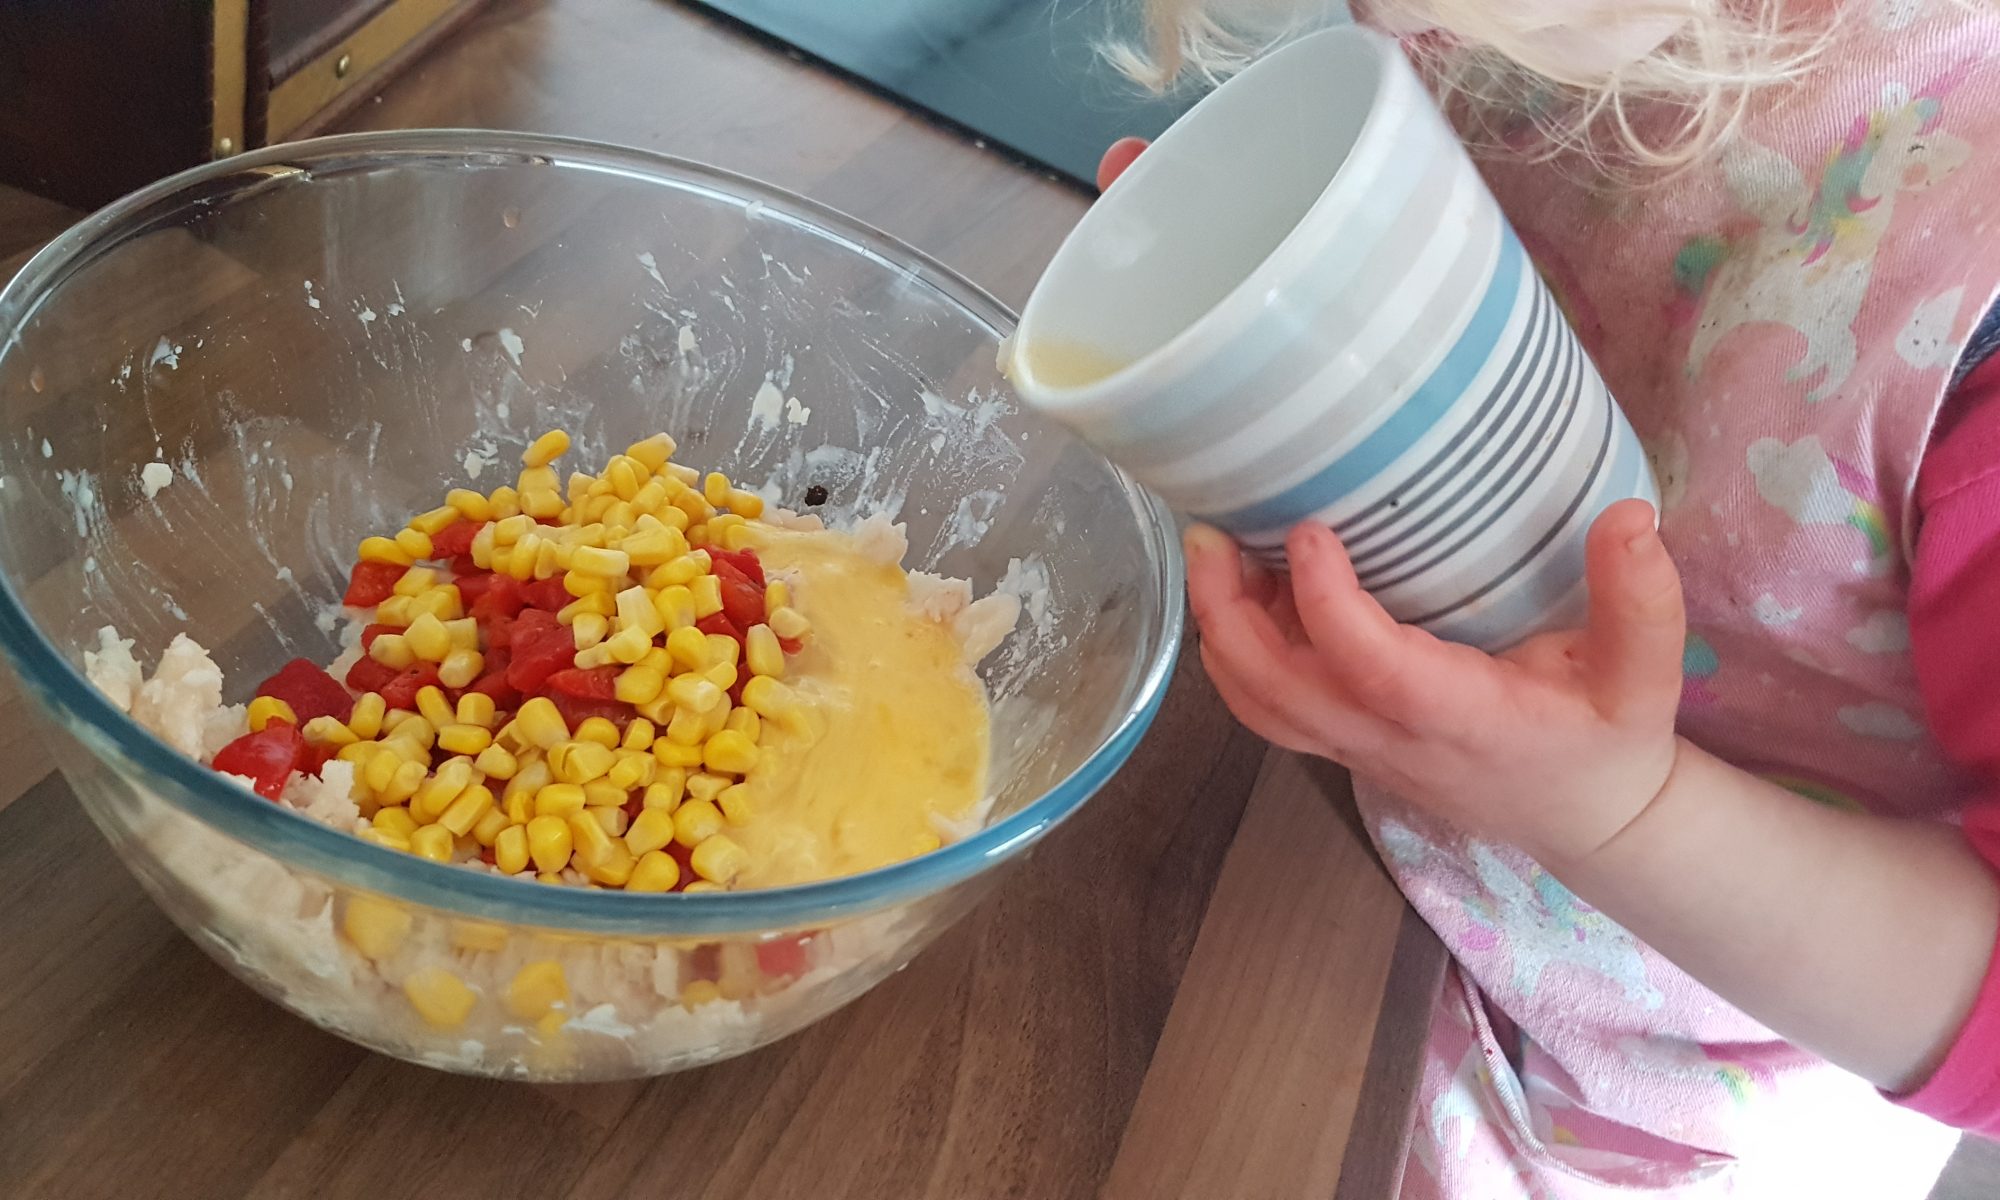
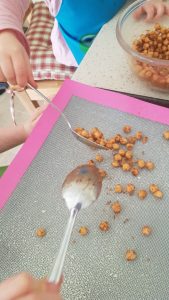
This recipe is full of processes that children love; squishing and squashing, chopping, cracking, mixing and transporting. The latter is a mucky process, and if your child doesn’t enjoy getting their fingers dirty, you may well want to consider using a couple of tablespoons to make the fritters and flatten them a bit.

Ingredients

  • 1 tin cannellini beans
  • 150g roasted red peppers from jar
  • 75g sweetcorn
  • 1 beaten egg
  • 50g flour
  • 1/2 tsp garlic (we used frozen)
  • Seasoning

Method

  1. Adult line a couple of baking trays with silicone baking mats or baking parchment.
  2. Drain and rinse the cannellini beans and place in a large bowl.
  3. Mash the cannellini beans with a fork or potato masher. Small children may well require some help to get this started. Mash until they no longer look like beans.
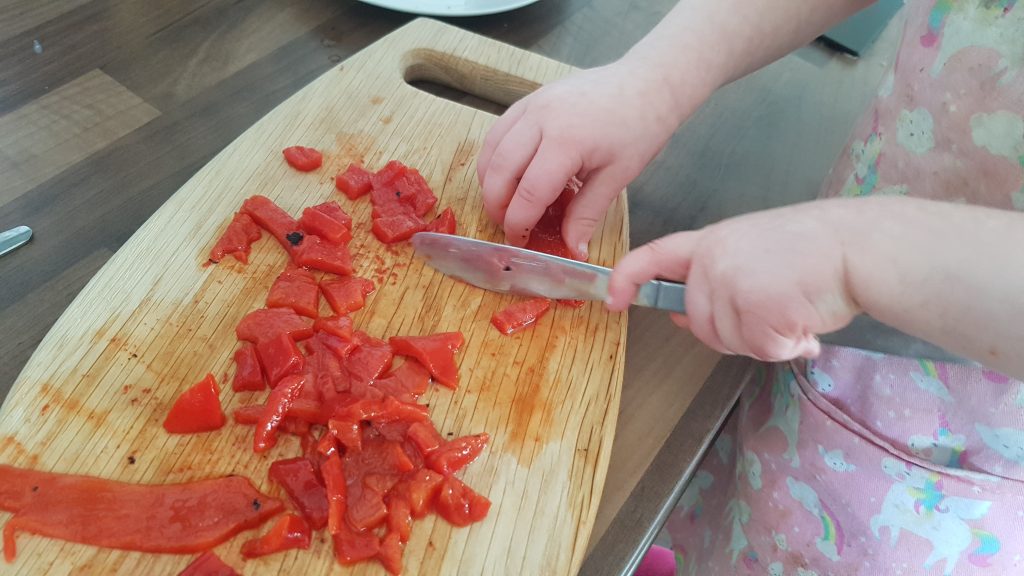
  4. Chop the peppers into small pieces. We used table knives.
  5. Add the chopped peppers, sweetcorn, flour, seasoning and garlic to the mashed beans.
  6. Crack an egg into a small bowl or mug and gently whisk.
  7. Pour the egg into the bowl and mix with a wooden spoon.
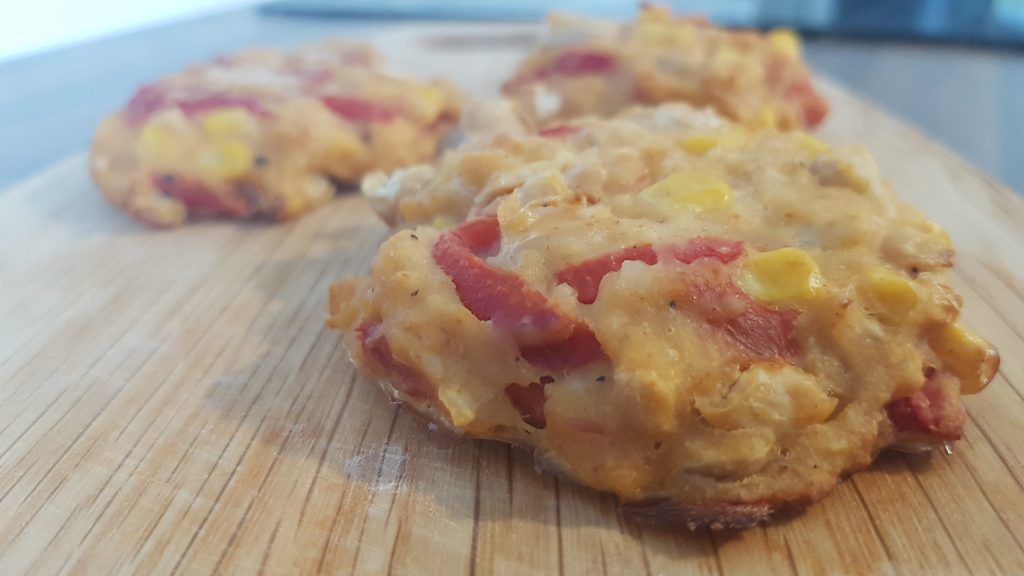
  8. Using your hands make patties out of the mixture. Depending on their size, you should get between 6 and 8. If you don’t want to use your hands, dollop a couple of tablespoons per fritter and pat down with the back of a spoon.
  9. Refrigerate for around 1 hour (this makes them more stable) before cooking at 180°c fan for 15-20 minutes, turning half way through. Alternatively, they can be pan fried.

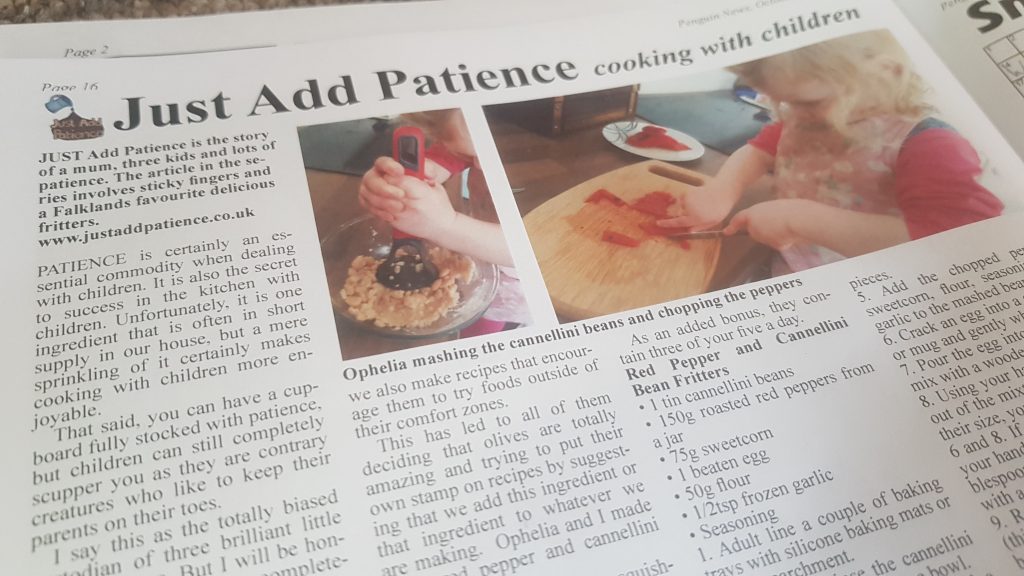
This recipe appeared in Penguin News on October 11, 2019. For those of you not lucky enough to be able to purchase a copy, I have included a picture of the article from the newspaper.

Stuffed Mushrooms

Mushrooms are my husband’s favourite vegetable. Unfortunately, they are not mine (long live courgettes!) Now I come to think of it Simon and I both have rather strong feelings about our favourite vegetables, but he wouldn’t choose to eat a courgette and I wouldn’t choose to eat a cooked mushroom. I like to eat button mushrooms raw, but don’t do so well when they are cooked. Two of our children seem to agree with me about the mushrooms, but the third, or actually the first, seems to quite enjoy them. It is real juggling act remembering what each child will or will not eat!

Lots of kid-friendly jobs.

To encourage the children to try mushrooms, I thought it was time that we tried to use them in a recipe. It was a fun recipe to make with chopping, measuring, spooning, mixing and then trying it. One boy enjoyed them with encouragement, the other ate the filling – which did also contain chopped mushroom so that is progress and the little girl completely ignored them on her plate. Their daddy quite happily dealt with all the leftovers without a single reference to me!

Ingredients

Serves 4 as an accompaniment.

  • 4 large flat mushrooms
  • 40g mozzarella
  • 15g pine nuts
  • 1tbsp pesto
  • 10g grated cheddar
  • 20g breadcrumbs

Method

  1. Preheat the oven to 180° fan and lightly grease a baking tray.
  2. With a table knife, carefully chop off the mushroom’s stalk and chop into small pieces and place in a bowl.
  3. Chop the mozzarella into small pieces and add to the bowl with the mushroom stalks.
  4. Add in the pine nuts and pesto and mix until it is all combined.
  5. Spoon the filling equally between the four mushrooms.
  6. In a separate bowl add the breadcrumbs and the cheddar and mix together. If your kids want to grate the cheese, I would recommend a box grater.
  7. Sprinkle the cheesy breadcrumbs over the mushrooms .
  8. Place in the oven for 15-20 minutes until the mushrooms are cooked.
  9. Remove from the oven and serve immediately.

This recipe featured in the September/October Soar Valley Life Magazine.

Sprinkling the cheese and breadcrumbs on top of the mushrooms and ready for the oven.

Chocolate Dip

I love it when I plan to make something with the kids and I actually get round to making it the week I planned to. I know it sounds crazy, but I have list upon list of ideas that I want to try in the kitchen with my little chefs. Some make it to the top incredibly quickly, but others linger for a while before they have their turn in the limelight. I may have made this one the week I planned to, but writing it up to share with you all has taken another week or two. I am placing the blame for this one firmly in the court of the house spring clean. Yes I am still trying to sort our house – it is a job of epic proportions. I should maybe be calling it a summer clean now as despite the changeable weather, not even I can deny that it is in fact summer. I find myself continually distracted and I am at the stage where I find any other activity more interesting than the one at hand! Do I sort through a pile of mismatched toys or plan a list of baking activities?! Yup the latter tends to win. Oh and I am very good at planning, it seems finishing a task is my downfall.

Top; chocolate dip spread on pancakes, bottom left dolloped in cereal and bottom right as a dip for strawberries. All totally yummy and considerably less sugar than regular chocolate spread.

This recipe is essentially a chocolate hummus. We decided to call it dip as the kids had fun dipping strawberries into it. We have also discovered that it works remarkably well with pancakes and dolloped into a bowl of cereal for added protein at breakfast. I am fully aware that it is not a usual thing to make with kids. I know this because when I informed my husband what Ophelia and I were going to be making in the kitchen, a glazed expression crossed his face. He was probably thinking something along the lines of why doesn’t she just make a batch of cookies or cupcakes?!

Ophelia had fun looking at the ingredients and pouring them into the food processor. She took great delight in helping me push down the side with a spatula to ensure it was fully mixed. The best part, once again was licking the bowl. She asked to do this pretty much from the start. I am pretty sure she figured that baking on her own with me meant she wouldn’t have to share the treat. Her brothers were referenced a couple of times.

Ingredients

  • 1 can of chickpeas, drained
  • 140g 0% fat Greek-style natural yoghurt
  • 5 tbsp. cocoa powder
  • 50g Sweet Freedom Chocolate Shot
  • 3 tbsp. honey
  • 1/4 tsp salt

Method

  • Add all of the ingredients to the food processor and blitz until smooth. Stop the food processor every so often to scrape down the edges to ensure that it is all mixed.
  • Store in the fridge until ready to use.

Roasted Chickpeas

It is the season for spring cleaning. I am not a huge fan of spring cleaning. Don’t get me wrong, I love the results, I just hate the sheer volume of work we always have to do to make the house look uncluttered. The reason we are in this mess is because we all seem to be hoarders. I am going to make a concerted effort to prevent our house becoming a nest of items with vague memories attached to them once we are done. But, I will probably be writing a very similar post this time next year!

Over half term, we all managed to escape our decluttering project and go to visit my mum. It was lovely not to have to think about sorting out our house and decide what we should keep and what should go. But it seems that we must have missed the process as we spent a significant amount of time helping her declutter. I have discovered it is much easier to sort someone else’s space rather than your own. So if I end up inviting you over for cake or under any other pretence, before accepting, it may be best to check that I am not going to put you to work!

Anyway, between moving boxes and hunting in the loft for other boxes, the kids and I managed to roast some chickpeas. I never thought I would be posting about roasting chickpeas, but the kids discovered that they liked crunchy chickpeas over Christmas when I bought some salt and vinegar ones for me. I was so surprised that they liked them, that I neglected to feel frustration at donating my treat to them! It seems sharing can be just as hard for grown up as their small charges! They have also been known to request them rather than a chocolate biscuit as an afternoon snack. Strange children; I don’t think I would ever make that choice!

This recipe was made with the younger two (five and two). The younger one enjoyed counting out tsp of the spices to add. The elder one trying to read the labels. They both had a good sniff of all of the ingredients. The scent of cinnamon is the one they seem to remember the most – probably because we seem to use it in savoury and sweet bakes. They do often associate it with chocolate though…

Ingredients

  • 1 can of chickpeas, drained and rinsed.
  • 1/2 tsp onion salt
  • 1tsp lazy garlic
  • 1tsp cinnamon
  • 1tsp paprika
  • 1tsp mixed herbs
  • Spray oil of choice

Method

  1. Preheat the oven to 200°c fan and line a baking tray with a silicone baking mat or greaseproof paper.
  2. Put the chickpeas into a large bowl.
  3. Add all the herbs and spices in with the chickpeas and either mix or gently move the bowl from side to side to ensure that the chickpeas are fully coated in the spices.
  4. Pour or spoon out onto the baking tray and generously spray with oil.
  5. Place in the oven for 40 minutes turning half way through.
  6. Remove from the oven and let them cool completely before storing.
The finished product.

We didn’t have any left from this to store for another day as my youngest two really seem to enjoy them! They served as a substitute for crisps in one of our half term picnic lunches and their wasn’t a single complaint about the lack of crisps from any of the kids!

Herby Garlic Butter

When the boys interest in cooking began, I read about how you can make butter by vigorously shaking double cream in a jam jar. We did try it to make a small quantity of butter at the time. The boys were delighted when it turned to whipped cream and then the buttermilk separated. It was a very labour intensive way to make butter and considering all the butter that we use in baking, I decided it would be easier to just buy butter!

Cutting parsley.

While thinking about what we could make for a bring and share lunch with family, I remembered the butter I made with the boys. Ophelia never having seen it and the boys now being a bit older meant it was now time to make it again. This time we decided to make it with crushed garlic and chopped parsley for added flavour. This activity is really one in which the whole family can get involved. We took it in turns around the table to shake the jar. It also seemed to become a competition as to who could pull the funniest face and do the silliest actions while shaking the plastic jar. Yes folks, these are the activities which make up the funny stories and enrich memories!

Ingredients and equipment

  • 150ml double cream
  • 2 cloves of garlic
  • Small handful of fresh parsley
  • Jam jar (we used a plastic one)
  • Marbles (washed and we used one per child). The marbles help you to tell when the mixture is turning from cream to whipped cream to butter and buttermilk.
  • Rolling pin
  • Garlic press
The buttermilk separating from the butter.

Method

  1. Pour the double cream into the jar and allow each child to put a marble in.
  2. Gently bash the garlic clove with the side of a rolling pin to loosen and remove the skin.
  3. Crush the garlic cloves with the garlic press. My children needed help with the press, but were ever so determined to give it a go.
  4. Add the garlic to the jar of cream.
  5. Cut the parsley into small pieces using scissors and add them to the cream jar.
  6. Firmly secure the lid of the jar and start to shake it. This process will take around 15 minutes depending on how vigorously you shake the jar. It will turn from cream to whipped cream and then to butter and buttermilk. When it is turning to whipped cream the marbles will start to move slower and when it has become butter and buttermilk you will hear them clatter against the sides again more frequently.
  7. Pour off the buttermilk and then shake again and pour off any further buttermilk.
  8. Put in the fridge until ready to use.

We used this butter into two partially baked baguettes to make some homemade garlic bread. This was enjoyed by the whole family at our bring and share lunch. To make the garlic bread you will need to:

Placing the butter inside the cuts.
  1. Remove the butter from the fridge around 20 minutes before starting.
  2. Take the baguettes and make small diagonal cuts the whole way across each baguette taking care not to slice them fully.
  3. Take small amounts of the butter and place inside each of the diagonal cuts.
  4. Melt the remaining butter in the microwave and paint the baguettes with it to get a yummy crispy shell for your garlic bread.
  5. Place in the oven according to the packet’s instructions and remove when golden.
Wonderfully crunchy and buttery garlic bread.

Potted Crab

Transporting the crab from the mixing bowl to our large ramekin.
Squishing the piece of lime.

You may be rather sceptical when you learn that I made potted crab with my 2 year old. I encourage you to read on despite any misgivings as this really was a fun recipe to make with her. She had fun counting out the tablespoons of yoghurt and squishing the slice of lime, twisting the salt and pepper mills, mixing, transporting and pouring – lots of activities which are present on early years schemas. It also allowed me to introduce a fish with a different texture to her and hopefully encourage her to widen her pallet when she is older. She wasn’t a huge fan, but I remain undeterred as tastes change as children get older and the boys did enjoy it.

When Ophelia went ‘shaky shaky’ with the paprika!

This recipe could be managed solo by an older child, but Ophelia did need some encouragement to stay on task and not go ‘shaky shaky’ with the paprika or try and eat the rest of the lime. I managed to prevent the latter, but was unfortunately completely incompetent at the former… More vigilance was required and in this instance I was lacking! I would also be lying if I said that I managed to remain completely calm… What this picture doesn’t show is the rest of the kitchen counter!

Time to pour the melted butter on top of the crab.

Ingredients

  • 1 tin of white crabmeat, drained. Recipes for potted crab generally call for fresh crabmeat, but as this was for making with kids we opted for tinned crab and the result was delicious.
  • 2 tbsp. Greek-style natural yoghurt
  • Zest from half a lime
  • Juice from 1/8 of a lime (or just a small slice)
  • Seasoning
  • 50g unsalted butter, melted (easiest in a small jug)
  • 1/8tsp of paprika

Method

  1. Put the crabmeat into a bowl and count in the tablespoons of Greek-style natural yoghurt. Add the lime zest, juice and seasoning and mix well. We used a tub grater with the fine grater attachment to zest the lime.
  2. Spoon the mixture into a shallow dish, one large ramekin or two smaller ramekins and gently flatten.
  3. Add the paprika to the melted butter and mix.
  4. Pour the melted butter over the ramekin(s) and refrigerate until set. This will take around 30 minutes.
  5. Remove from the fridge around 30 minutes before serving to make it easier to spread. Enjoy with toast, crackers or crumpets.
Remember to remove from the fridge around half an hour before you want to spread it. The boys enjoyed this in sandwiches.

Sesame Toast Shapes

Yesterday morning was particularly challenging. I should have realised that it was going to be a long one when Atticus insisted on wearing daddy’s Santa hat on the way to school. I thought I had left the house with three happy children when it was located and the other two didn’t raise a single objection. I failed to realised that the Santa hat would in fact cause a meltdown of gigantic proportions as I didn’t have the foresight to name it before leaving the house and I refused to let my little gingernutter take it into school. He also had to keep on readjusting the hat so he could see where he was going while walking! We must have looked quite comical walking down the street and me yelling to remind him to readjust his hat. Oh and that is not mentioning the fact that it got drenched thanks to the beautiful school run shower we had this morning. In hindsight, I should have remembered to pick up the hat for the collection, but hey ho no-one is perfect and it was still somewhat soggy. I was delighted that he had forgotten about the hat the following morning and we avoided a repeat of the argument at the classroom door!

Used as a crouton in a festive broccoli and sprout soup.
The concentration levels were epic for this!

So to cheer myself up after the traumatic and rather damp school run, I decided to make some sesame toast shapes with Ophelia. You can cut these into any shape you choose and they are perfect as croutons in soup if you fancy getting children involved in Christmas food preparation. Mine also enjoyed them as a fun addition to their beans on toast. These are lots of fun to make with kids. Seb and Atticus (at 6 and 4) would be able to manage these with minimal parental input. Ophelia needed some help, but she did enjoy trying to spread the margarine and use the cookie cutters to cut out shapes before splatting them in a plate of sesame seeds. Yes they could be considered somewhat wasteful as you are stamping shapes out of bread. Alternatively you could just slice the bread into triangles or squares to avoid the wastage. 

Ingredients

  • Bread (we used 50/50, but white or wholemeal would work too)
  • Butter or margarine (we used an olive spread)
  • Sesame seeds

Method

  1. Preheat the oven to 150°c fan and line a baking sheet with a silicone baking mat or greaseproof paper.
  2. Spread one side of the slice of bread with butter.
  3. If you are using shapes, cut the shapes out with the cookie cutters.
  4. Put the some sesame seeds on a plate in an even layer.
  5. Put the buttered side up into the sesame seeds so that they stick and place them sesame seed side down onto the surface.
  6. Spread the back side of the shapes with butter and put on the sesame seed plate so that both sides are covered.
  7. Place in the preheated oven for 20 minutes.
  8. Remove and turn them over and return to the oven for a further 20 minutes. They will look golden and crisp when finished cooking.

These will keep in an airtight container for a couple of days so can be made in advance of any festive celebrations. Ours didn’t survive 12 hours with the three kids and their dad! I hope that you enjoy them.


Roasted Minature Potatoes

Are you a fan of a Sunday roast? In our house it is a family tradition. It is the meal for which daddy is usually responsible; it is best not to leave the vegetarian in charge of roasting the meat – she may instead decide to serve a nut roast. This would cause a riot. Simon is relatively happy eating veggie once or so during the week, but would never choose to eat a vegetarian Sunday Dinner! There would probably be mutiny in the ranks if I served a vegetarian Sunday Dinner…

Pretty much my favourite part of a roast dinner is the roast potatoes. I seem to easily put away considerably more roast potatoes than seems logical or sensible even. They are just so comforting and warm. As you have probably already guessed from my previous posts we wholeheartedly encourage our children to help out in the kitchen and when I found some Minature Potatoes during my weekly shop, they set me thinking about mid-week roast potatoes . I walked around the supermarket with a grin fixed upon my face thinking about having roast potatoes on an non-Sunday. Smaller potatoes means less roasting time which is perfect for mid-week and with them being small they have the added bonus of appealing to the children.

The boys shared the job of shaking the potatoes from side to side to coat them all in the oil mixture.

The hands on time for this recipe is minimal. The youngest of little kitchen helpers could definitely manage this recipe under supervision. I gave my two boys the instructions and they proceeded and successfully executed it by themselves (once I had decanted the oil into a smaller vessel to pour it – I did not want to have to clean an oil spillage). You could make this recipe with new potatoes or any type of small potatoes. If you are unable to find small potatoes, you could even cut down larger potatoes. Please do remember that the larger the potato, the longer the roasting time. Yes I am stating the obvious, but just in case as these things do sometimes slip my mind…

When the boys made this, they only made enough for thei
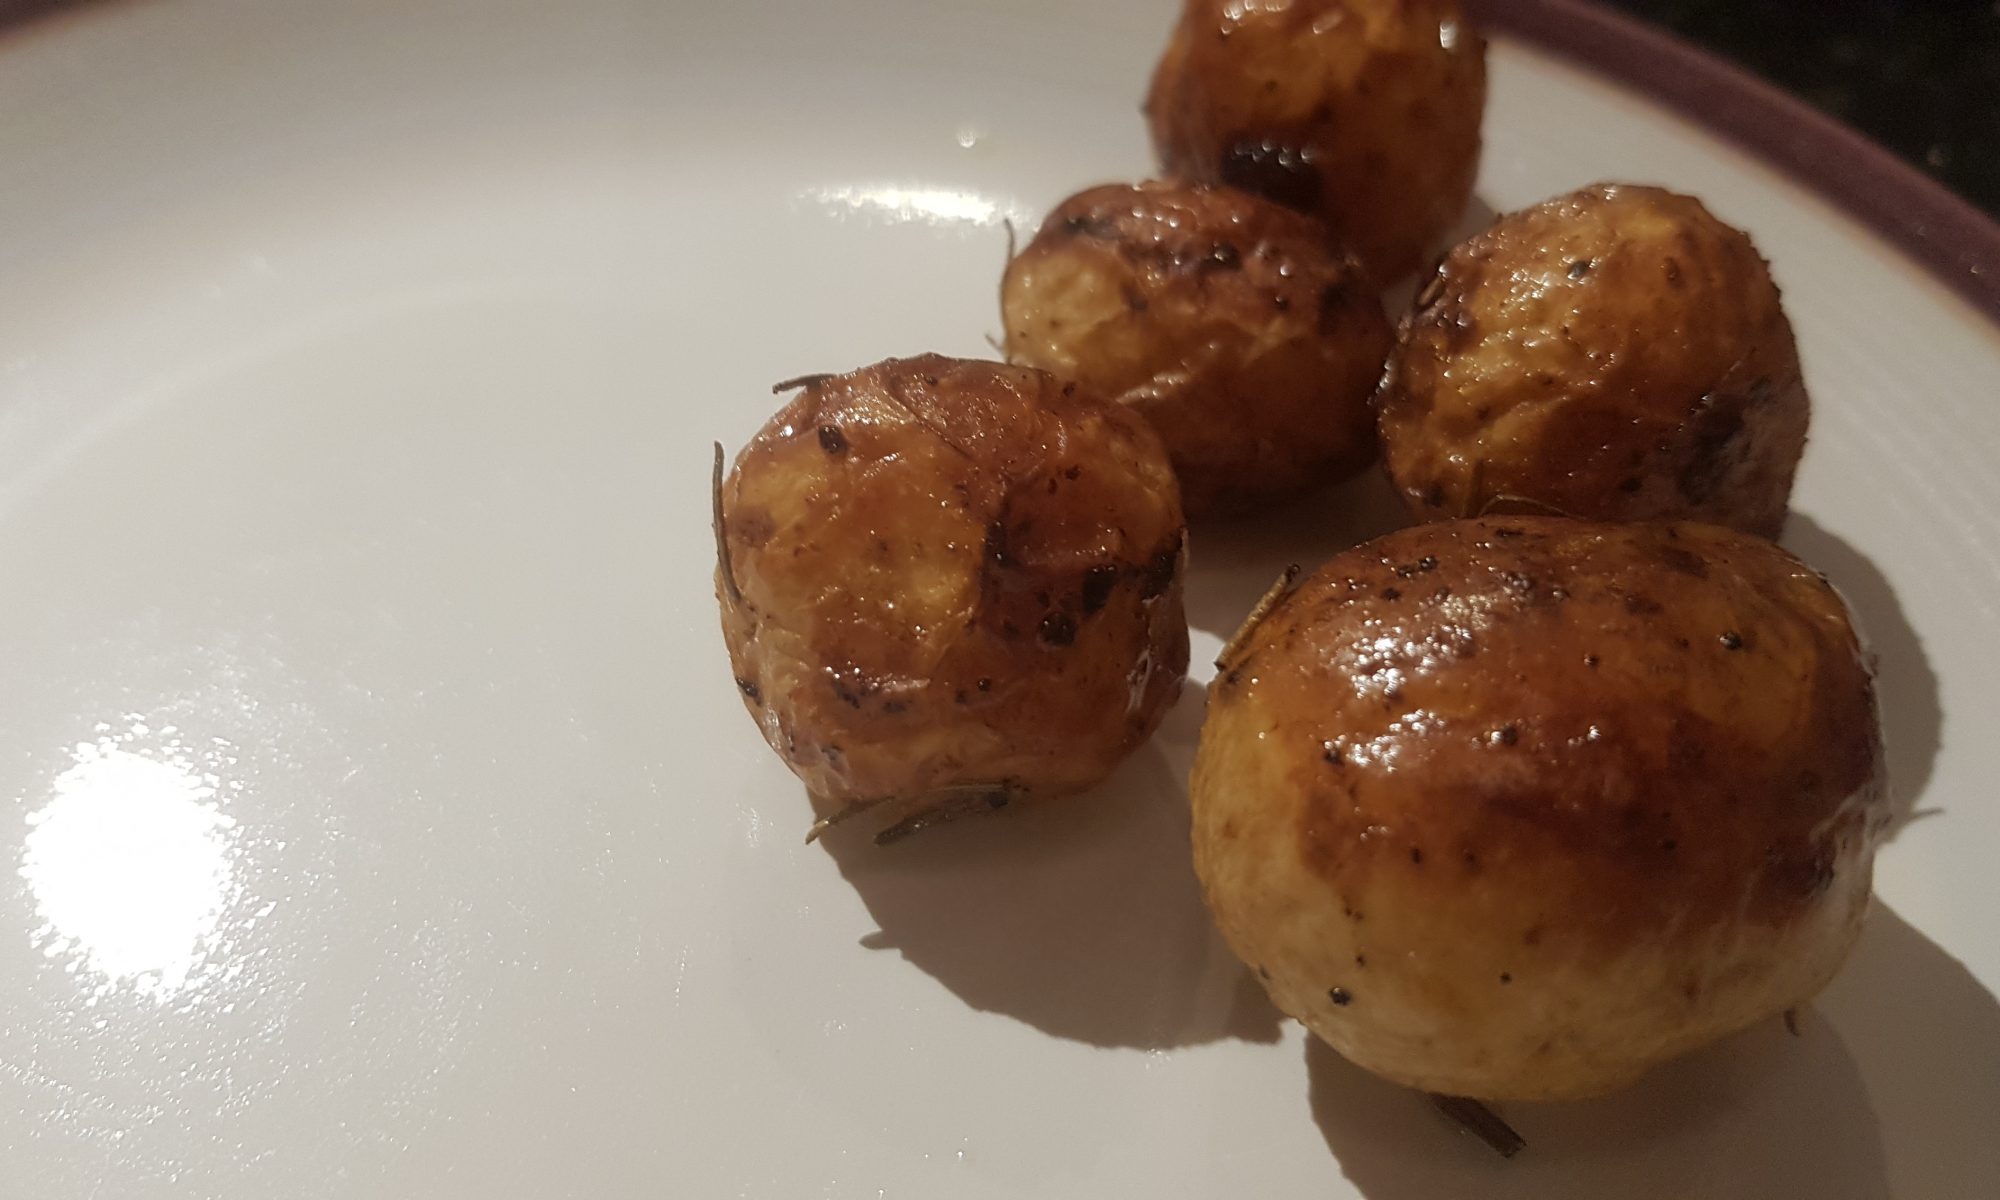
r dinner as us grown-ups tend to eat later.  This recipe can easily be increased to make enough for a family roast. Don’t judge us, but we always make more roast potatoes than it seems our family could eat, but by the end of Sunday they have generally all disappeared. I am not at liberty to divulge who tends to gobble them up between meals, only that they are never wasted!

Ingredients

  • 150g miniature potatoes
  • 3tbsp olive oil
  • 1tbsp lemon juice
  • 1/4 tsp garlic salt
  • A couple sprigs of fresh rosemary/2tsp dried rosemary
  • Pepper to season

Method

  1. Preheat the oven to 180°c and get an oven proof dish.
  2. Pour the olive oil, lemon juice, garlic salt and rosemary into a bowl and mix around. If you are using fresh rosemary, you will need to remove the rosemary leaves from the stalks and consider tearing large leaves in half.
  3. Add the potatoes to the bowl and gently shake it from side to side (not up and down unless covered!) to ensure that all of the potatoes are coated in the oil mixture.
  4. Add pepper to season the potatoes and mix again.
  5. Pour the oil-coated potatoes into the oven proof dish and place in the oven for 35-45 minutes until they are tender. Ours took just under 40 minutes. They may well require turning to prevent them from getting too coloured on the top.
  6. Sprinkle some salt on top before serving if you desire.

These were hit the spot and provided my midweek roast potato fix. They would also work really well if you have time restrictions on making your roast, or you are just somewhat impatient. I hope you enjoy them as much as we did. Our resident potato-hater managed one whole one and some of the insides of another – so maybe we are making potato progress!

Red Pepper and Walnut Pesto

Do you ever find that dinner is a battleground? It often comes to dinner and I am wondering why the children aren’t grateful for the food I have lovingly prepared them. There are some evenings when I just take the path of least resistance and end up feeding the children pesto pasta even if they have already had it once in the week as it is a crowd pleaser in his house.

Now we have made pesto several times 
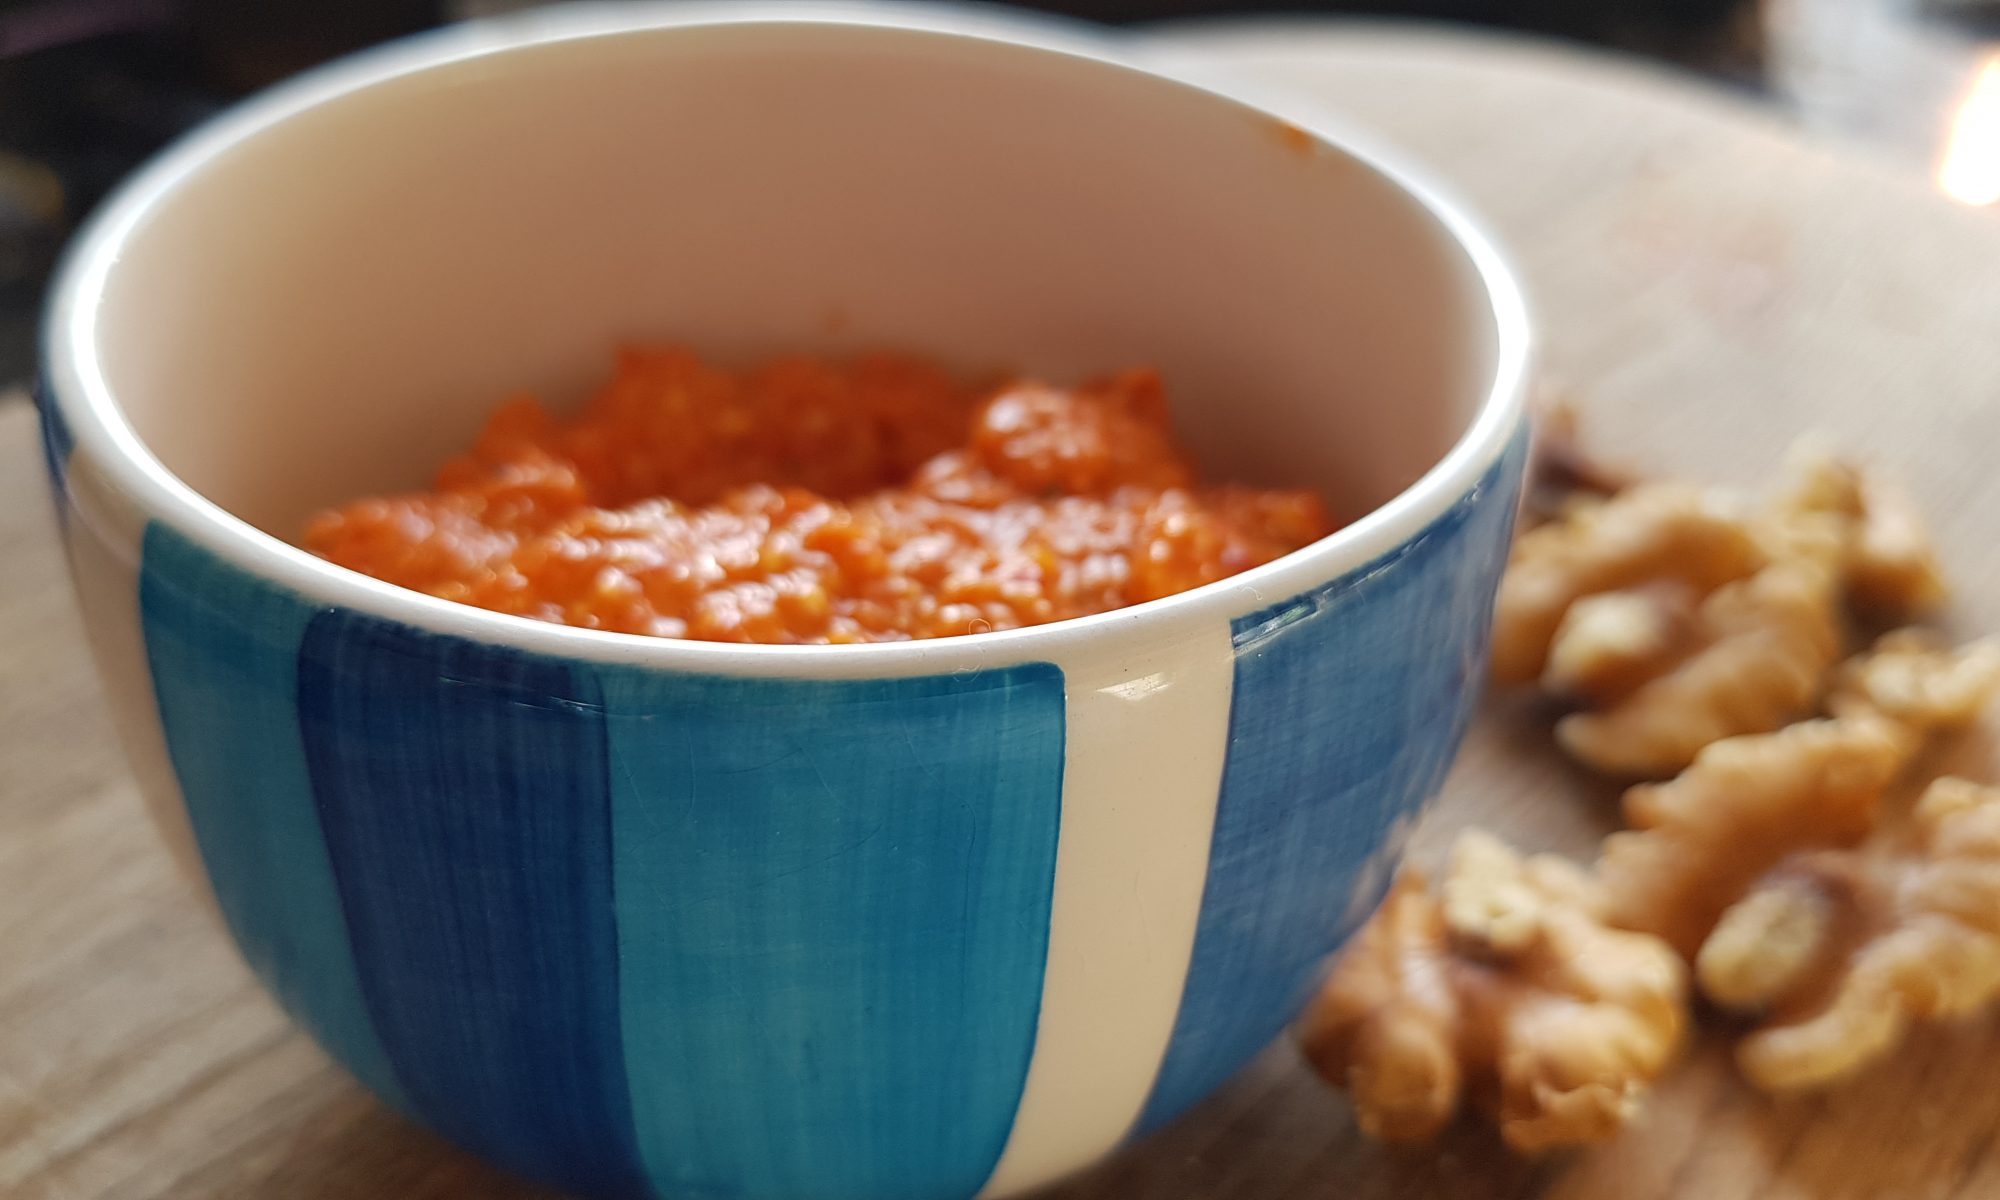
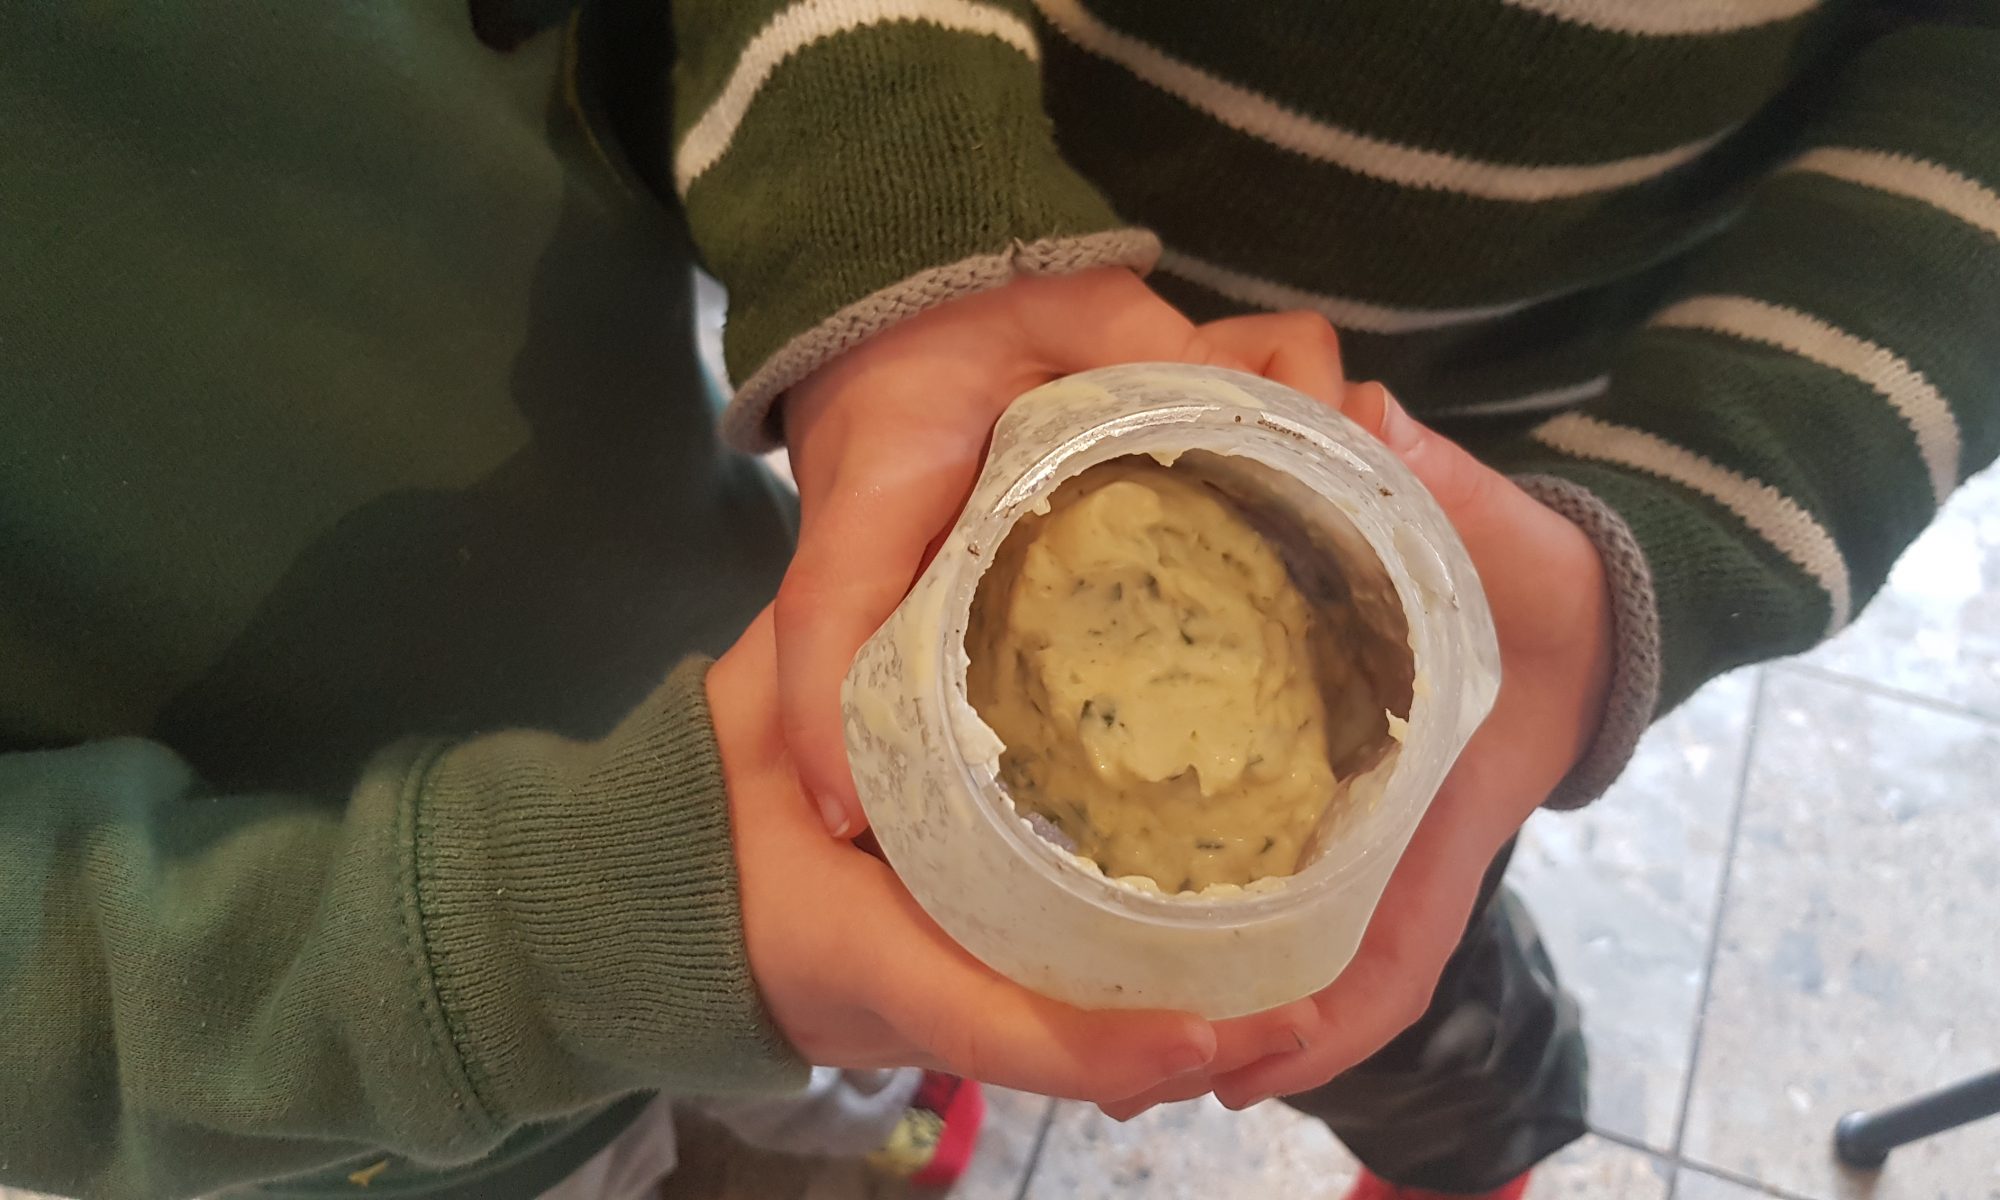
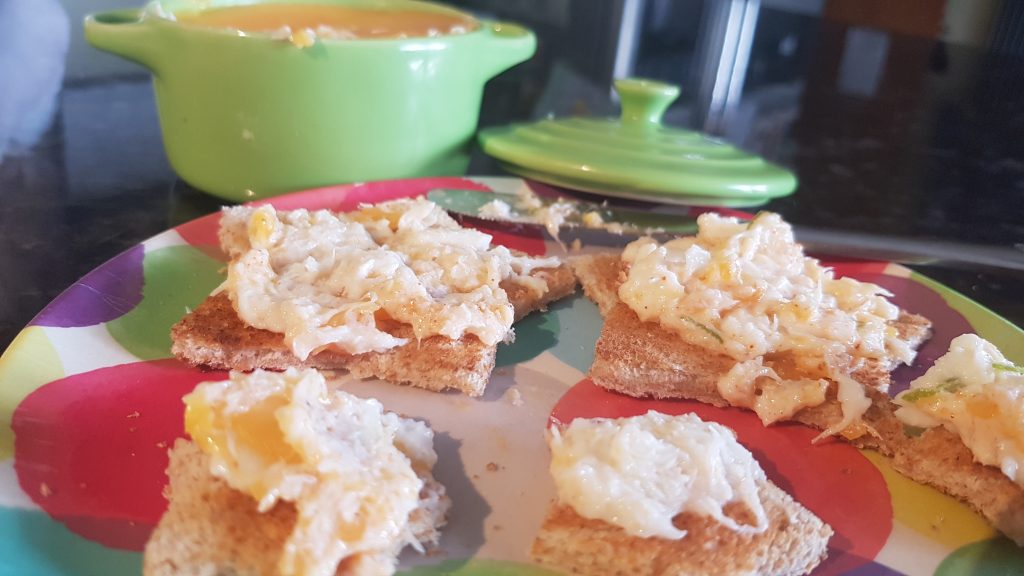
with the kids, but always the traditional basil and pine nut pesto. Since the children have decided they also like red pesto, I thought we would try and make some with a jar of red peppers I had lurking in the pantry. We added some walnuts and fresh rosemary from our garden – yes the rosemary bush seems to be taking over again. Red pesto generally has a sweeter taste than its green counterpart, so if your kids haven’t tried pesto, it is a good one with which to introduce its flavour and texture.

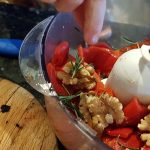
Atticus chopped the peppers with a table knife, but Ophelia decided that using her hands to tear them apart was preferable to trying to use the knife in this instance.  I wasn’t going to complain as she was doing a really good job this way and the result was the same.

The children enjoyed this pesto 
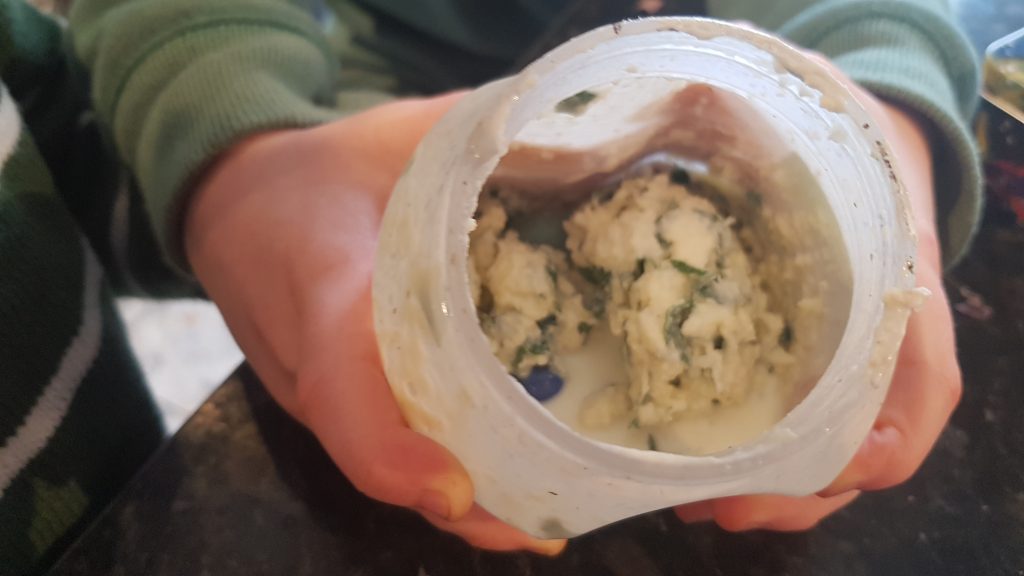
with pasta, but also as the sauce on tortilla wraps for homemade pizzas. I definitely love how versatile pesto is. In all honesty, both Atticus and Ophelia would have eaten it out of the jar with a spoon had the opportunity arisen!

Ingredients

  • 1 jar roasted red peppers, drained weight 360g
  • 40g walnuts
  • 2 cloves of garlic
  • 30g grated parmesan
  • 125ml olive oil
  • 2 large sprigs of fresh rosemary

Method

  1. Drain the red peppers and chop with a table knife of tear into smaller pieces and place in the food processor.
  2. Gently bash the garlic cloves with a wooden spoon or rolling pin to loosen the skin and peel it off and add to the food processor.
  3. Put the cheese and olive oil into the food processor.
  4. Pull the rosemary leaves off the stalks and add to the food processor.
  5. Blitz until smooth.
  6. Place in a container and keep refrigerated until ready to use.

We think homemade pesto definitely tastes nicer than the shop bought stuff. Making this saved me from having to buy pesto in my shop this week. However, as it is homemade, it does have a shorter shelf life, think a week compared to the two the shop bought brands recommend. It didn’t survive a whole week in this house though!

Potato Pizzas

It really feels as if winter is on its way now. I am delighted when the heating comes on and I seem to be spending my evenings wrapped up in a comforting big jumper (often liberated from my husband’s wardrobe! – ssshhh, don’t tell him!), snuggly thick socks and slippers. Oh and hot chocolate when the kids are in bed.

With the colder weather, I have 
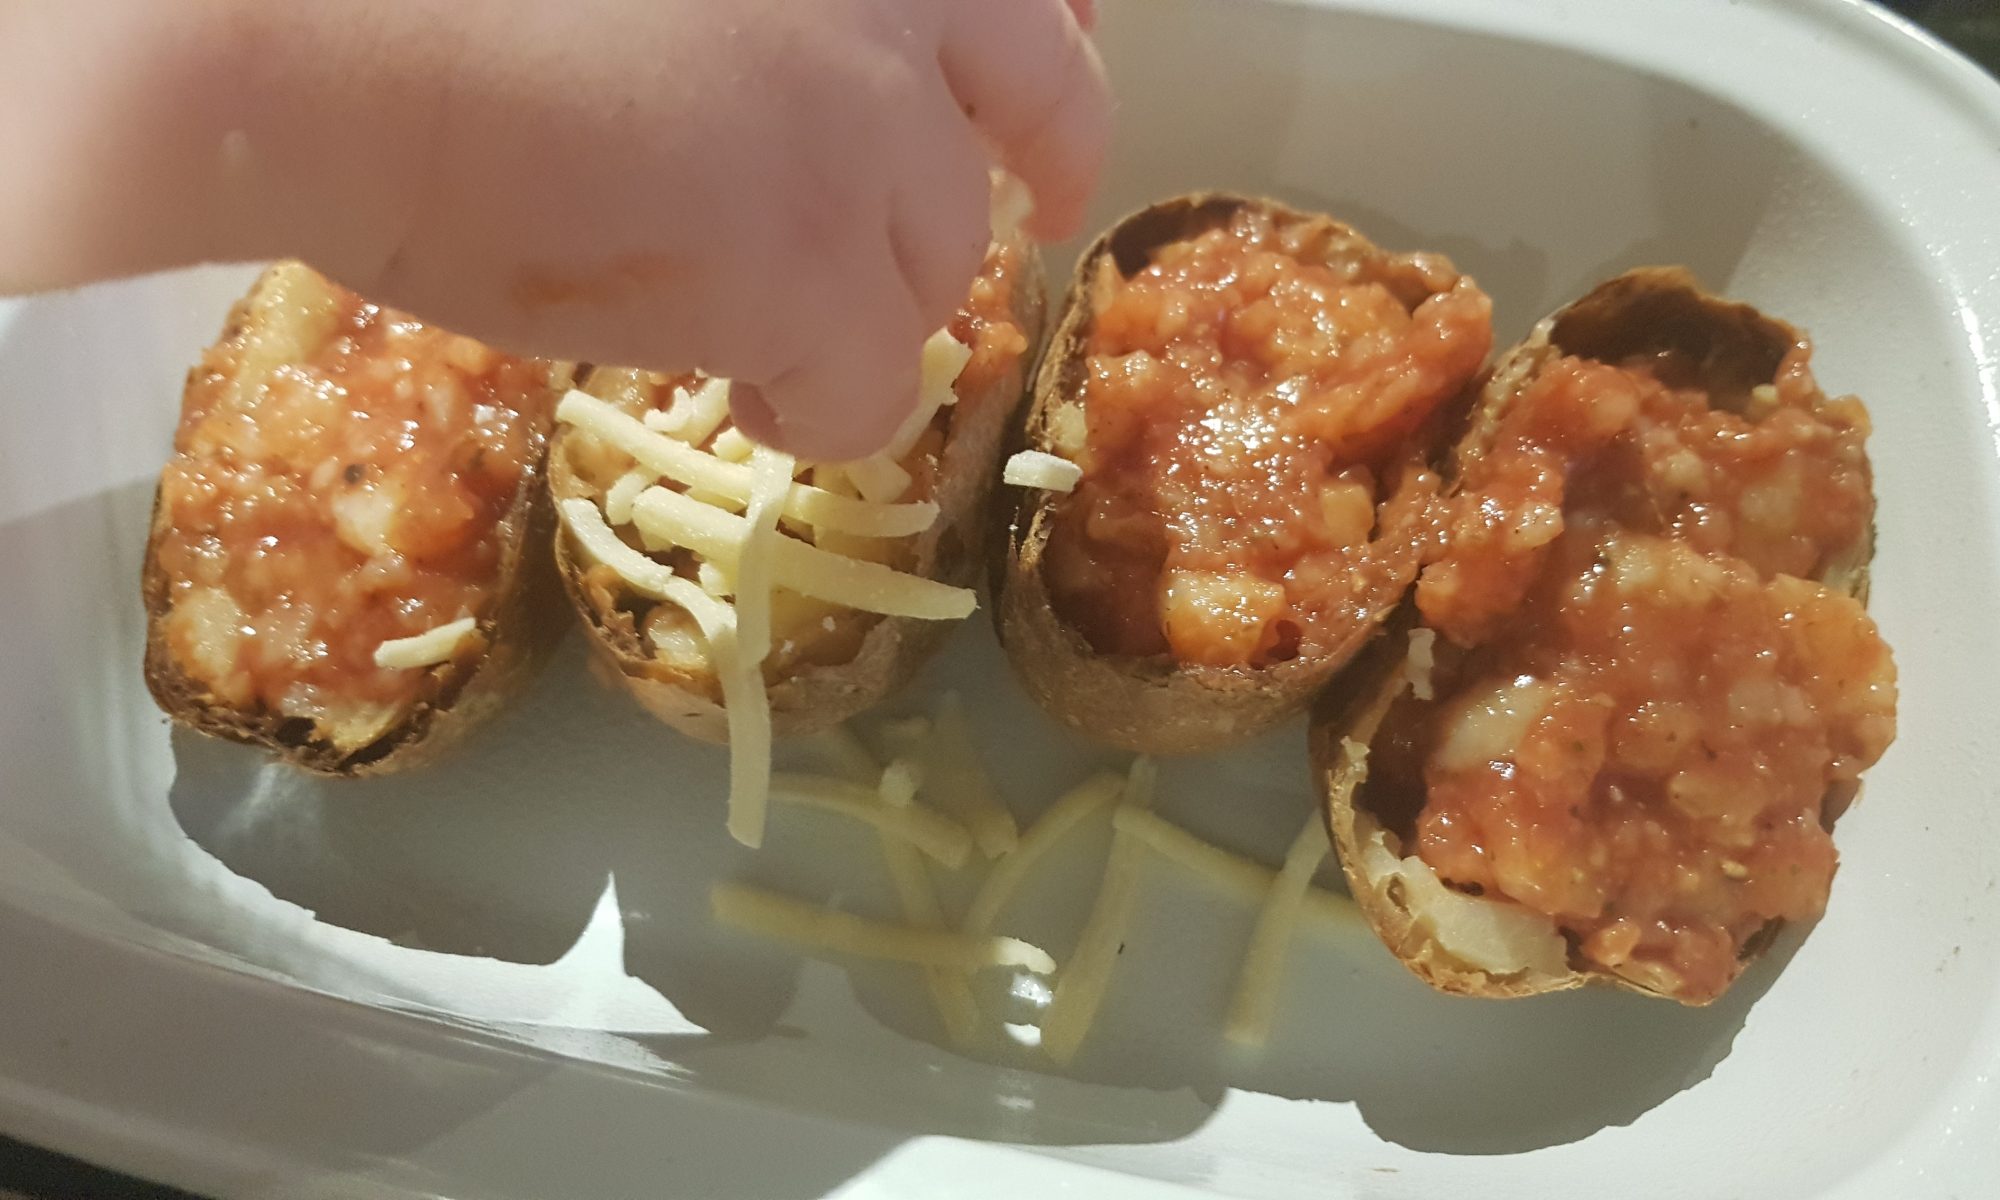
been increasing my efforts to make potato more appealing and appetizing to my little potato-hater. We did try making hash browns, and he really did love using the food processor to grate the potato, but the entire recipe failed to entice him to devour a potato. Maybe wanting Atticus to do a complete one-eighty on his opinion of potatoes is a long shot, but I am really, really hoping that he will all of a sudden discover his Irish roots and the love of potatoes that everyone in my side family seems to have.

This recipe is the latest attempt, and I am happy to say that it is the most successful to date. I also have photographic evidence of Atticus eating it as I didn’t think his dad would believe me unless I had proof. I am unsure as to whether this was a one off or if it will become a bit more frequent, but for the moment I am revelling in my success!

For this recipe, I allowed one jacket potato per adult and half per child. We served it as an accompaniment to sausages, and corncobs for the kids. I had mine with salad and Simon had chicken wings.

Ingredients

  • 4 cooked jacket potatoes (I tend to cook mine for a couple of hours the morning of or the evening before making these. They are easier to do when the skin is crispy)
  • 250ml passata
  • 1/2tsp garlic salt
  • 2tsp dried mixed herbs
  • 150-200g grated cheddar (or cheese of choice)
  • Black pepper to taste (optional)
  • Variations; add some tuna and sweetcorn as well as the passata or chopped sausage or pepperoni to make different flavours.

Method

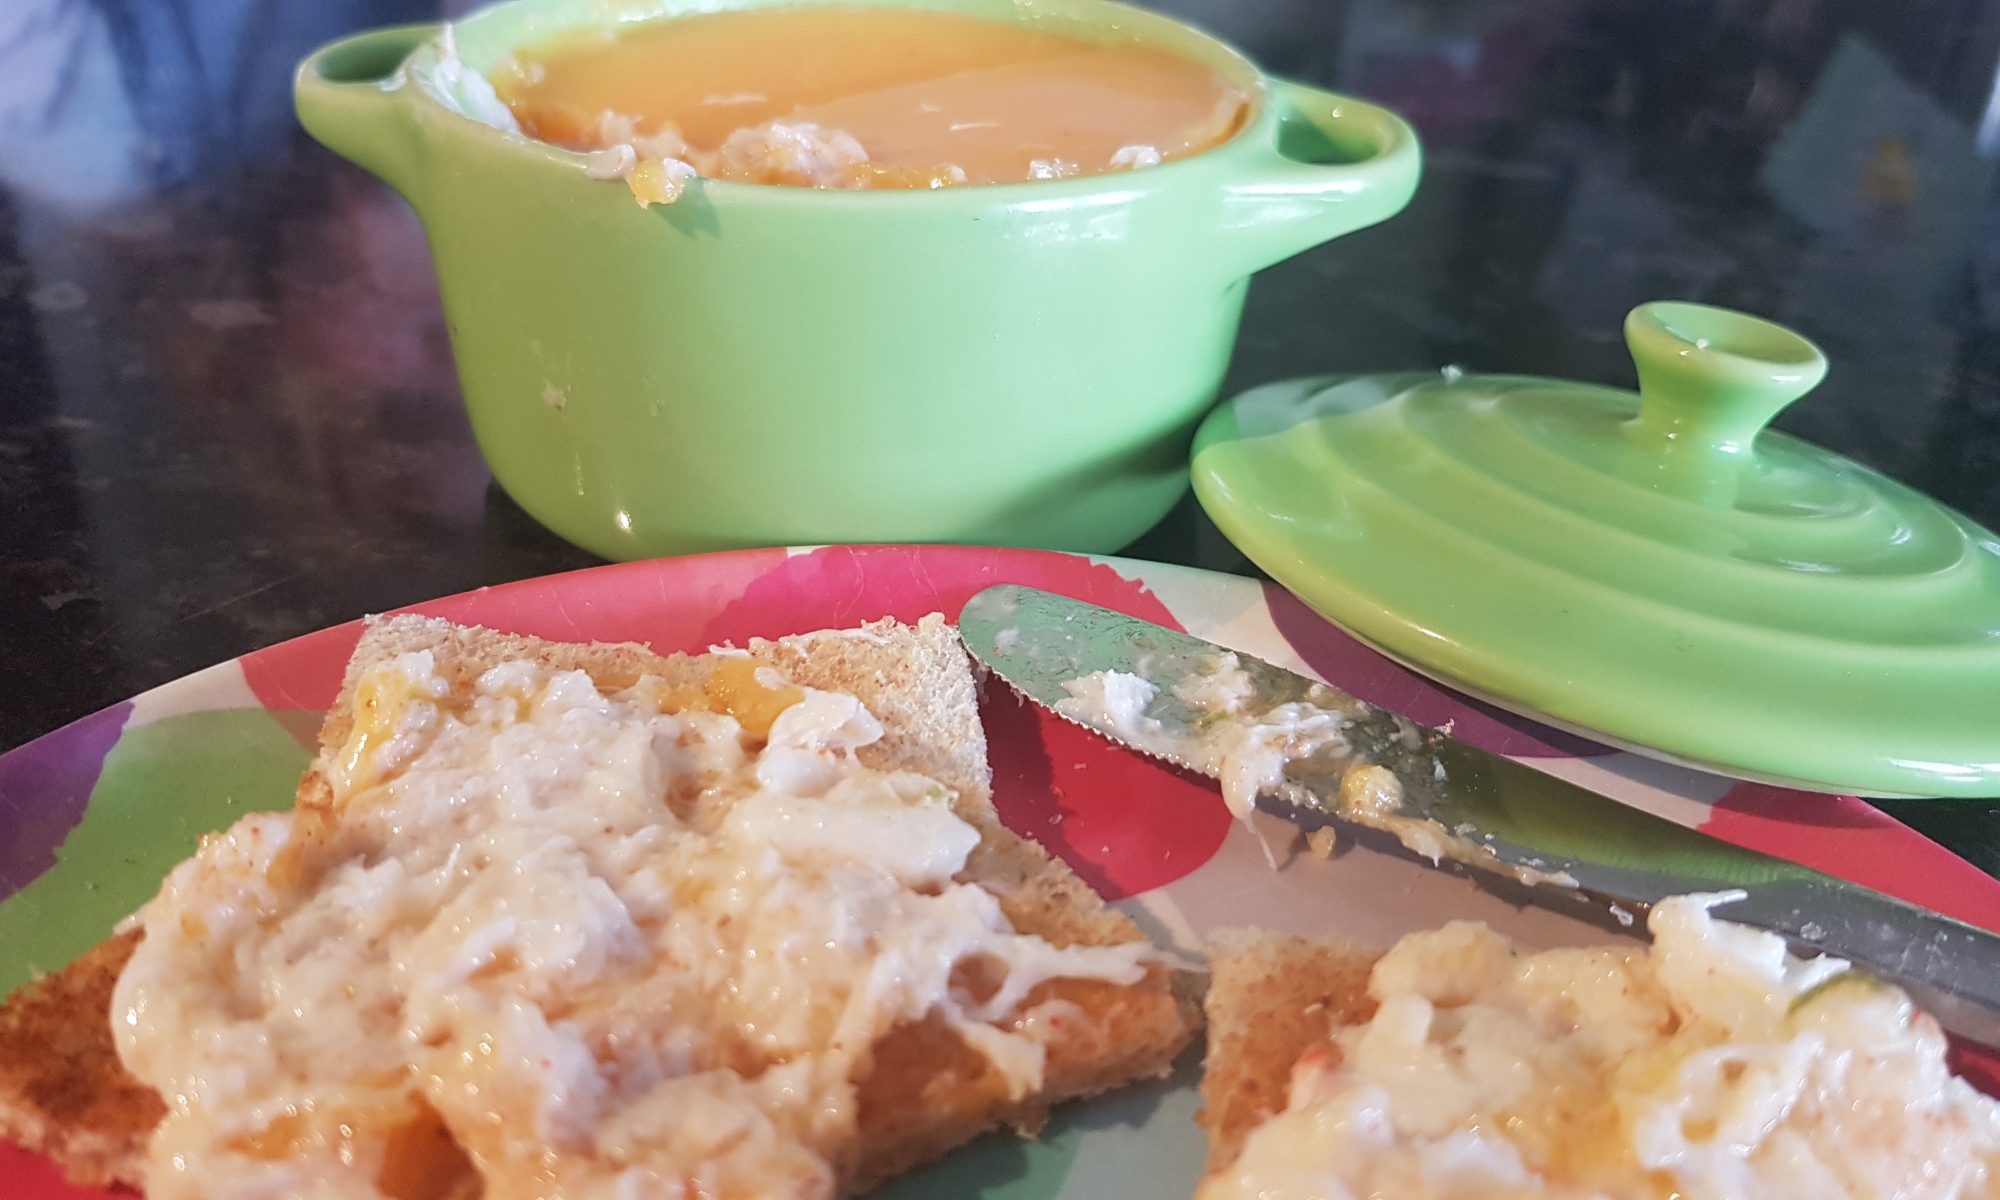
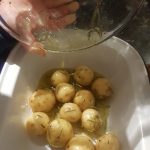
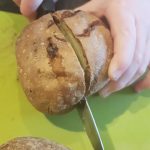
  1. Slice each cooked jacket potato in half (lengthways). The boys (6 and 4) used a sharp knife to do this).
  2. Scoop out the centre of the potatoes 
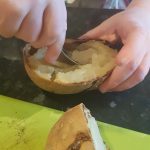
with a spoon being careful not to tear the skin and put in a large bowl. Place the skins in an oven proof dish.
  3. Squish and squash the potato with a masher.
  4. Add the passata, garlic salt, dried mixed herbs and black pepper (if using) and any other flavours and mix so that the mashed potato is fully coated in the passata.
  5. Spoon the potato mixture back into the potato skins and place in a large ovenproof dish.
  6. Sprinkle the cheese on top and put in the oven for 15 minutes so that the cheese melts and the potato warms through.

The children thought these were fun and they all got really involved in the process of making these ‘Pizza Potato Boats’. The two year old told me off for trying to help her (Little Miss Independent!). It was wonderful to see them all hard at work with the same activity and then all actually eat it without a single complaint!