Chocolate Muddy Puddles

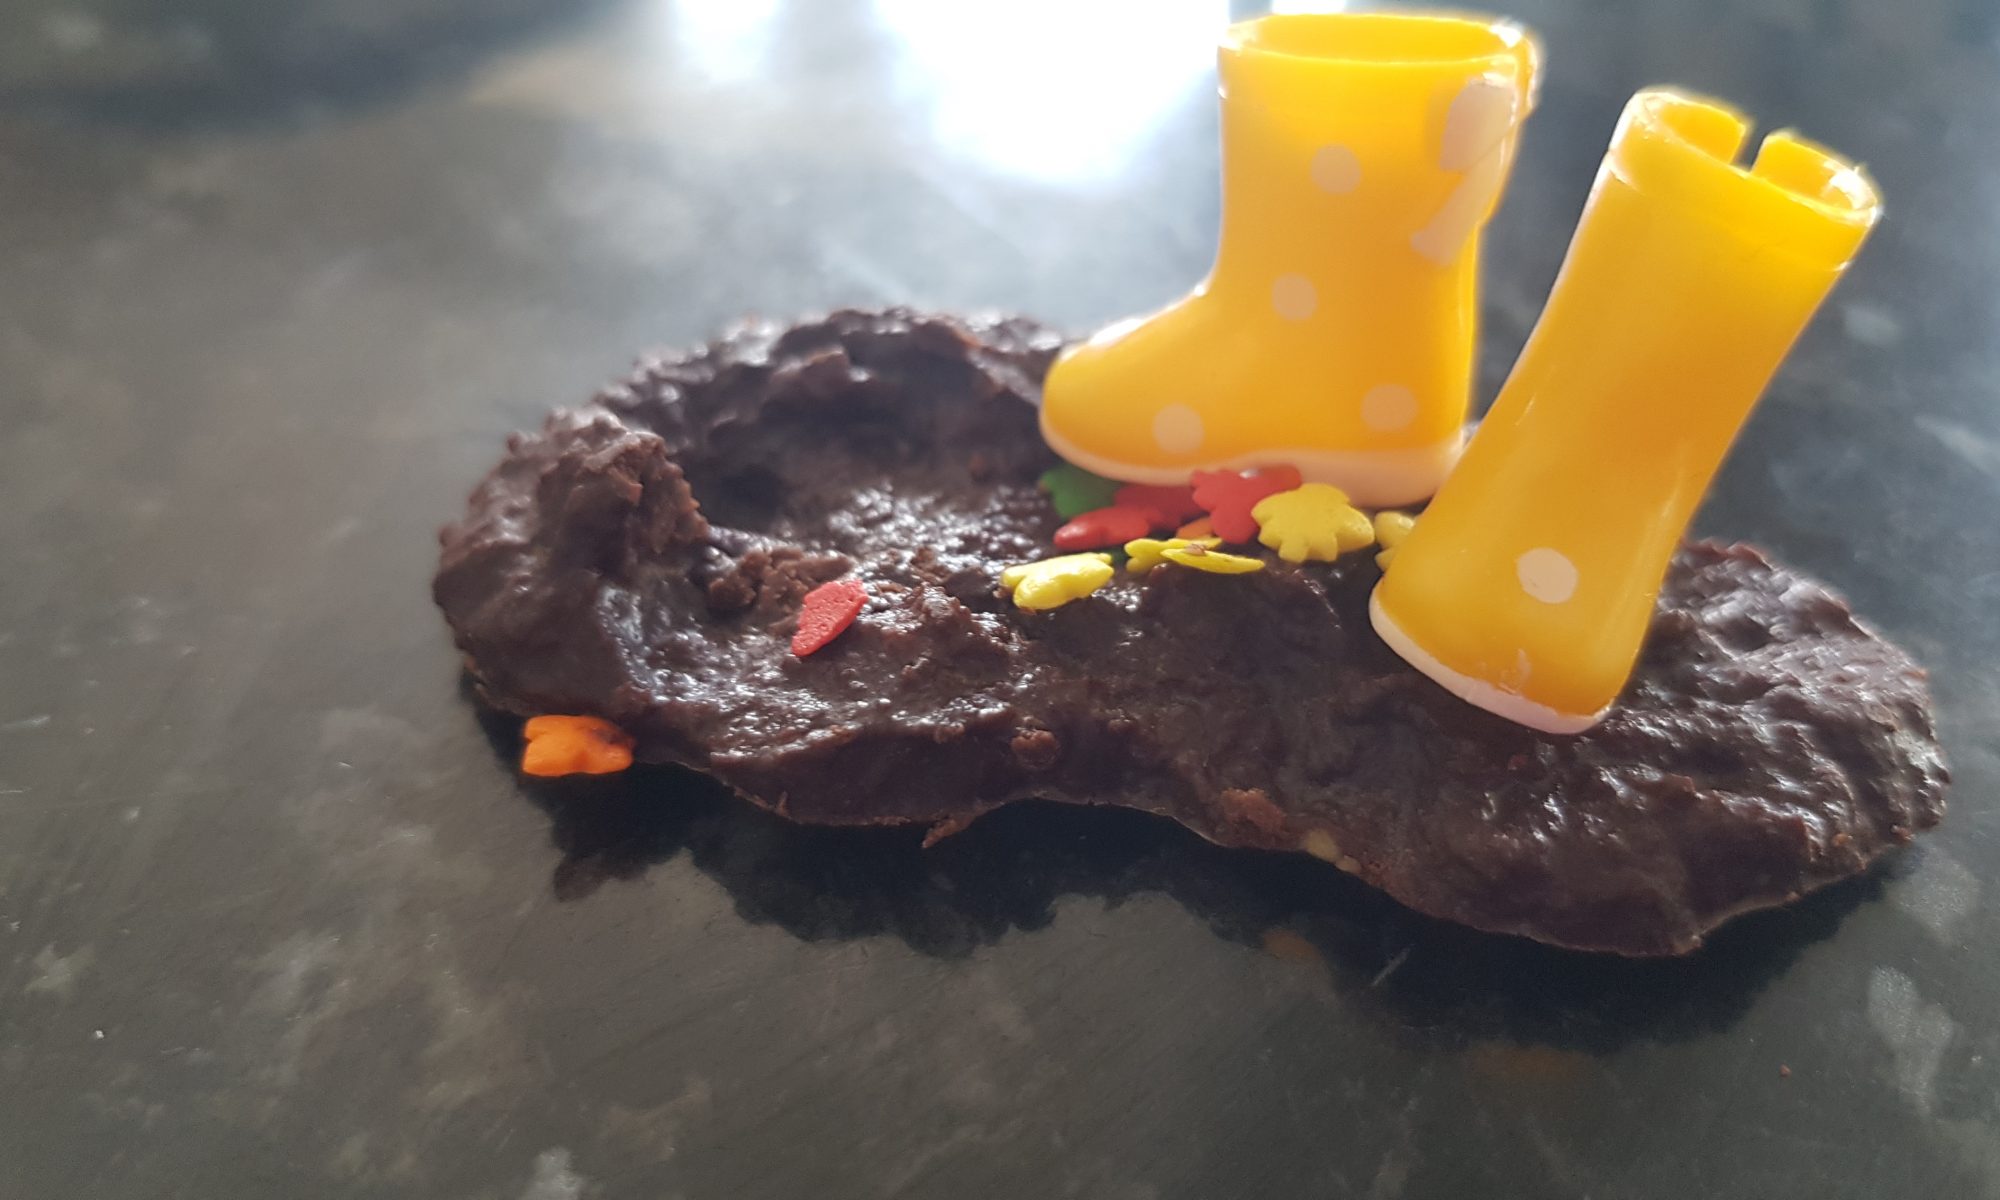
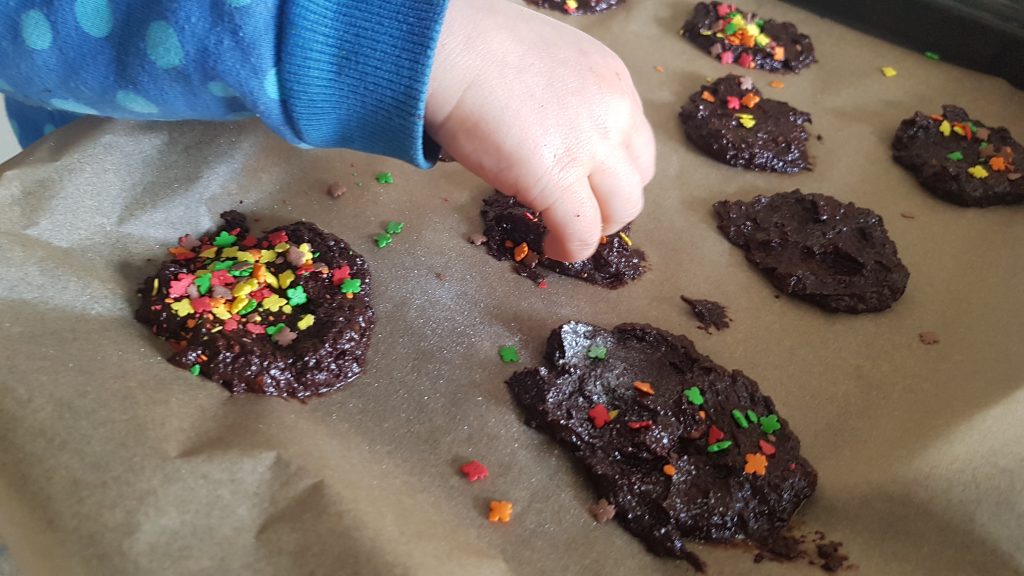
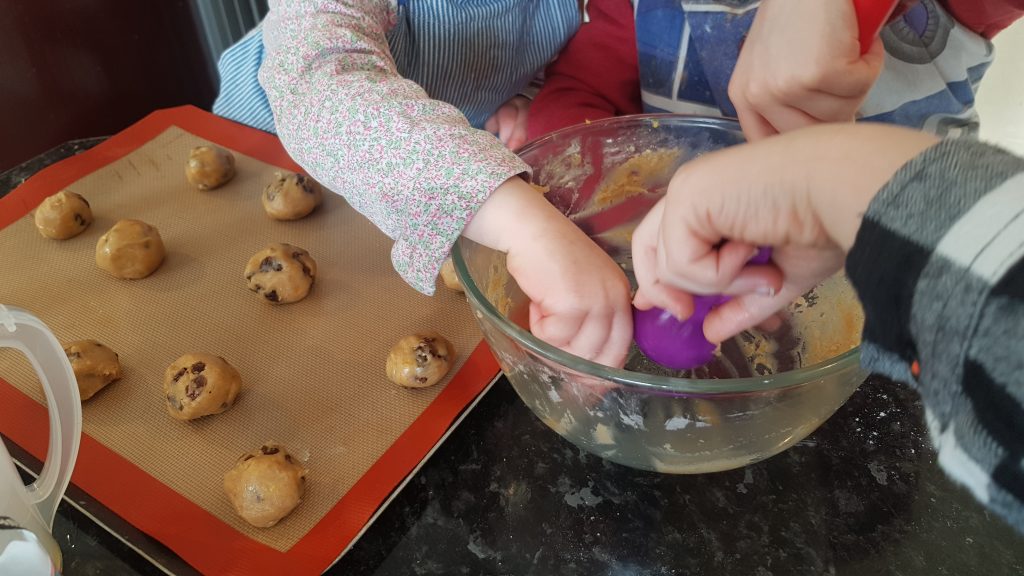
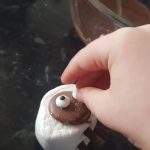
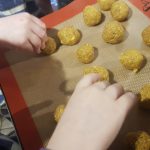
Ophelia had a Muddy Puddle walk for Save the Children at nursery today. By the sounds of it, grown ups and pre-schoolers alike had fun and managed to get drenched! In anticipation of this event, I thought it would be fun to make some muddy puddles of our own to get into the spirit. She had lots of fun spooning, mashing and squishing, mixing, dolloping and sprinkling. It has to be said that you do have to use your imagination when looking at them, because they could be described as looking a bit like cow pats. This was the reason for adding the leaf shaped sprinkles to make people realise their true nature!

This recipe is essentially a truffle made with only 3 ingredients (4 if you include the sprinkles!), but instead of rolling them into truffles, we dolloped teaspoons of the mixture onto greaseproof paper and flattened with the back of a spoon. To make these you will only need 1 small ripe avocado, chocolate and some vanilla extract. We used only dark chocolate as that is what I had in the house, but I would recommend using half dark chocolate and half milk chocolate if you are making this recipe for small children so that it is a little sweeter. To make them dairy free or vegan, you just need to ensure that your chocolate is dairy free/vegan.

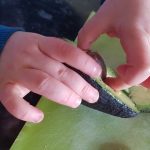
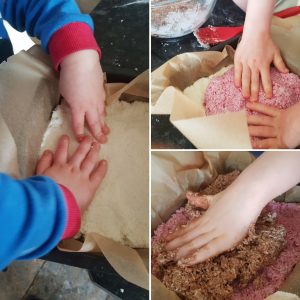
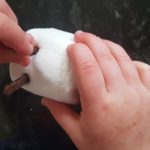
Ophelia was rather intrigued by the large stone in the middle of the avocado and after several attempts managed to get it out. I loved the fact that she tried several times to get it out and didn’t give up until she had achieved it. I feel the need to add at this point, that this is the only way the boys will eat avocado! Ophelia seemed to like it on its own, but the boys have turned their noses up at it several times in salad and homemade guacamole. To my delight, Atticus asked for a second and as he was consuming avocado, I was happy to let him have another!
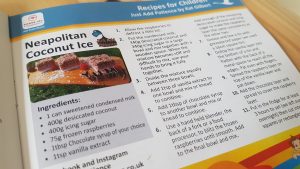
Ingredients

  • 1 small ripe avocado
  • 175g chocolate of choice (see above paragraph for further advice on chocolate choice)
  • 1/2tsp of vanilla extract
  • Sprinkles of choice (we used autumn leaves ones which I managed to get on offer at TKMaxx, but anything, would work such as chocolate or coloured strands, etc)
Adding the sprinkles.

Method

  1. Adult slice the avocado in half.
  2. Melt the chocolate in a double boiler.
  3. If sufficiently ripe, ask your child to pull out the stone. They may need encouraging to hold the avocado with one hand and to pull the stone out with the other hand.
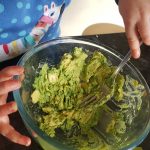
  4. Scoop out the flesh of the avocado and put it into a bowl. Mash with a fork until smooth. You may want to use a stick blender to ensure that it is completely smooth.
  5. Add the vanilla extract and the melted chocolate to the mashed avocado and mix to combine fully.
  6. Take tsp amounts and spoon onto a greaseproof lined baking tray and gently press down with the back of the teaspoon.
  7. Add the sprinkles to the top and store in the fridge until you want to eat.

I thought these were really yummy and the kids enjoyed them too. They felt less naughty as they contained avocado rather than double cream. So two thumbs up from our family and a big yippie as they contain a hidden vegetable!

Neapolitan Coconut Ice

Do you have a go to treat that makes you feel better no matter what the world (or the nearly pre-schooler) may decide to throw at you? There are some days when we our smallest small displays all the world’s emotions within the space of a couple of hours. This goes some way to explaining why toddlers throw tantrums when these big emotions burst out even if it doesn’t make it any easier to cope with them! Anyway back to treats. The combination of chocolate and coconut transports me to my happy place from where I can cope with any new obstacles that our little monkeys may decide to hurl at us next. Needless to say it is also one of the children’s favourite flavour combinations too!

Coconut ice wasn’t a treat of my childhood, it seems to have featured more prominently in Simon’s. When brainstorming for this recipe, I was wondering how we could put our own stamp on it. It didn’t take me long to conclude that adding chocolate and raspberries to it would be the perfect way to do so. Practically everything is better with chocolate! Unless you are thinking along the lines of cheese then I would have to disagree.

Patting it all down.

The kids loved pretty much the whole of this recipe from decanting the condensed milk into the bowl, blitzing the raspberries, measuring the chocolate syrup and patting a layer in the tin each. Having three children may also have contributed to my conviction that this recipe needed a third layer so each child could have a go on their own! So just a way of reducing my stress levels and increasing my chocolate intake at the same time!

Ingredients

This recipe was featured in the May/June 2019 Soar Valley Life Magazine

  • 1 can sweetened condensed milk
  • 400g desiccated coconut
  • 400g icing sugar
  • 75g raspberries
  • 1tbsp Sweet Freedom Coconut Chocolate Shot (or chocolate syrup of your choice)
  • 1tsp vanilla extract

To make:

  1. Allow the raspberries to defrost a little bit.
  2. Put the condensed milk, and 340g of both the desiccated coconut and the icing sugar in a large bowl and mix together with a wooden spoon. When the mixture becomes stiff and difficult to mix, use your hands to bring it fully together.
  3. Divide the mixture equally between three bowls.
  4. Add 1tsp of vanilla extract to one bowl and mix or knead to combine.
  5. Add 1tbsp of chocolate syrup to another bowl and mix or knead to combine.
  6. With a hand held blender, blitz the frozen raspberries until smooth. You could also do this with the back of a fork or a food processor. Add to the final bowl and mix. Add enough of the remaining desiccated coconut and icing sugar to make the raspberry layer the same consistency as the other two.
  7. Grease and line a tin with greaseproof paper (we used a 16cm square tin).
  8. Dollop the vanilla layer into the bottom of a tin and flatten with the back of a metal spoon to reach all the edges. Pat even with fingers.
  9. Spread the raspberry layer on top of the vanilla layer and spread a pat down.
  10. Add the chocolate layer a spread to cover the raspberry layer.
  11. Put in the fridge for at least 3 hours to set (we left ours overnight) and then cut into small squares or rectangles.
The article in print.

This treat graced our lunchboxes when we visited Legoland over the Easter holidays and it was a most welcome addition. We did receive some rather envious looks from other children queuing for the same ride while the kids were enjoying this! The icing on the cake for me in this instance was to see this recipe in print in Soar Valley Life Magazine.

Hot Cross Cookies

Working as a team to mix together the dough.

I love a good hot cross bun. They are wonderfully squidgy and are so yummy when toasted and lathered in chocolate spread (sorry I am not a purist as I am not a fan of butter). I don’t make a habit of buying hot cross buns until the Easter holidays as if I do, I know that I will eat them all and happily forget that the kids also enjoy them. My husband is out of sync with the rest of the family on this one – he would prefer, well not to be obliged to eat a hot cross bun I am sure!

Scooping out the dough
Rolling into balls

I have made hot cross buns in the past, but not with the kids. I remember it being a somewhat lengthy process and not necessarily compatible with my kids’ tiredness levels during term time. However, I did want us to make something related to our faith and have an opportunity to talk with them about the Easter story so I decided we would make cookies as they take less time. As an added bonus, we could make them smaller and perfect for an afterschool snack without having to share a whole hot cross bun and causing arguments over who gets which bit! I don’t know about your kids, but mine will argue over literally anything and make it look like an Olympic sport! Anything not to run the risk of an argument over what I would consider a small inconsequential occurrence, which is clearly the biggest injustice since the previous occasion!

Time to lick the bowl!

We used melted butter in these cookies to recreate the squidgy texture of a hot cross bun, and added orange zest, cinnamon and raisins to replicate the flavours of them. We used icing pens for the crosses, but my eldest had some difficulties piping these out so had help. Alternatively, you could use icing sugar and water, melted white chocolate to pipe a cross on them or cut crosses out of rolled marzipan to stick on. It seems the options are endless! Seb actually quite enjoyed directing me and rating my attempts at putting crosses on the cookies!

Ingredients

  • 225g plain flour
  • 1 egg
  • 150g melted butter
  • 160g soft light brown sugar
  • 1tsp bicarbonate of soda
  • 1 tsp cinnamon
  • 150g raisins
  • Zest of an orange
  • 1tsp vanilla
  • 1tsp of orange extract
  • 1/4 tsp salt

Method

  1. Preheat the oven to 180° or 160°c fan and line two baking sheets with silicone baking mats.
  2. Mix the melted butter and sugar together until light and fluffy.
  3. Crack the egg in and add the vanilla and orange extract and beat it in until fully combined.
  4. Add the flour, orange zest, cinnamon and bicarbonate of soda and bring together until a dough forms.
  5. Add in the raisins and squish and squash to ensure an evenish distribution of fruit in the dough.
  6. Using a tablespoon to measure, get small pieces of dough and roll them into balls and put then on the baking sheets. Remember to leave space for spreading.
  7. Bake for 12-15 minutes until golden. Leave on the trays to cool as they are a little fragile directly out of the oven.
  8. When they have cooled slightly make the crosses using icing pens, melted white chocolate, icing or even marzipan.
Who wants a cookie?! Silly question!

These were delicious cookies. If your little ones aren’t a fan of raisins, you could substitute them for chocolate chips. Do let me know if you make these with your monkeys or without them as that is also an option!

Marshmallow Sheep

Pushing the legs in.

It is officially spring! In our front garden the daffodils are out in their splendour. They make me happy even if I am yelling at the kids to run as we have set out late for school. The temperature is getting warmer and we seem to have said goodbye to winter. Well now I have said that you can guarantee the snow will arrive next week, but I am holding onto the sunshine that we saw last week and hoping for the spring-like conditions to stay! In my head the only bad thing about spring is the fact that we lose an hour of sleep when British Summer Time begins!

On go the eyes.

I have been thinking about making these sheep since Christmas when I was thinking how the kids and I could make the nativity scene out of food items. Unfortunately, I only really got as far as the sheep and then ran out of time to think of more ideas and execute them before Christmas. It may well be on the list for this Christmas, but as usual it depends on time and if I can take precious time away from making mince pies and Christmas cake! I was then racking my brain to see when I could appropriately make them and it occurred to me that new lambs traditionally mark the beginning of spring so there we go! A start of spring activity instead then!

Atticus’s efforts.
Seb’s efforts

As this was a super quick Saturday morning baking in pyjamas activity, I decided to use the opportunity to get the boys, Atticus in particular, to practise their handwriting skills. I find he is more eager to have a go at writing something when it is fun and these sheep and more specifically the promise that he could have one for snack time really spurred him on to have a go. I must say I am super proud of his efforts. His teacher is always advocating him having a go at writing something about something that interested him or that he enjoyed so this certainly fit the bill.

Ingredients

  • Rocky Mountains Mega Marshmallows
  • Giant chocolate buttons
  • Matchmakers
  • Edible eyes
  • Melted chocolate
A pyramid of sheep drying!

Method

  1. Grown up cut each Matchmaker into four for legs.
  2. Push each leg into the bottom of the marshmallow. You will need to push it in quite far for it to work. Some of ours didn’t stand properly, but most did. It is all a matter of making them even.
  3. Put the sheep on its bottom and coat the back (with a spoon or by dipping although the latter is messier in this case!) of the chocolate button in melted chocolate and stick to the sheep’s face.
  4. Put a tiny bit of chocolate on each eye and stick to the chocolate button.
  5. Leave the sheep on their bottoms (so chocolate button facing upwards) until the melted chocolate has set so they don’t move around.
  6. Enjoy!
What you doing?!

My kids are now waiting to be allowed to eat one of these sheep. I am quite enjoying having an ovine (yes the adjective for sheep is ovine in case you didn’t know) audience as I write this up for you all. Please do send me pictures of your sheep if you do make some!

Choccy Toffee Squares

I try alone mummy!

I find baking therapeutic. I even find baking with children relatively therapeutic. This is especially true when the alternative is a 20-minute argument about what board game they should play or TV show they should watch or a meltdown because one little Gilbert didn’t listen to any other little Gilbert’s ideas. The reason for this is generally because any argument can be solved by licking the bowl or by consuming copious amounts of leftover melted chocolate. Yes there are times when the melted butter pot gets knocked over or the flour manages to escape out of the packet and everyone swears they didn’t touch it, but the good in it definitely outweighs the bad and most of the time I get through the activity with my frazzled temper relatively intact! Disclosure; I would like to remind my lovely readers that the more children you try to cook with, the more stressful the undertaking for the ‘responsible’ adult. As a mum who has been cooking with little people for around 5 years, if you manage to get through the planned recipe with no mistakes or cross words I salute you! You deserve all the chocolate!

When I managed to decorate without the children!

These squares were initially mummy-daughter baking time. The boys didn’t participate as they had agreed on a game and were tearing around the garden completely immersed in their imaginations (completely lovely to see especially seeing as it was a rather rotten day). But as is so often true, two is company and three a crowd so Ophelia was at a loose end. And as it is a darn sight easier to cook with just one child rather than my whole tribe, I enjoyed this time with just her and she seemed to enjoy having me completely to herself!

This recipe makes a thin biscuit bar coated in chocolate. Don’t be tempted to place it in a smaller tin for a thicker biscuit. It will fit in a brownie pan when spread out thinly – your little chef may need a bit of help to achieve this. If you are making these bars with small children I recommend using more chocolate to coat them as it is easier to spread a thicker layer of chocolate than a thin one to ensure that the top of the bar doesn’t get damaged. I think these are yummy with desiccated coconut or chopped almonds on the top. Unsurprisingly, Ophelia prefers them with sprinkles – the pinker the better! You will see that she and I compromised and both coconut and multi-coloured stars to decorate one of the batches.

Ingredients

For the biscuit base

  • 100g margarine (or softened butter)
  • 100g light soft brown sugar
  • 1 egg yolk
  • 50g plain flour
  • 50g porridge oats (this recipe works best with bog standard oats rather than jumbo ones)

For the top

  • If for young children 200g milk chocolate and 50g margarine/butter
  • For older children 150g milk chocolate and 40g margarine/butter
  • Chopped nuts, desiccated coconut or sprinkles to decorate

Method

The concentration level was immense!
  1. Preheat the oven to 180°c fan and grease a brownie pan with a silicone baking brush and line it with greaseproof paper.
  2. Put the margarine, sugar and egg yolk into a bowl and mix until smooth, pale and creamy.
  3. Sift in the flour and add the oats and gently mix them in.
  4. Carefully spread in the brownie tin (adult help may be required here) and cook for 15-20 minutes until golden.
  5. Remove from the oven and melt the chocolate and margarine. This can be done in a double boiler on the stove or in the microwave. If you are using the microwave, melt it in short bursts on medium power, ensuring you mix it frequently.
  6. Pour the chocolate over the biscuit base (the tin will probably still be hot, so carefully) and spread with a silicone spatula. Decorate with your toppings of choice.
  7. Cut into squares while still warm and then leave in the tin until they have completely cooled.
The compromise: sprinkles and desiccated coconut!

Every time these are made I am surprised when they survive the night as I am always worried I may decide to sneak down stairs and devour the whole batch before the children wake! Do get in contact if you make these and let me know what you think.

Apricot and Pistachio Energy Balls

We are nearly at the end of January and I am taking big breathes to relax as we have made it. It really can be a really dreary and depressing month weather wise and with everyone trying to be good it can seem like the fun is sucked out of it. Let me tell you this though, it isn’t all bad as when life gets overly stressful, when the kids drive me round the bend, my wonderful husband sends me off to a café on my own, with my laptop so I can write a blog post in the day and he instructs me to eat cake. Yes my lovely readers, my gem of a husband sends me out to eat cake. Some of you may well struggle to believe that I have to be told to eat cake with all the things we make, but it turns out I do… I have just ordered my second slice and I am not feeling one bit guilty. Why? Because it has been a stressful day month and I have been really good since I devoured practically a whole batch of meringue topped mince pies – and that was last year! Please don’t remind me that that was only last month! Yes the second slice of cake may well cancel out the rest of the good in the month, but for my sanity I was ordered to eat cake, so I have. It is one thing I can tick of my list without any trouble. And I will vow to work with even greater dedication at the exercise classes I attend during the week. So if any of my instructors are reading this yes you may yell at me to work harder next week and I won’t roll my eyes at you or grimace at you. I promise. Well I promise to endeavour not to!

Ophelia deciding I had taken enough time photographing the snack and wanting to dive right in!

So before I went out to eat loads of cake, last week the boys made these delectable Apricot and Pistachio Energy Balls. We seem to get through kilos of dried fruit in cereal, cakes and snacks during the year, but looking back over the things we have made, I realised energy balls had never featured. The main reason is due to the nut content and me being super paranoid about another child getting hold of them in the school grounds. But when they have these, I herd the children out of the school grounds questioning where their snacks are, (it is after all a long walk or trek in their eyes home) and then distribute them to the eager recipients. I would maybe say though, they are probably better as a pack up snack in the winter months as they do need to be stored in the fridge.

Rolling the energy balls without licking their fingers!

I promise they couldn’t be easier to make. My children made them one evening after school and enjoyed the fruits of their labour the rest of the week and over the weekend. They are literally one of the easiest thing to make with your little chefs. We also made it a game to see who could go the longest while rolling them into balls without licking their fingers. I have to say even I was sorely tempted to lick my fingers as they were so truly scrummy and at the end we all sat there eating the remains off our fingers before hand washing! We truly must have looked a sight! Poor Ophelia though, watched from the other end of the counter as she had a particularly bad cold I that was one thing I was not eager for her to share. She was given a little spoon to lick to feel included while she chatted along to grandma.

Ingredients

  • 275g dried apricots
  • 85g shelled pistachios
  • 2tbsp runny honey (or use maple syrup to make vegan)
  • 50g oats

Method

  1. Place all the ingredients in a food processor and put the lid on.
  2. Turn it on at a medium speed. You may need switch off and scrape the sides a bit.
  3. Blend together until the ingredients form a big thick clump.
  4. Remove the lid and the blade from the food processor and take pieces of the mixture and roll into balls. Ours were all slightly different slices, but mainly around the half a tbsp. mark.
  5. Refrigerate for a couple of hours and the return to the fridge in a tub. These will store in the fridge for a week or so.
Challenge completed!

It has to be said that the boys were more fond of these than Ophelia. I do think that the no finger licking contest that they had going made this activity even more fun and made them want to eat even more of them! There were many happy sounds from them when I said I had energy balls for snacks. I think we shall be trying some different flavours next time. I am dreaming of chocolate and ginger… I shall leave that one out there and hopefully they will come around at some point!

Fat Rascals

I was never a particularly rebellious teenager. That said, I do remember being told off by my dad when I was thirteen for reading a book in the back of the car as we drove across the Grand Canyon National Park. I remember having looked out the window and seen the astonishing beauty of the scenery, feeling overwhelmed and then delving back into my historical fiction book about the area that I had bought earlier that day. Language and books have always held a spot very close to my heart. While translating I used to spend hours procrastinating with Roget’s Thesaurus to try and find the perfect word to convey the meaning of the text. This may seem to have no connection whatsoever to the Fat Rascals that I made with Ophelia last week, but the word rascal got me thinking of what other words I could use for them. So, drum roll please… we made Massive Scoundrels! It made me chuckle so much to myself that I had to share!

No mummy I don’t want help cutting the dough, I do it myself!

For those of you who haven’t heard of Fat Rascals before, they are a rich scone and rock cake hybrid from Yorkshire. I don’t come from Yorkshire, but my sister and I had a lovely mini break there before I had the kids, when I was between jobs. We went to the iconic Betty’s Tearooms and had a Fat Rascal and tea. It was exquisite and I still hold very fond memories of that trip and the Fat Rascal all these years later. So when I was hunting for something I could make with Ophelia and was thinking of scones, I decided we would try and replicate Betty’s yummy Fat Rascals. The exact recipe Betty’s Tearooms use is a closely guarded secret, but I did some research and drew elements from a couple of recipes I found in my cookbook collection and online. They did also resemble my memories so I was happy.

Making faces.

These are excellent to make with children as they can get involved in pretty much every stage from rubbing in butter, pouring cream, squishing and squashing to form the dough and counting out and tearing the glacé cherries and counting out the almonds to make faces on top of them.

Ingredients

For the dough

  • 125g plain flour
  • 125g self raising flour
  • 1tsp baking powder
  • 100g unsalted butter
  • 75g caster sugar
  • 150g dried fruit (we use a mixture of raisins and sultanas)
  • 1tsp cinnamon
  • 1/8tsp nutmeg
  • Zest of half a lemon
  • 1 egg
  • 60ml double cream

For decoration

  • 6 cherries halved
  • 18 whole almonds
  • 1 beaten egg

Method

  1. Preheat the oven to 200°c or 180°c fan. Line a baking tray with a silicone baking mat or greaseproof paper.
  2. Sieve the flowers into a large bowl. I tend to let the children alternate between gently tapping the side of the sieve and gently stirring the flours in the sieve.
  3. Stir in the baking powder.
  4. Add the butter and ‘tickle’ it into the flours until it looks like fine breadcrumbs.
  5. Add the sugar, lemon zest, cinnamon, nutmeg and dried fruit and mix until fully combined.
  6. Pour in the cream and the beaten egg and mix gently before bringing together with your hands. Knead until a dough has formed.
  7. Divide the dough into two equal pieces and then make three equally-sized pieces from each of the two pieces of dough. You should have 6 lumps.
  8. Shape each lump with your hands until they look like large rounds.
  9. Brush the second beaten egg over the Fat Rascals.
  10. Tear the 6 cherries in half and use two pieces on each for eyes.
  11. Use three almonds on each to make a smile.
  12. Place in the oven for between 15 and 20 minutes. They are done when golden brown. Leave to cool on the tray for 5-10 minutes before moving them.
Imagine them with long thin tails to look like the gulper eels like my daughter did or just look at the yummy Fat Rascals and decide when to make them!

When these came out of the oven and Ophelia had a look at her handiwork and she exclaimed: ‘They look like gulper eels!’ In case you are not as familiar with sea creatures as my Octonaut-loving two year old, a gulper eel is an eel with a mouth which looks disproportionate to the size of its thin tail. It’s animation in the show portrays a creature with beady eyes and small, but very prominent pointy teeth. So I suppose she was right, they do look a bit like gulper eels in their own little way…

Cheesy Popcorn Squares

A very happy new year to all my lovely readers wherever you are. Like most people, I find it so very easy to get lost in the random period between Christmas and New Year. At the end of boxing day, I feel as if the Christmas celebrations should be drawing to a close, but my pantry and kitchen indicate otherwise. I wouldn’t be exaggerating much by saying that we still have a small mountain of chocolate left over despite our best efforts to make it shrink. I don’t think we shall need to buy any more chocolate until Easter. I have even found some new places in our messy pantry to hide chocolate from myself and everyone else to save for when everything and everyone are driving me around the bend and I need a chocolate fix. I am sure you will agree that this isn’t selfish, but merely survival!

In a desperate attempt to move away from sweet recipes with the kids after a wonderfully sugary build up to Christmas, I managed to entice the boys to make their lunch. I am completely convinced that the only reason that I succeeded in doing this is because I said the recipe included popcorn. This baffled them somewhat as they normally have unflavoured popcorn with some raisins or nuts for film snacks and made them all the more eager to get stuck in. The other reason for using popcorn is the pure sound of joy that comes from the children when the popcorn machine starts whirring and popping and the popcorn comes jumping out.

Flattening it with the spatula – shortly before the spatula got licked!

Ingredients

  • 75g popped plain popcorn
  • 100ml garlic and herb cream cheese
  • 80ml crème fraiche
  • 150g grated cheese
  • 2 eggs
  • 2tbsp tomato paste
  • 3 slices ham (or omit to make vegetarian)
  • Seasoning

Method

  1. Preheat the oven to 180ºc fan and grease and line a brownie tin or a square or rectangular cake tin.
  2. Crack the eggs into a large bowl and whisk.
  3. Add the cream cheese, crème fraiche, tomato paste and seasoning and mix well.
  4. Put the grated cheese, ham (if using) and popcorn into the mixture and mix until fully combined.
  5. Transfer the mixture to the tin and bake in the oven for 15 minutes. Remove from the oven when golden and the cheese is all lovely and melty. Leave for 15-20 minutes to cool before slicing into squares.
  6. Enjoy!
Atticus decided he couldn’t wait for me to finish taking some pictures of their creations before trying them!

Simon and the kids had this for lunch one day. I was expecting them to leave some so the kids could have some the following day. This didn’t happen as all the pieces were gobbled up at lunch! I suppose this is an accurate indication of their opinion of the bake! Do get in touch if you have a chance to make these Cheesy Popcorn Squares.

Bacon, Brie and Cranberry Muffins

It is easier to cut the brie when it is straight out of the fridge as it is less sticky!

In my head, bacon, brie and cranberry is inextricably linked with Christmas festivities. While it is true, it normally comes in a sandwich or maybe even a pie, I wanted to make something a bit more transportable and with a lower potential of creating a sticky mess with little fingers. These muffins work both hot and cold so can be eaten fresh from the oven or even once cooled on the way home from school or while waiting to see the man in the red suit. I bet the aforementioned man would also appreciate one to help him on his long journey on Christmas Eve!

I have never been particularly fond of the smell of meat cooking.  This is probably because I am a vegetarian. Early in our marriage, I banished my husband from my presence as he smelt of chicken. Moreover, while working in East London, I  used to get off the tube and there was a greasy spoon which served bacon butties every morning and seemed to do very good trade. I remember having to hold my breath as I walked past as I really couldn’t stand the smell of bacon cooking.

Anyway, fast-forward 6 years and I am now at the stage where I can cook meat for the kids and Simon. I frequently cook bacon and I don’t even have to hold my breath now! This may not seem like a big thing, but for me it really is! I was determined that I wasn’t going to insist my children be vegetarian; it is their choice just as it was mine.

Ingredients

Makes 12 large muffins or 15 slightly smaller muffins.

  • 250g self raising flour
  • 1tsp baking powder
  • 5 rashers of bacon, cut into small pieces and cooked
  • 1tsp dried mixed herbs
  • 3 eggs
  • 100ml milk
  • 90g grated cheddar (50 for inside muffins and 40 for sprinkling)
  • 100g brie, chopped into small pieces
  • 3tbsp cranberry sauce
  • Seasoning

Method

  1. Preheat the oven to 170°c fan and put the muffin cases in a muffin tray.
  2. Mix the flour, baking powder, herbs and seasoning in a large bowl.
  3. Make a well in the centre of the flour bowl and add the eggs and milk and cranberry sauce.
  4. Mix to form a smooth batter.
  5. Add the bacon, brie and 50g of the cheddar and mix well.
  6. Divide the mixture between the cases and sprinkle the remaining cheddar on the top.
  7. Place in the oven for 20-25 minutes until the muffins feel firm to the touch and are golden. These can be enjoyed both warm and cold.

Every time we make these, they are gobbled up quickly. I think that because it is a muffin and looks like a cake, the children feel that they are getting a treat when in fact it isn’t a sugar loaded snack! I would love to hear from you if you make these.

Candy Cane Breadsticks

Happy December everyone! Welcome to the busiest, friendliest and most expensive month of the year. I hope you are all well prepared as I find that it is also the most exhausting. Exhausting because of everything going on and also because you have to contend with not only all the activities, but also the inherent excitement that Christmas brings. The excitement levels of my children always end up making me snap or shout at some point, bringing the inevitable mum guilt that I am spoiling their fun. This year I am trying my best to avoid that scenario. I shall let you know how I am doing slightly nearer Christmas.

Anyway onto happier thoughts. I have had these breadsticks on my brain since I started this blog back in March. Just after Christmas last year I stumbled upon The Crafty Gentleman’s version and decided that I wanted to make a simpler, more child friendly recipe when we reached Christmas again. So now we are back in December again, they were the first item to be ticked off my ever growing list of Christmas cooking.

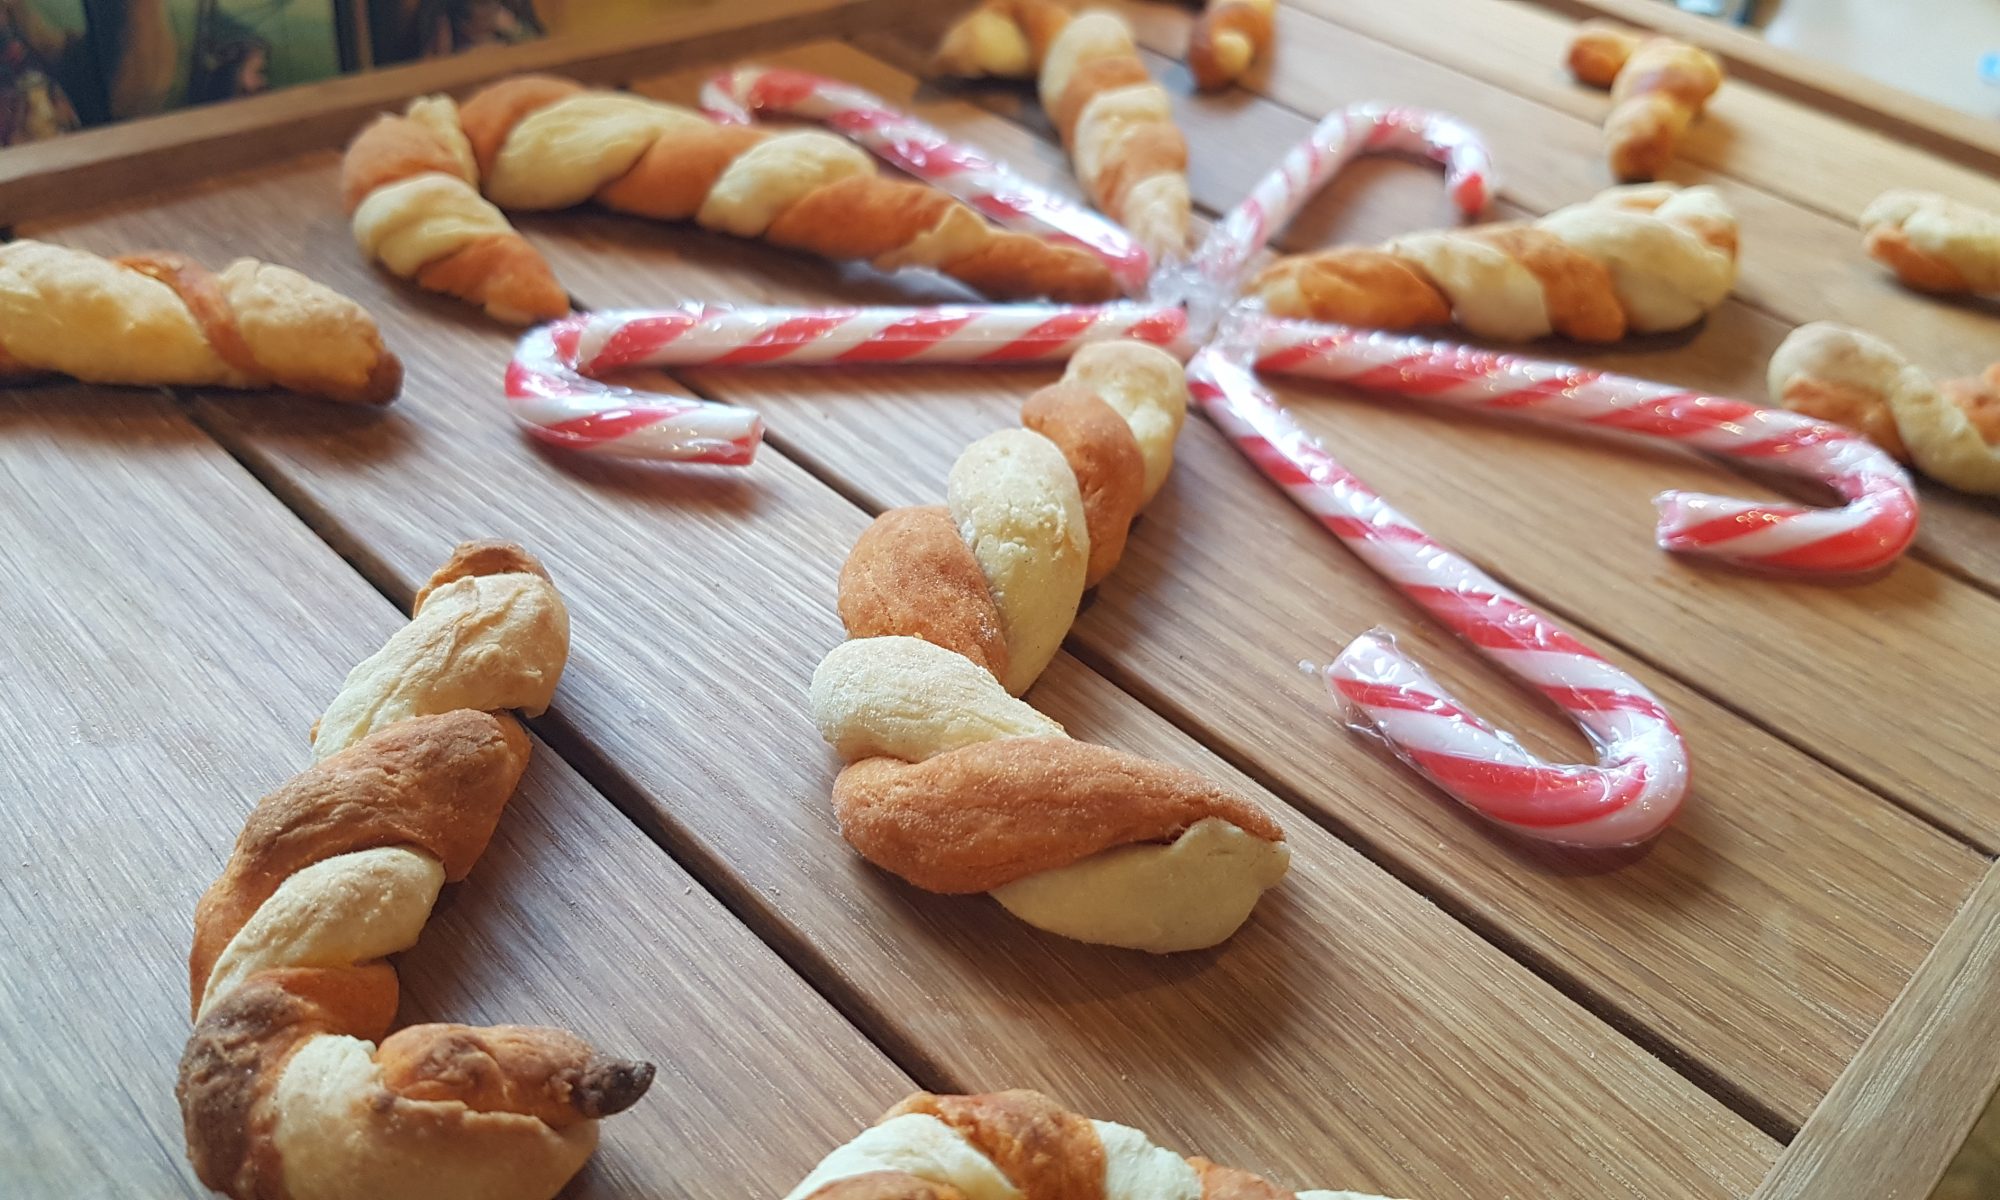
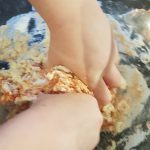
The breadsticks we made were two different flavours. Unsurprisingly the red strand was tomato flavoured and we used garlic salt to flavour the white strand. 
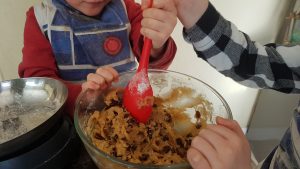
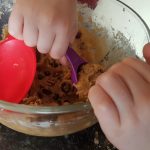
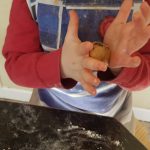
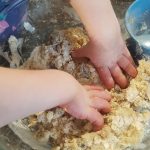
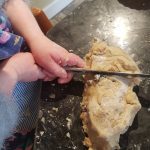
This was a beautifully hands on activity with the kids and all three of them had so much fun squishing and squashing the dough together and rolling out the sausages. They did need help to twist them together, and yes they do look 
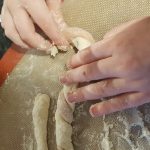
homemade, but they all had a lot of fun and were delighted to make something Christmassy. As each child always had a job whether it be kneading the dough, making more snakes or having a go twisting the tomato and garlic strands together, it meant there was no bickering! We found that all of ours ended up being different sizes, but I had one baking tray of bigger ones and a second with smaller ones so the smaller ones were removed from the oven earlier than the others.

Ingredients

Recipe adapted from Tickle Fingers Cookbook

For the garlic strand

  • 90g self raising flour
  • 60ml milk
  • 1/8tsp garlic salt
  • Olive oil
  • Plain flour

For the tomato strand

  • 90g self raising flour
  • 50ml milk
  • 2tbsp tomato paste
  • 1/8tsp salt
  • Olive oil
  • Plain flour

Method

  1. Preheat the oven to 220°c and put silicone baking sheets or greaseproof paper on two baking sheets.
  2. Put the ingredients for the garlic strand (apart from the oil) in a medium-sized bowl and mix. Use your hands to bring the dough together and gently knead until smooth. Put to one side.
  3. Put the ingredients for the tomato strand (apart from the oil) in a medium-sized bowl and mix. Use your hands to bring the dough together and gently knead until smooth. This one will be slightly wetter than the garlic one.
  4. Dust your surface with plain flour. Roll out sausages with each of the doughs. These do work better if they are quite thin and about 10 cm long. If they are thick they will need to be longer to retain their shape.
  5. Take two strands which are around the same length. Pinch them together at the top and twist together quite tightly. Put on the baking sheet and bend the top to form the candy cane shape. We found the easiest way to twist them together was me holding the top and the kids twisting the strands together. This ensured they were twisted tightly and held their shape whilst in the oven.
  6. Gently paint each candy cane with the olive oil with a pastry brush.
  7. Place in the oven for 10-15 minutes for smaller and thinner candy canes and 15-20 for the larger ones. They are cooked when the are light golden and crisp. They do start to burn easily so keep an eye on them.

I hope your kids enjoy making these savoury candy canes as much as mine did. Breadsticks are always a good snack choice and especially at Christmas when everything seems to be full of sugar! I would love to hear from you if you make these.