Hulk Halloumi Bake

Are your children superhero obsessed? Mine certainly are and I am not ashamed to admit that I use this to my advantage somewhat when they are confronted with a vegetable they don’t want to try. We talk about vegetables helping them to be strong like superheroes and helping them to build up their vitamin stores for strength. In particular, the green ones which generally have a slightly more bitter taste. And as the hulk is green in colour, we make that connection too. My parents used to tell me to eat my vegetables so I would be strong like Popeye (even though it felt like a dated cartoon when I was small) so maybe this is just the modern version! So this is the reason for the name of the dish. It isn’t an original recipe of mine, but an adaptation of a recipe from one of my favourite cookery authors, Rukmini Iyer in her book the Green Roasting Tin. As a family we love Rukmini’s recipes and they frequently make an appearance on our dinner table or get sent into school with the kids on their birthdays.

The first time we made it I loved it, but my family didn’t appreciate all the Brussel Sprouts, so we adapted it to include some other green vegetables too. We make it with frozen vegetables as that is the most economical way to ensure we all get enough fruit and vegetables in our diet here in the Falklands. It also means that you can buy the ingredients for this dish and it doesn’t matter if it takes you a while to get around to making it as the vegetables won’t spoil and halloumi generally has a long shelf life when in a sealed packet.

Ronan watching Seb with his high-vis jacket (at least we would see if he fell in) and little grin.

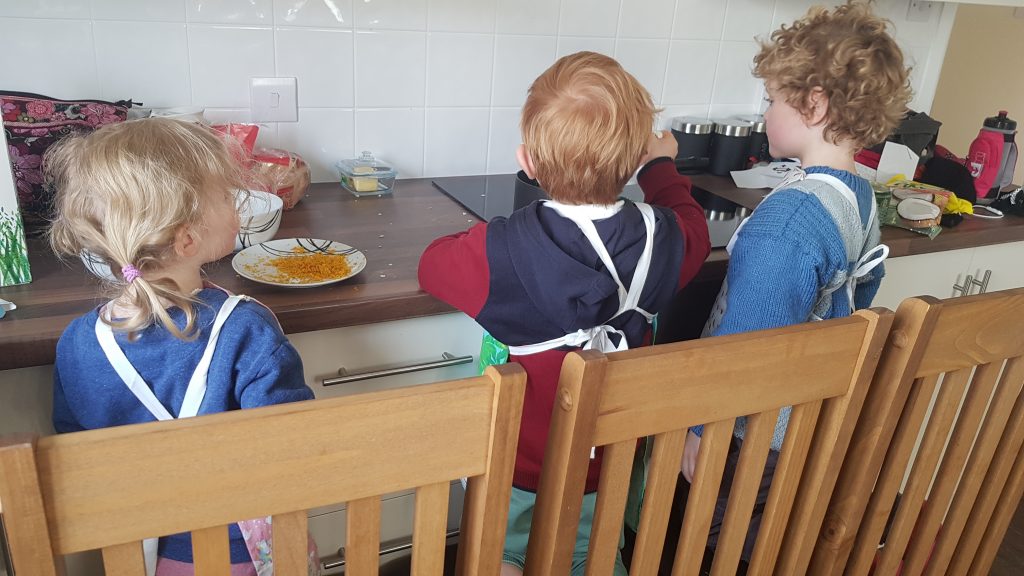
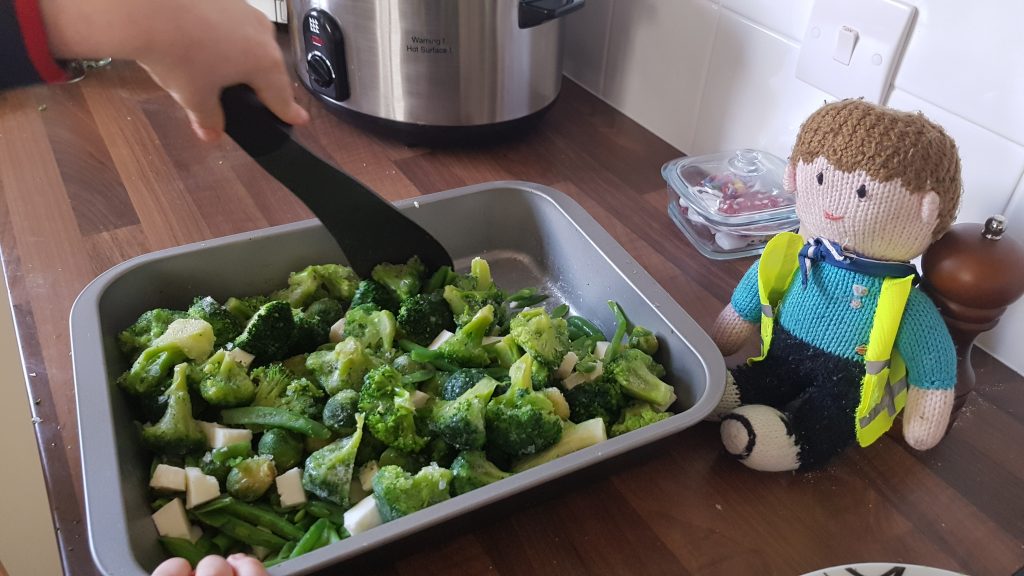
This dish was our activity when Sebastian had Ronan, the take home knitted Beaver, for the week. Ronan sat on the counter and ‘helped’ us make this dish. We didn’t have any disasters – no falling in or unwelcome splatters and Seb happily spouting the importance of vegetables in a healthy diet the whole way through our endeavours. Ronan returned to Beavers the following week safe and sound after his Hulk Halloumi Bake! It has to be said our entry was one of the more boring ones, but it was second nature to me as the kids cook with me on a weekly basis. No extra planning required! I reckon that makes me a superhero in my own right!!!

Ingredients

  • 1 block of halloumi
  • 400g broccoli
  • 75g Brussel sprouts
  • 200g green beans
  • 2tbsp olive oil
  • 3tsp garlic
  • 2tsp nigella seeds
  • 2tsp garam masala
  • 3tbsp lemon juice
  • Seasoning
  • 350g cooked rice (warm)
Mix it all around.

Method

  1. If you are using frozen vegetables like we did, remove from the freezer and allow to defrost for half hour or so.
  2. Preheat the oven to 180°c fan.
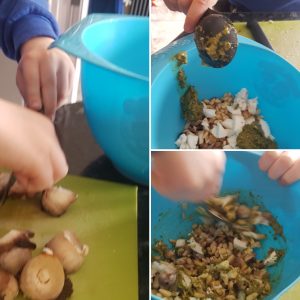
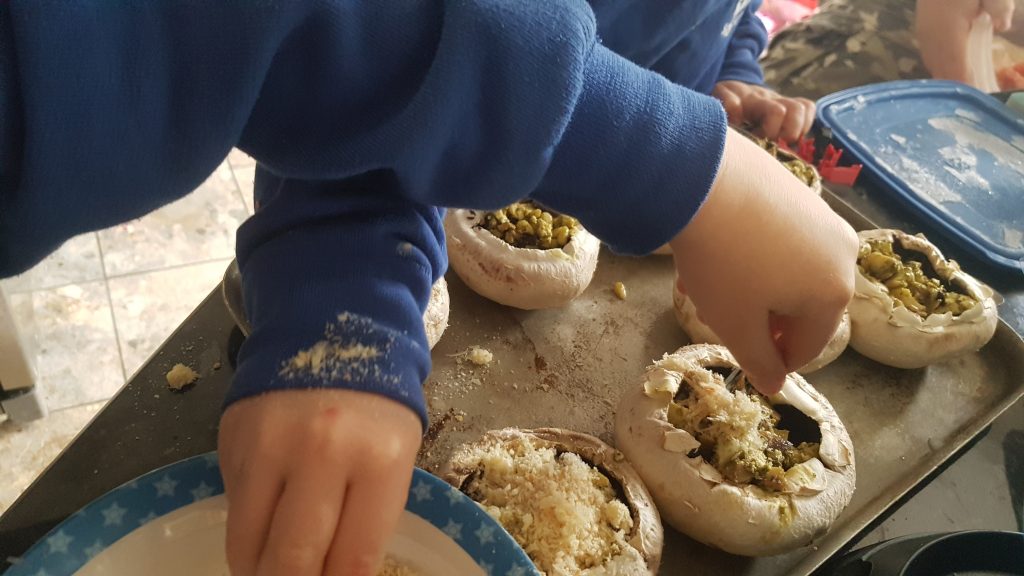
  3. Chop the halloumi into small squares with a child safe knife. Chop any large piece of broccoli into smaller pieces.
  4. Add the halloumi, broccoli, Brussel sprouts and green beans to a roasting dish.
  5. Drizzle with the oil, add the garlic, nigella seeds, garam masala and seasoning.
  6. Gently agitate the tray so that the vegetables and halloumi are covered with spices and oil. Be careful not to shake up and down!
  7. Put in the oven for 20 minutes.
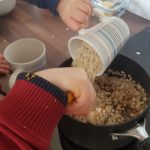
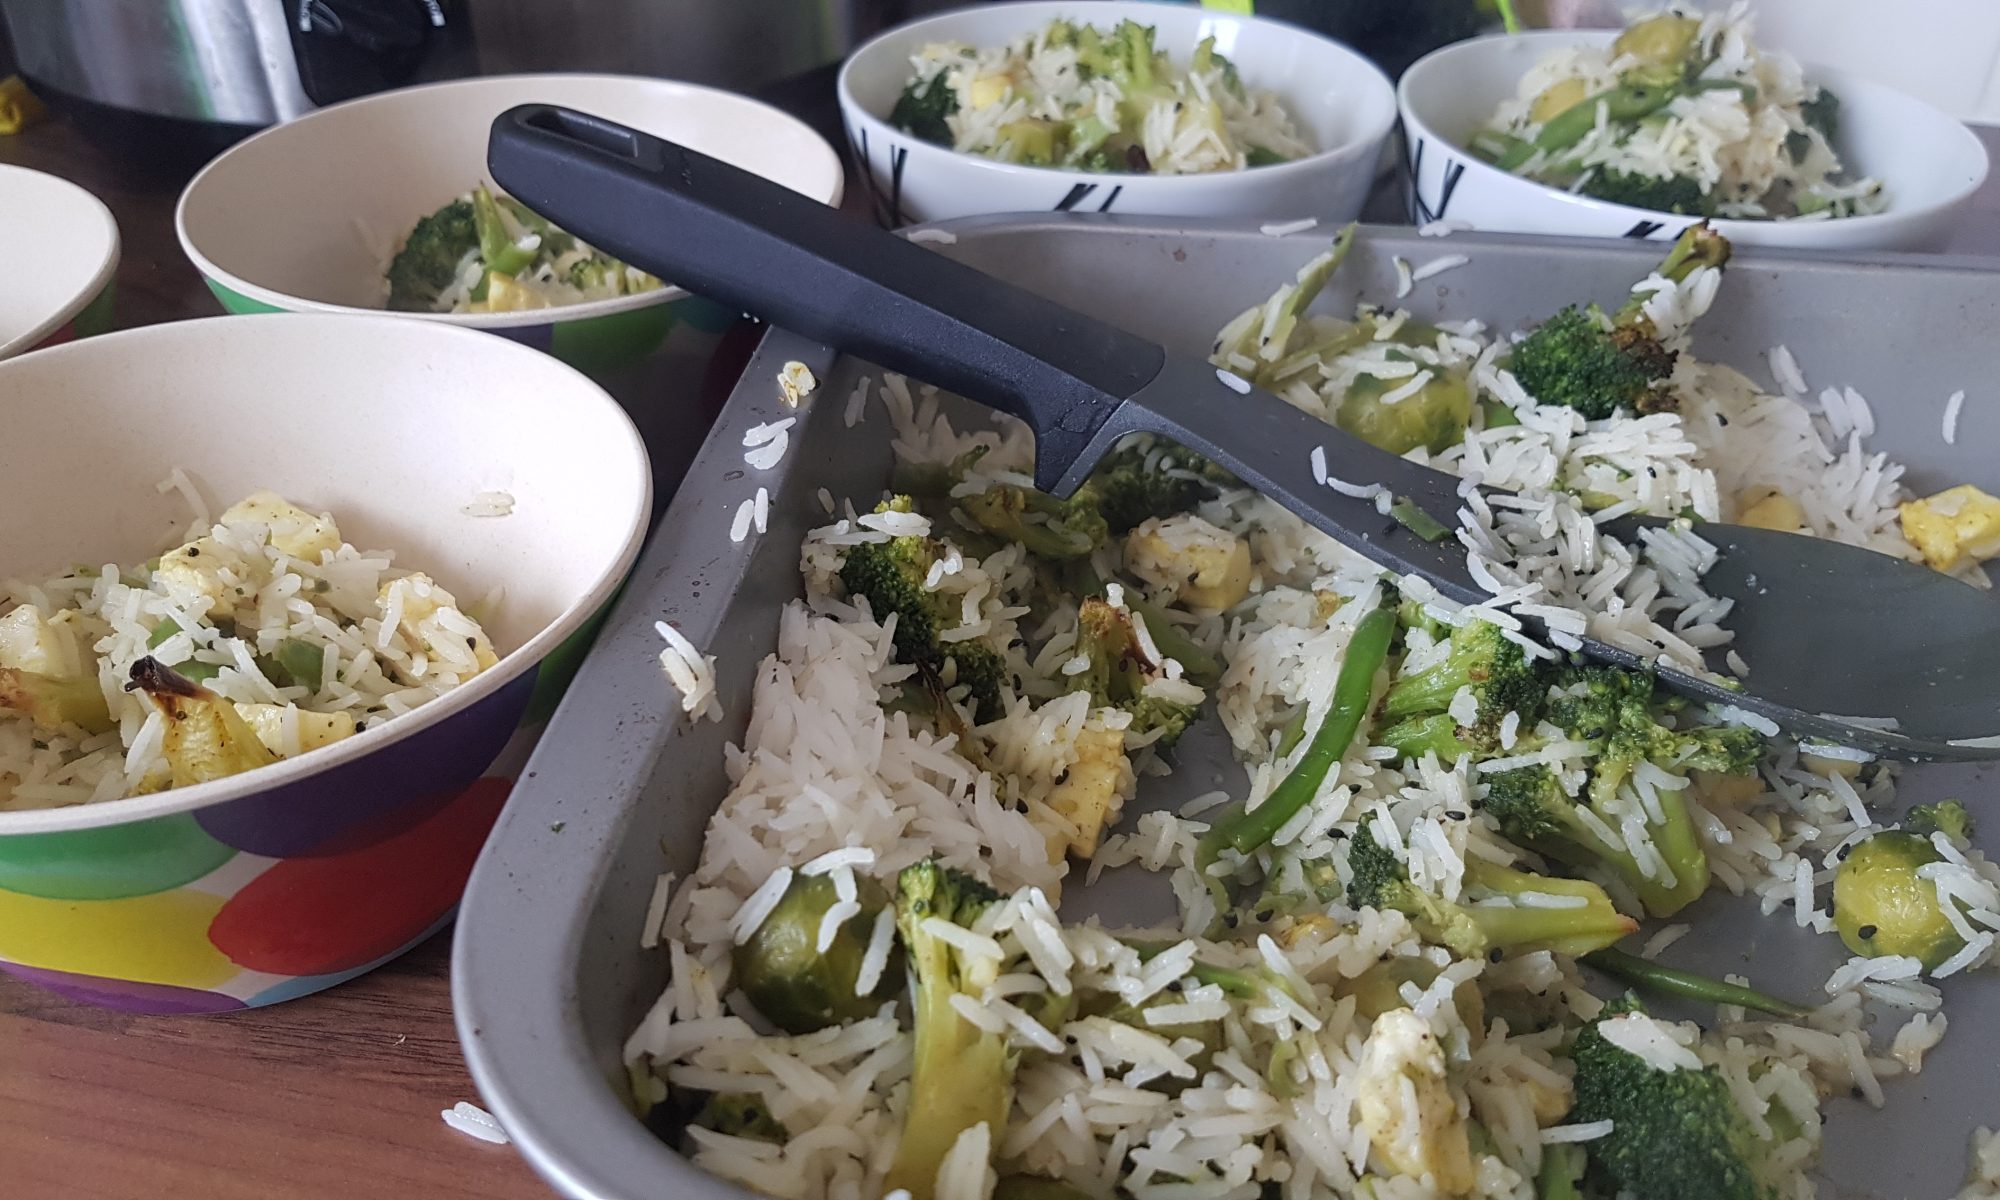
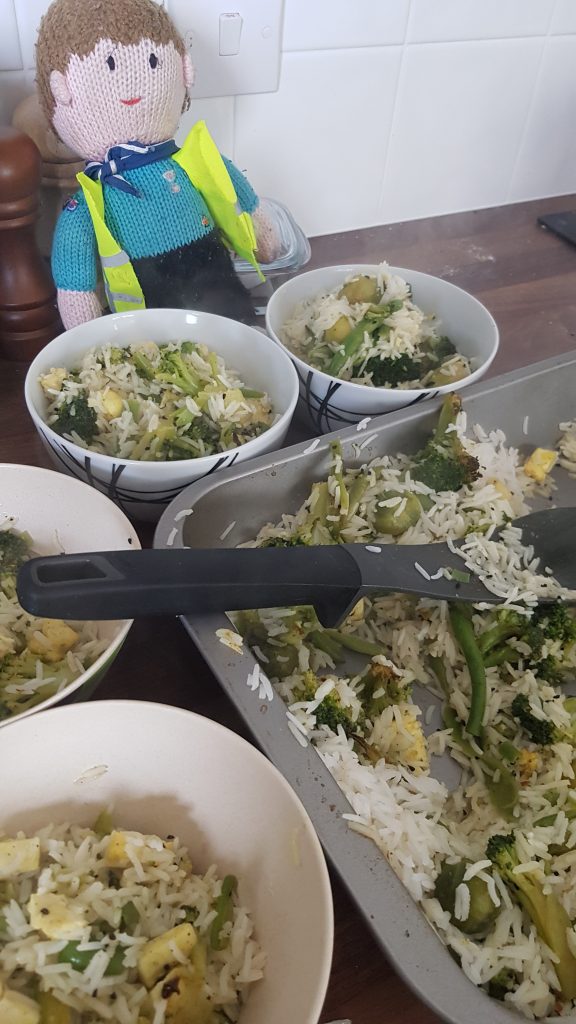
  8. Remove from the oven and mix the cooked rice and lemon juice through with the halloumi and vegetables.
  9. Distribute between bowls and enjoy warm.
Ronan looks pretty proud of his creation!

I love this dish and it is one meal that my family can all eat together as it is vegetarian. I hope it goes down as well with your family as it does with mine.

Rocky Road Traybake

There are certain days when only chocolate cake will do. I would love to claim that this cake was the outcome of a desperate need for chocolate due to a bad day, but it was in fact just a way to entertain the kids and have them working towards pudding for a family dinner! Atticus helped Simon make the main course and Seb and Ophelia joined me on the other side of the kitchen to make pudding. On this occasion, dinner certainly was a full family effort. They are happy memories.

Into the pan.
On go the marshmallows!

This cake also gave me an excuse to open the kilogram bag of mini marshmallows that I managed to find and sent Simon and the kids off to discover for themselves and purchase. There was pure delight when they saw such a large bag of mini marshmallows. Previously they had only seen the 150g bags that I would purchase in Tesco. I did miss an opportunity for a maths lesson asking how many small bags would make up the large bag. Oh well, there’s an idea for next time! I was a mean mum though; I made them wait until I had a definite recipe in mind before we opened them. I knew that if we just opened them, I would blink and they would all be finished! I have three marshmallow-loving kiddies and a husband who isn’t averse to adding them by the handful to his pudding or cereal bowl! They would have been inhaled and while this would have been an impressive feat, I really wanted to prevent this outcome.

To mark the opening of our gigantic bag of marshmallows, we made this Rocky Road Traybake. It is a very think cake sprinkled with raisins, chopped nuts and mini marshmallows and drizzled with melted white chocolate. You will be surprised to hear that it lasted more than 24 hours. Although this is probably because I packaged it away and hid it under the bread in the bread bin! No one thought to look there so it was safe until I was ready to distribute it! However, now I have written this, I shall have to find a new cake hiding place.

Ingredients

  • 115g butter/margarine
  • 115g dark brown sugar
  • 100g plain flour
  • 15g cocoa powder
  • 1 medium egg
  • 5tbsp milk
  • 50g chopped nuts
  • 40g raisins
  • 20g mini marshmallows
  • 40g white chocolate, melted

Method

  1. Grease and line a brownie pan, or small square/rectangular cake pan and preheat the oven to 160°c fan.
  2. Cream the butter and the sugar together until smooth.
  3. Add the egg and beat.
  4. Sift in the flour and cocoa powder and mix until combined.
  5. Add the milk and mix until smooth.
  6. Dollop the batter into the baking tin and spread so all the edges are covered. This is meant to be a thin cake, so it may require a bit of effort.
  7. Sprinkle the nuts, raisins and marshmallows on top and place in the oven for 15 minutes until a skewer comes out clean (unless you go through a marshmallow!
  8. Allow to cool fully before drizzling with melted chocolate.

I hope you enjoy this traybake as much as my family did and do look for a good hiding place for it so it doesn’t all disappear in a blink!

Look at that chocolatey goodness!

Red Pepper and Cannellini Bean Fritters

Patience is an important commodity when dealing with children. It’s mere presence bolsters success in the kitchen with children. I mean it isn’t as if you need a kilo of it or anything – a sprinkling is just fine. That said, my stockpiles of patience have been dwindling this week. I should have known it was going to be a hard week when I hurt my leg running and my favourite outlet for solitary time vanished. This was further impacted, when I ended up late to collect Seb from a school club because I lost track of time and a last minute pre-schooler toilet trip.

Contrary children have certainly greatly contributed to this feeling of frustration. Allow me to provide an example: Ophelia loved making this recipe. She ate copious amounts of the individual ingredients, but barely countenanced the idea of eating the end product. I won’t lie, I had to take some deep breaths and think of the fact that our shipment has arrived and we now have all our stuff except our car. Once I had found these happy thoughts, I realised that this meant all the more for me to gobble up!

Not hugely photogenic, but totally delicious!
Sticky fingers warning!
Chopping with a table knife

This recipe is full of processes that children love; squishing and squashing, chopping, cracking, mixing and transporting. The latter is a mucky process, and if your child doesn’t enjoy getting their fingers dirty, you may well want to consider using a couple of tablespoons to make the fritters and flatten them a bit.

Ingredients

  • 1 tin cannellini beans
  • 150g roasted red peppers from jar
  • 75g sweetcorn
  • 1 beaten egg
  • 50g flour
  • 1/2 tsp garlic (we used frozen)
  • Seasoning

Method

  1. Adult line a couple of baking trays with silicone baking mats or baking parchment.
  2. Drain and rinse the cannellini beans and place in a large bowl.
  3. Mash the cannellini beans with a fork or potato masher. Small children may well require some help to get this started. Mash until they no longer look like beans.
  4. Chop the peppers into small pieces. We used table knives.
  5. Add the chopped peppers, sweetcorn, flour, seasoning and garlic to the mashed beans.
  6. Crack an egg into a small bowl or mug and gently whisk.
  7. Pour the egg into the bowl and mix with a wooden spoon.
  8. Using your hands make patties out of the mixture. Depending on their size, you should get between 6 and 8. If you don’t want to use your hands, dollop a couple of tablespoons per fritter and pat down with the back of a spoon.
  9. Refrigerate for around 1 hour (this makes them more stable) before cooking at 180°c fan for 15-20 minutes, turning half way through. Alternatively, they can be pan fried.

This recipe appeared in Penguin News on October 11, 2019. For those of you not lucky enough to be able to purchase a copy, I have included a picture of the article from the newspaper.

Banana, Orange and White Chocolate Muffins

Still using cups while we wait for the scales to arrive!

We are in the home stretch. Our shipping crate is allegedly imminent. We will soon have all of the baking supplies that I packed including my scales and beloved brownie pan! To celebrate this auspicious occasion, what did we do?! Yes you’ve got it, we baked! We made Banana, Orange and White Chocolate Muffins.

Mix it all up!

There were bananas in the supermarket recently. Back in the UK I would think nothing of weighing out my bananas and buying them so Seb could eat a daily banana. Here in Stanley, I have to remind myself how lucky I am that Seb is the only one in the family who really loves bananas. In our local supermarket they sell for 50p each unless they are brown when they sell for 25p each. I must confess that after seeing a friend buy brown bananas for banana bread and to freeze for smoothies I quickly followed suit. I bought a 10 bananas and promptly froze 8 in slices to put in cakes. Yes I did also ensure that I cut each banana into the same amount of pieces so that I knew how many slices made up a banana. In case you need to know, in this instance it was 6.

Spot the orange between the muffins!

Having all those bananas in the freezer meant that a banana bake was on the cards. I was in the fortunate enough position to have some leftover white chocolate following my raspberry blondie making session for Simon’s birthday so combined with some orange zest and bananas and boom! There you have it these yummy muffins were born!

Ingredients

  • 2 ripe bananas
  • 2 cups self-raising flour
  • 1/2 cup sugar
  • 1/2 cup milk
  • 4tbsp melted butter
  • 2 eggs
  • Zest of 2 oranges
  • 100g chocolate chips/chopped chocolate

Method

  1. Preheat the oven to 180°c fan.
  2. Mush the banana with a fork and make it as smooth as you can.
  3. Put the mashed bananas, flour, sugar, milk and melted butter into a large bowl.
  4. Crack the 2 eggs into a small bowl and gently whisk.
  5. Add the whisked eggs to the bowl and then mix until all the ingredients are fully combined.
  6. Add the chocolate and the orange zest and mix to ensure they are distributed evenly.
  7. Divide the mixture between 12 muffin cases and place in the oven for 18-20 minutes until they are golden and springy to the touch.

These didn’t last long, and it wasn’t because we had friends popping in to share them! Atticus and Ophelia did a stellar job and even helped with the washing up and were rewarded with a clean bowl of water with bubbles for their boats. Yes they did get rather soggy and it did necessitate a change of clothes for each child, oh and several tea towels to absorb all the water that had spilled onto the floor!

Peanut Butter Eve’s Pudding

There are two big things we are currently doing; waiting for our shipping crate with the kids’ toys and books and our car to arrive and adjusting to the new house, living in a small community, the weather conditions and the price and availability of food. The first hurdle for me was that the key to our back door, which faces the sea, is labelled front door and the key for the front door which faces the street is labelled back door. It turns out that the sea is used as point of reference. The first time I tried to lock the front door with the key labelled accordingly, Simon had to come to my rescue as I was getting increasingly frustrated at my lack of progress. Have I changed the key rings around? Nope, I have adapted to that fact and moved on.

Fresh fruit and vegetables are expensive. Yes you can buy them, but gone are the 6 small apples for under £1. This has meant that I have adapted. I found some tinned apples in the supermarket. Now had we still been in the UK, I wouldn’t have contemplated using tinned apples. It does have to be said they are significantly less faff than having to peel, core and chop apples and then stew them. We just opened the tin and spread them out in the Pyrex! Simple!

Simple process and yummy results!

Now apple and peanut butter is a favourite snack of mine and I thought adding the chopped nuts and the peanut butter would make this pudding a bit different. I believe I was right as the peanut butter gave it the qualities of a self-saucing pudding. I could have eaten the whole pudding, but I think I would have had an exceptionally grumpy family had the refrain all the yummies are mummy’s turned out to be true on this occasion!

Ingredients

  • 1 tin of apples
  • 2 eggs
  • 8tbsp self raising flour
  • 8tbsp butter/margarine
  • 8tbsp caster sugar
  • 4 tbsp chopped nuts (3 to put with the nuts and one for the top)
  • 3-4tsp peanut butter.

Method

Dolloping the cake batter on top of the apple and nut mixture.
  1. Preheat the oven to 150°c fan.
  2. Spread all the tinned apples out into the bottom of a Pyrex dish or baking tin. I like to use Pyrex dishes for this kind of pudding so you can see the apple and the cake layer.
  3. Sprinkle or spoon 3tbsp of the chopped nuts over the apples.
  4. Gently dollop the tsps. of peanut butter in random places over the apples.
  5. Put all the cake ingredients into a large bowl and mix them all together quickly until they are fully combined.
  6. Spread the cake over the apples and peanut butter and then sprinkle the remaining chopped nuts over the top.
  7. Place in the oven for 15-17 minutes until the cake is golden brown and springs back when gently touched.
Sprinkling nuts

Much to my delight, this recipe was featured in the Falkland Islands Newspaper, Penguin News. I really hope that you enjoy this pudding as much as we did. Please do get in touch if you make this as we love to hear from people who have used our recipes.

Stuffed Mushrooms

Mushrooms are my husband’s favourite vegetable. Unfortunately, they are not mine (long live courgettes!) Now I come to think of it Simon and I both have rather strong feelings about our favourite vegetables, but he wouldn’t choose to eat a courgette and I wouldn’t choose to eat a cooked mushroom. I like to eat button mushrooms raw, but don’t do so well when they are cooked. Two of our children seem to agree with me about the mushrooms, but the third, or actually the first, seems to quite enjoy them. It is real juggling act remembering what each child will or will not eat!

Lots of kid-friendly jobs.

To encourage the children to try mushrooms, I thought it was time that we tried to use them in a recipe. It was a fun recipe to make with chopping, measuring, spooning, mixing and then trying it. One boy enjoyed them with encouragement, the other ate the filling – which did also contain chopped mushroom so that is progress and the little girl completely ignored them on her plate. Their daddy quite happily dealt with all the leftovers without a single reference to me!

Ingredients

Serves 4 as an accompaniment.

  • 4 large flat mushrooms
  • 40g mozzarella
  • 15g pine nuts
  • 1tbsp pesto
  • 10g grated cheddar
  • 20g breadcrumbs

Method

  1. Preheat the oven to 180° fan and lightly grease a baking tray.
  2. With a table knife, carefully chop off the mushroom’s stalk and chop into small pieces and place in a bowl.
  3. Chop the mozzarella into small pieces and add to the bowl with the mushroom stalks.
  4. Add in the pine nuts and pesto and mix until it is all combined.
  5. Spoon the filling equally between the four mushrooms.
  6. In a separate bowl add the breadcrumbs and the cheddar and mix together. If your kids want to grate the cheese, I would recommend a box grater.
  7. Sprinkle the cheesy breadcrumbs over the mushrooms .
  8. Place in the oven for 15-20 minutes until the mushrooms are cooked.
  9. Remove from the oven and serve immediately.

This recipe featured in the September/October Soar Valley Life Magazine.

Sprinkling the cheese and breadcrumbs on top of the mushrooms and ready for the oven.

Tropical Flapjacks

Welcome to my first blog post from the Southern hemisphere! I apologise for the somewhat haphazard recipe, but I must confess I have no scales so all measurements were in cups, well mugs actually, and I doubled the recipe below as we were using a roasting tin. The latter doesn’t bother me though; it merely means that we have more flapjack than I originally planned. Faithful readers are bound to have had enough of me droning on about my love of flapjack, but I shall repeat – my love for flapjacks runs deep and true. I am, however, point blank refusing to buy more baking equipment when we should be receiving my stuff at the end of next month. We shall see how firm my resolve is after another fortnight without my stuff, but for now it is cast-iron strong and not at all faltering…

We are starting to settle into our new home, well we must be if the kids are in the kitchen. It was a bit touch and go when I realised that we had no hangers, but I solved that problem so nearly everything has a home with my slightly wonky logic. I really do hate unpacking so Simon may well have had to delve into his savings of patience while I was putting off the inevitable chore!

Our kitchen set up here is a little different, and to tell the truth it may well take some getting used to, don’t think for a second that the kids would let any of this hinder us. I did let Ophelia wash up after this and I did think that it was going rather well and then I realised that she had used nearly an entire bottle of washing up liquid! Why oh why did I turn my back on her?!

A different set up, but we get on with it!

These are Tropical Flapjacks as they contain orange juice and zest, raisins and desiccated coconut. Tropical in flavour but, it’s just a shame that the August weather in Stanley doesn’t match the summery fruity vibes of these yummy flapjacks. They make me think of sunny memories in Loughborough and Surrey before our departure from the UK. They are perfect for after school snacks (if you are lucky enough that your angels have returned) or puddings or even if the kids are driving you around the bend and you need a little treat.

Ingredients

In they go!
  • 1/2 cup of butter or margarine
  • 1/2 cup of brown sugar
  • 1/4 cup of golden syrup
  • 1 cup jumbo oats
  • 1 cup regular oats
  • 1/2 cup of desiccated coconut
  • zest of 1 orange
  • 60g raisings
  • 3tbsp orange juice

Method

  1. Preheat the oven to 140°c fan.
  2. Grease a brownie pan or medium-sized roasting tin if you double the recipe like we did!
  3. Put the raisins in a bowl and cover with the orange juice.
  4. Melt the butter, sugar and golden syrup over a low heat.
  5. Zest the orange, we used a box grater for this – I did have to remove it from Finch as he was about to grate the orange as well.
  6. Pour both types of oats, the desiccated coconut, the orange zest and the raisins into the melted sugary mixture and mix with a wooden spoon until completely combined.
  7. Dollop the oat mixture into the tin and gently spread it around with the back of the wooden spoon. Make sure there is an even layer.
  8. Cook for 20-25 minutes until the flapjacks are golden. Allow to cool in the tin before removing and slicing.

As usual, I demonstrated my lack of patience by endeavouring to slice them before they were fully cooled. Despite the fact that they crumbled a bit, they were really yummy. I think the kids will have to keep a close eye on me tomorrow morning to ensure that I don’t decide to eat the rest of them for breakfast!

Lemon Meringue Traybake

I love the tang of lemon. Citrus fruit is so very yummy and lemons are one of my favourite ingredient to bake and cook with. I do love a good lemon meringue pie, but the time between embarking upon the bake and finally getting to sample it often puts me off baking it with the kids. Enter this Lemon Meringue Traybake; a yummy, tangy moist lemon cake with loads of smashed meringue covering its top. It is completely yummy and quick to make. It also involves smashing meringues which my kids think is amazing. I think it must be that I am giving them something to destroy on purpose!

Yes Ophelia, you may smash the meringue!
Picnic ready!

We took this traybake to a picnic with friends and not only did it travel well, but Seb managed to polish off 3 pieces. He tried to get away with stealing a fourth, but was stopped! This is certainly a sign of good cake!

Ingredients

  • 4 ready made meringue nests
  • 3tbsp ready made lemon curd
  • 300g caster sugar
  • 3 large eggs (separated – I did this bit for the kids)
  • 225g Greek style natural yoghurt
  • grated rind of 2 lemons
  • 175g self raising flour
Swirling in the lemon curd.

Method

  1. Preheat the oven to 160°c fan and grease and line a brownie pan.
  2. Beat the sugar, butter and egg yolks together.
  3. Add the yoghurt and lemon zest and mix together.
  4. Sift in the flour and fold it into the mixture.
  5. With electric mixers, whisk the egg whites until soft peaks form and then gently fold into the other mixture.
  6. Pour into the brownie pan.
  7. If your lemon curd is quite thick, you may need to loosen it in the microwave for a couple of seconds. Take small amounts of the lemon curd and dollop onto the traybake in random places.
  8. With a toothpick, gently swirl the curd in a squiggle to create a pretty pattern.
  9. Crush the meringues, but make sure there are some slightly larger pieces in there too.
  10. Sprinkle the crushed meringue all over the traybake.
  11. Cover with foil, ensuring that it doesn’t touch the mixture.
  12. Place in the oven for 35-45 minutes (oven dependent – in my mum’s oven it only takes 35, but in mine it needs closer to 40). The cake is cooked when it is springy and a skewer inserted comes out clean.
  13. Leave to cool completely in the tin before removing and cutting into squares or slices.
  14. Enjoy with friends or refuse to share!

This traybake is delicious, but to prevent the meringue going too soft it is best eaten on the day it made or the following day. It will keep for up to a week in the fridge, but if you want the meringue to retain a crispier texture, it is best to eat it sooner!

Date & Walnut Cookies

You know it is going to be one of those days when you are up before 7am with the kids in the school holidays. You know it is going to be longer than you want when in order to retain your sanity, you start baking before you would normally be leaving the house for the school run. Before you start yelling at your screen that I am crazy, my theory that over the summer it is cooler earlier in the morning and therefore easier to have the oven on without turning the whole house into a sauna and turning your children into little dragons set to breathe fire at each other and at you.

Snipping the dates

We made this recipe as we have a lot of dried fruit and nuts in the house – it seems I always put them in the trolley regardless of the quantity that I already own. So if you see me anywhere in the vicinity of a supermarket until the new academic year, please do feel free to remind me that I don’t need anymore of the aforementioned item or even remove them from my trolley unless I can tell you their exact date of use and purpose.

It was another baking in pyjamas session!
Cracking the egg into a separate bowl to whisk means it is easier to retrieve any stray bits of shell!

These cookies are ridiculously moreish; I managed to polish of significantly more of them than necessary for a healthy diet (after successfully completing a spin class, but still….) and the batch lasted under 24 hours from when they were made. The kids loved these and enjoyed bashing the walnuts and cutting the dates with scissors. I did also catch Atticus squeezing honey into his mouth directly from the jar. I was so surprised that I admonished him and he was so surprised that he dropped it. Luckily in this instance the jar was plastic. It is also a rather good thing that I wasn’t planning on sharing the honey with anyone outside the family.

The finished product!

Ingredients

  • 150g dates
  • 100 walnuts
  • 25g melted butter/margarine
  • 100g demerara sugar
  • 100g self raising flour
  • 1 egg, beaten
  • 1tbsp honey

Method

  1. Place greaseproof paper or silicone baking mats onto a couple of baking trays.
  2. Using scissors, cut the dates into small pieces.
  3. Using a pestle and mortar or a rolling pin gently bash the walnuts into small pieces.
  4. Crack the egg into a small cup or bowl and gently beat it.
  5. Place all the ingredients apart from the flour into a bowl
  6. Sift in the flour and mix until fully combined.
  7. Take tbsp. of the mixture and either roll into balls (beware it is sticky!) or just dollop onto the baking tray.
  8. Depending on the size of your cookies, you will have between 12 and 15.
  9. Place in the oven for 10-12 minutes until golden.
  10. Leave on the tray to cool for a couple of minutes before transferring to a cooling rack.
  11. Scoff the lot with or without the kids!

Frozen Raspberry Drops

Simon’s gardening philosophy is very simple; if you can’t eat it, he would prefer not to plant it. This has led to him creating a fruit patch in pretty much every single house in which we have lived. He also grew courgettes for me despite despising them – yes it must be true love. My summertime memories with the kids in our current house are saturated with harvesting fruit and vegetables from the garden and trying to persuade the kids that if the berries are still green then they are unripe… As they get older this is obvious, but to a one or two year old it is somewhat confusing!

The fruit patch doesn’t only produce fruit, it turns out it is also a wonderful for igniting the children’s imaginations. It has been a forest to explore; to look for Gruffalos or bears. I think it has also been a kelp forest during the Octonaut obsession each of our kids seems to have had!

Back to the subject of this post – raspberries. I wanted to use them in healthy recipe for summer with the kids and a bit of contemplation this was the outcome. These will definitely feature prominently in our summer kitchen and I hope they do in yours too.

Ingredients

The nearly 3 year old managed this recipe completely by herself.

With only 4 ingredients, this is a speedy recipe that children will love making. As an added bonus, it is perfect for working on fine motor skills with younger children and is a welcome treat in the summer months.

  • 150g fresh raspberries
  • 200g Greek-style natural yoghurt
  • 1/2tbsp honey
  • Milk chocolate chips

Method

  1. Wash your raspberries and allow to dry.
  2. Line a baking tray or container (that will fit in your freezer) with greaseproof paper or a silicone baking mat.
  3. Measure out the yoghurt into a large bowl and add the honey and mix to combine.
  4. Count out the raspberries and the same amount of chocolate chips (and maybe a couple of extra for hungry tummies!)
  5. Place a single chocolate chip inside each raspberry.
  6. One at a time, gently put the raspberries into the bowl of yoghurt and cover completely using a spoon.
  7. Fish the yoghurt-coated raspberries out with a fork and gently place them on the lined baking tray.
  8. Repeat until all the raspberries are covered.
  9. Place in the freezer until frozen and leave there until you want to serve them.

This recipe features in Soar Valley Life Magazine, July/August 2019