Cranberry, Bacon and Brie Tart

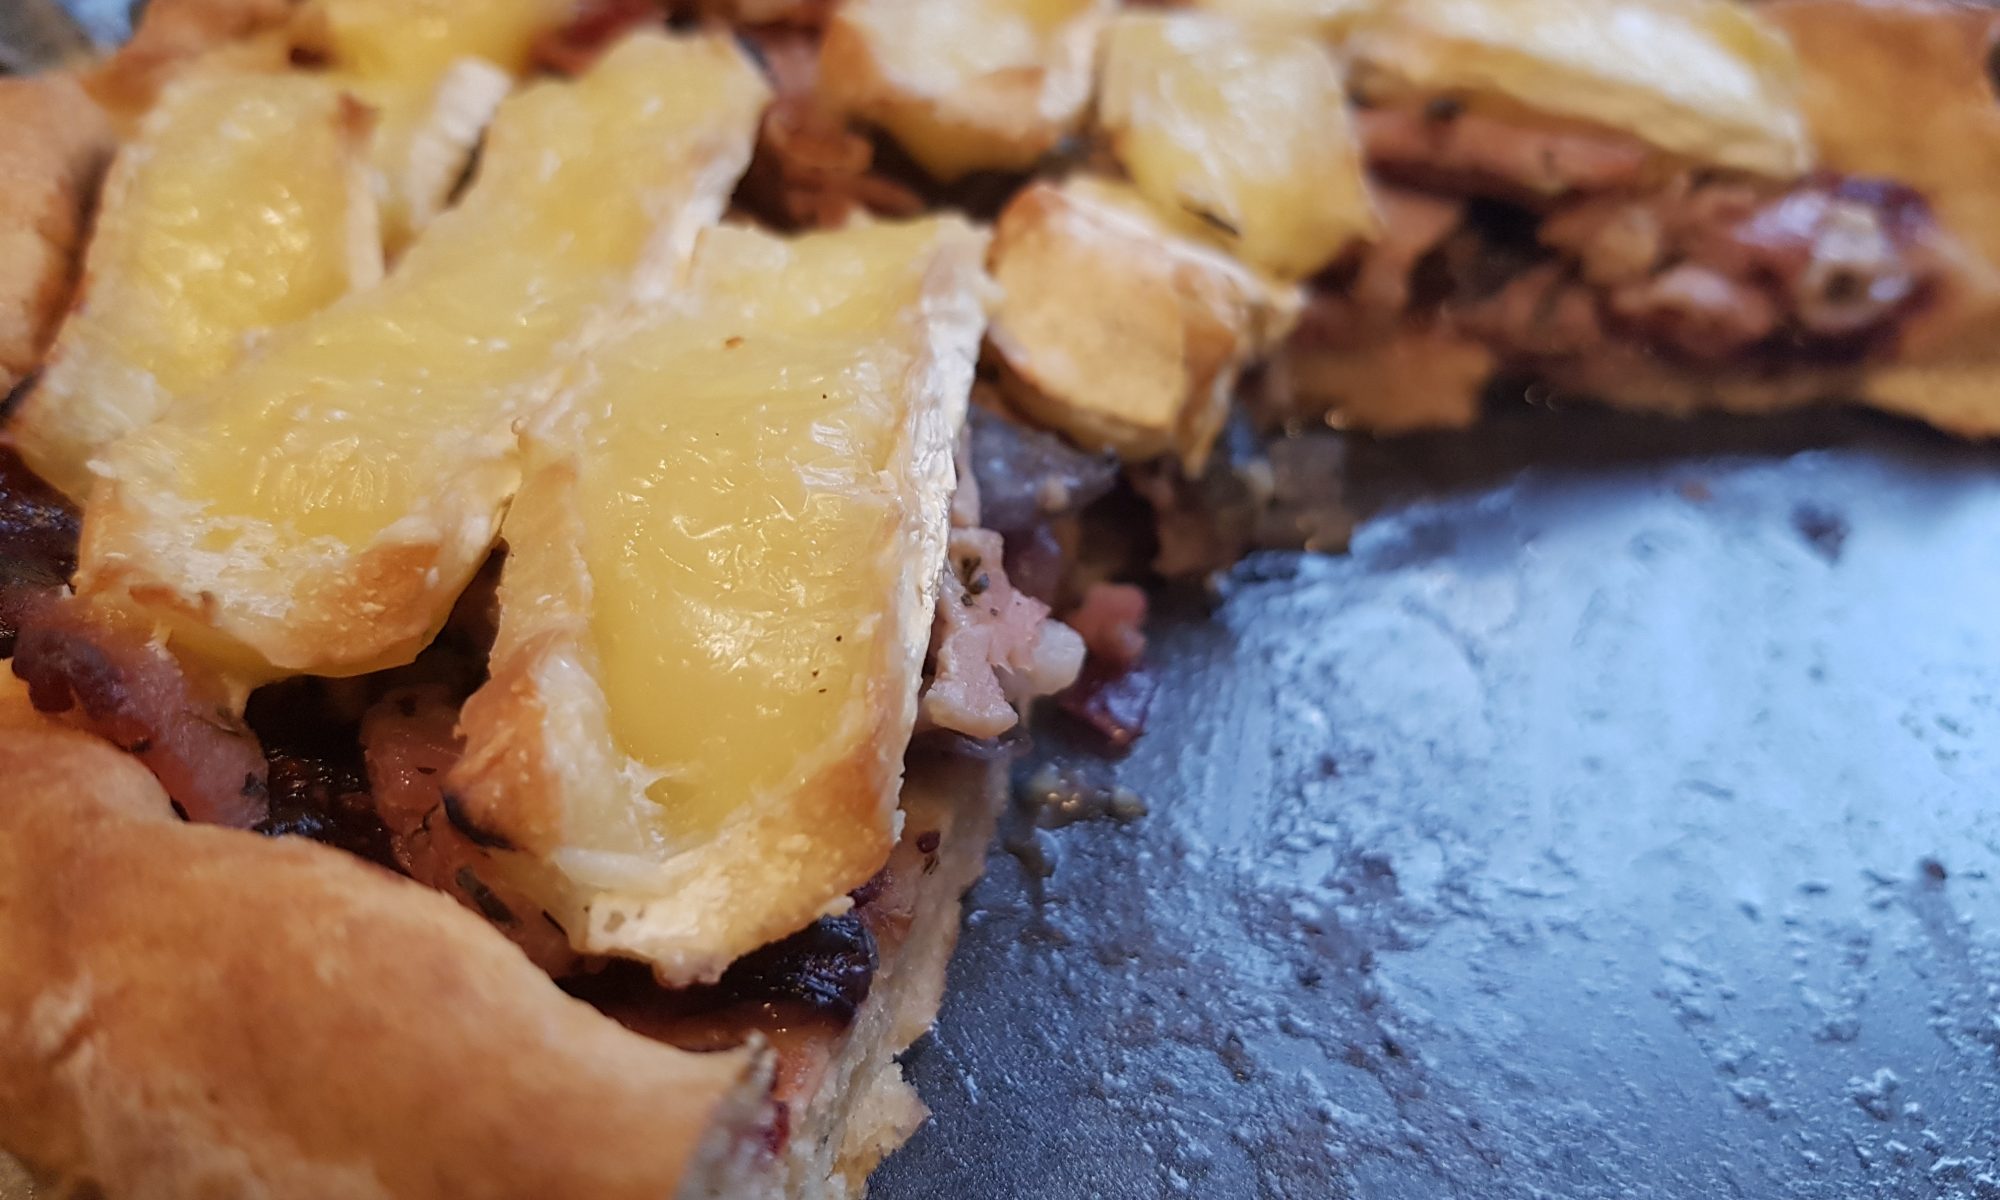
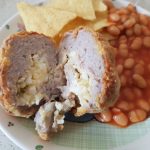
I love it when my children decide that they want to try a new flavour or food that they have never tried before. I also find they are more willing to taste a new food if we are cooking with it. This was how they all ended up tasting blue wenslydale cheese and it is what led to me making this Cranberry, Bacon and Brie Tart with Atticus. I must say it was quite a feat to convince him not to eat all the brie as we were slicing it for the top of the tart! I was quite surprised that he liked it and was planning of giving the children beans on toast if he turned up his nose at the cheese, but it turns out I needn’t have been concerned, the boy definitely loves his cheese!

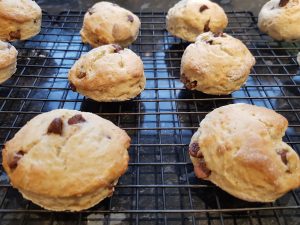
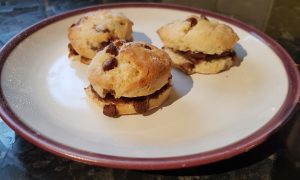
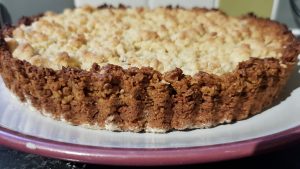
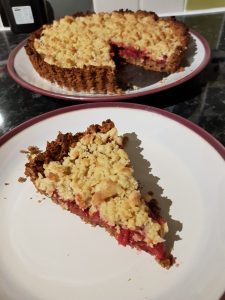
This tart can be made in several different ways and as I am a huge fan of experimenting in the kitchen so I like to mix up the recipe that I use for the pastry and how I put the filling together.  This time round we put more bacon in the filling and I relied on the sheer volume of meet in the tart to keep it all together, but you could use less bacon and a couple of eggs and make it more like a brie topped bacon quiche. The latter option would provide greater structural integrity for the tart. We decided to use a scone-like recipe for the pastry and the quantities below make a generous batch which will leave you with a bit left over after covering a 23cm diameter pie dish or very tall or thick sides. If you prefer you could use a short crust pastry recipe, but this one is so simple to put together with children that I do recommend that you give this one a go. Atticus enjoys getting his hands sticky so he happily mixed this all together with his hands, but you could also do it with a wooden spoon. If you would like you can add some parmesan to the pastry to add an extra layer of depth to the flavour, but it isn’t necessary.

Ingredients

  • 250g plain flour
  • 1 tsp baking powder
  • 1 tsp salt
  • 100ml milk
  • 40g melted butter
  • 1/4 tsp mustard powder
  • 1 large egg
  • 3 tbsp cranberry sauce
  • 1 small onion
  • 8 slices of bacon (or 4 slices of bacon and 2 medium eggs to make it a quiche)
  • 1 clove of garlic
  • 200g brie

Method

  1. Preheat the over to 180°c.
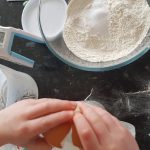
  2. Put the plain flour, baking powder, salt and mustard powder into a bowl. Combine the milk, melted butter and egg in a jug or cup.
  3. Pour the wet ingredients into the dry ones and mix with 
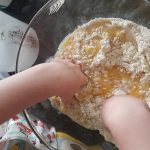
a wooden spoon or your hands. It will be a sticky dough so flour a silicone baking mat (easier to transfer the dough). Flour a rolling pin and roll the dough out until it is a little bit larger than the size of the pie dish. Transfer the dough to the pie dish and carefully remove the silicone baking mat and gently press the 
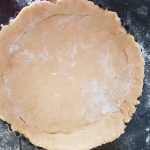
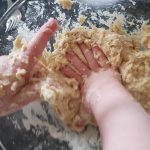
dough into the pie dish. Atticus enjoyed helping with this bit, but close supervision was required as he was becoming a little over enthusiastic during the transfer process and as a result our pastry cracked a bit and we ended up with thick edges following a repair job.
  4. Blind bake the pastry (baking parchment and baking beans on top of it) for 20 minutes. 
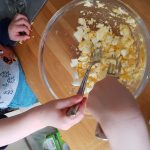
Meanwhile, chop the bacon with scissors. Atticus did this while I chopped the onion. Fry the onion and the 
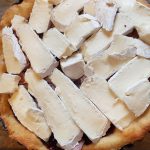
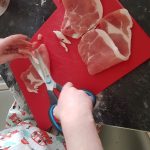
bacon with a clove of garlic and season and put to one side. If you would prefer to make this tart more like a quiche, beat a couple of eggs into bacon and onion mixture. Slice the brie into slithers.
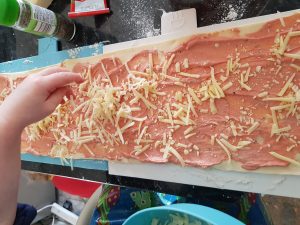
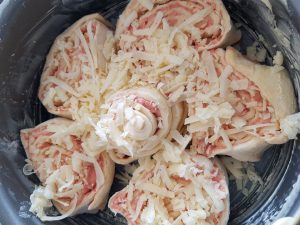
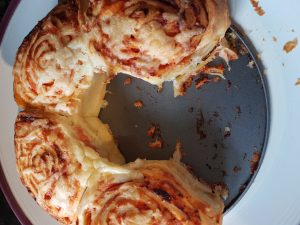
  5. Remove the pastry case from the oven and spread the cranberry sauce over the bottom of it with the back of a spoon. 
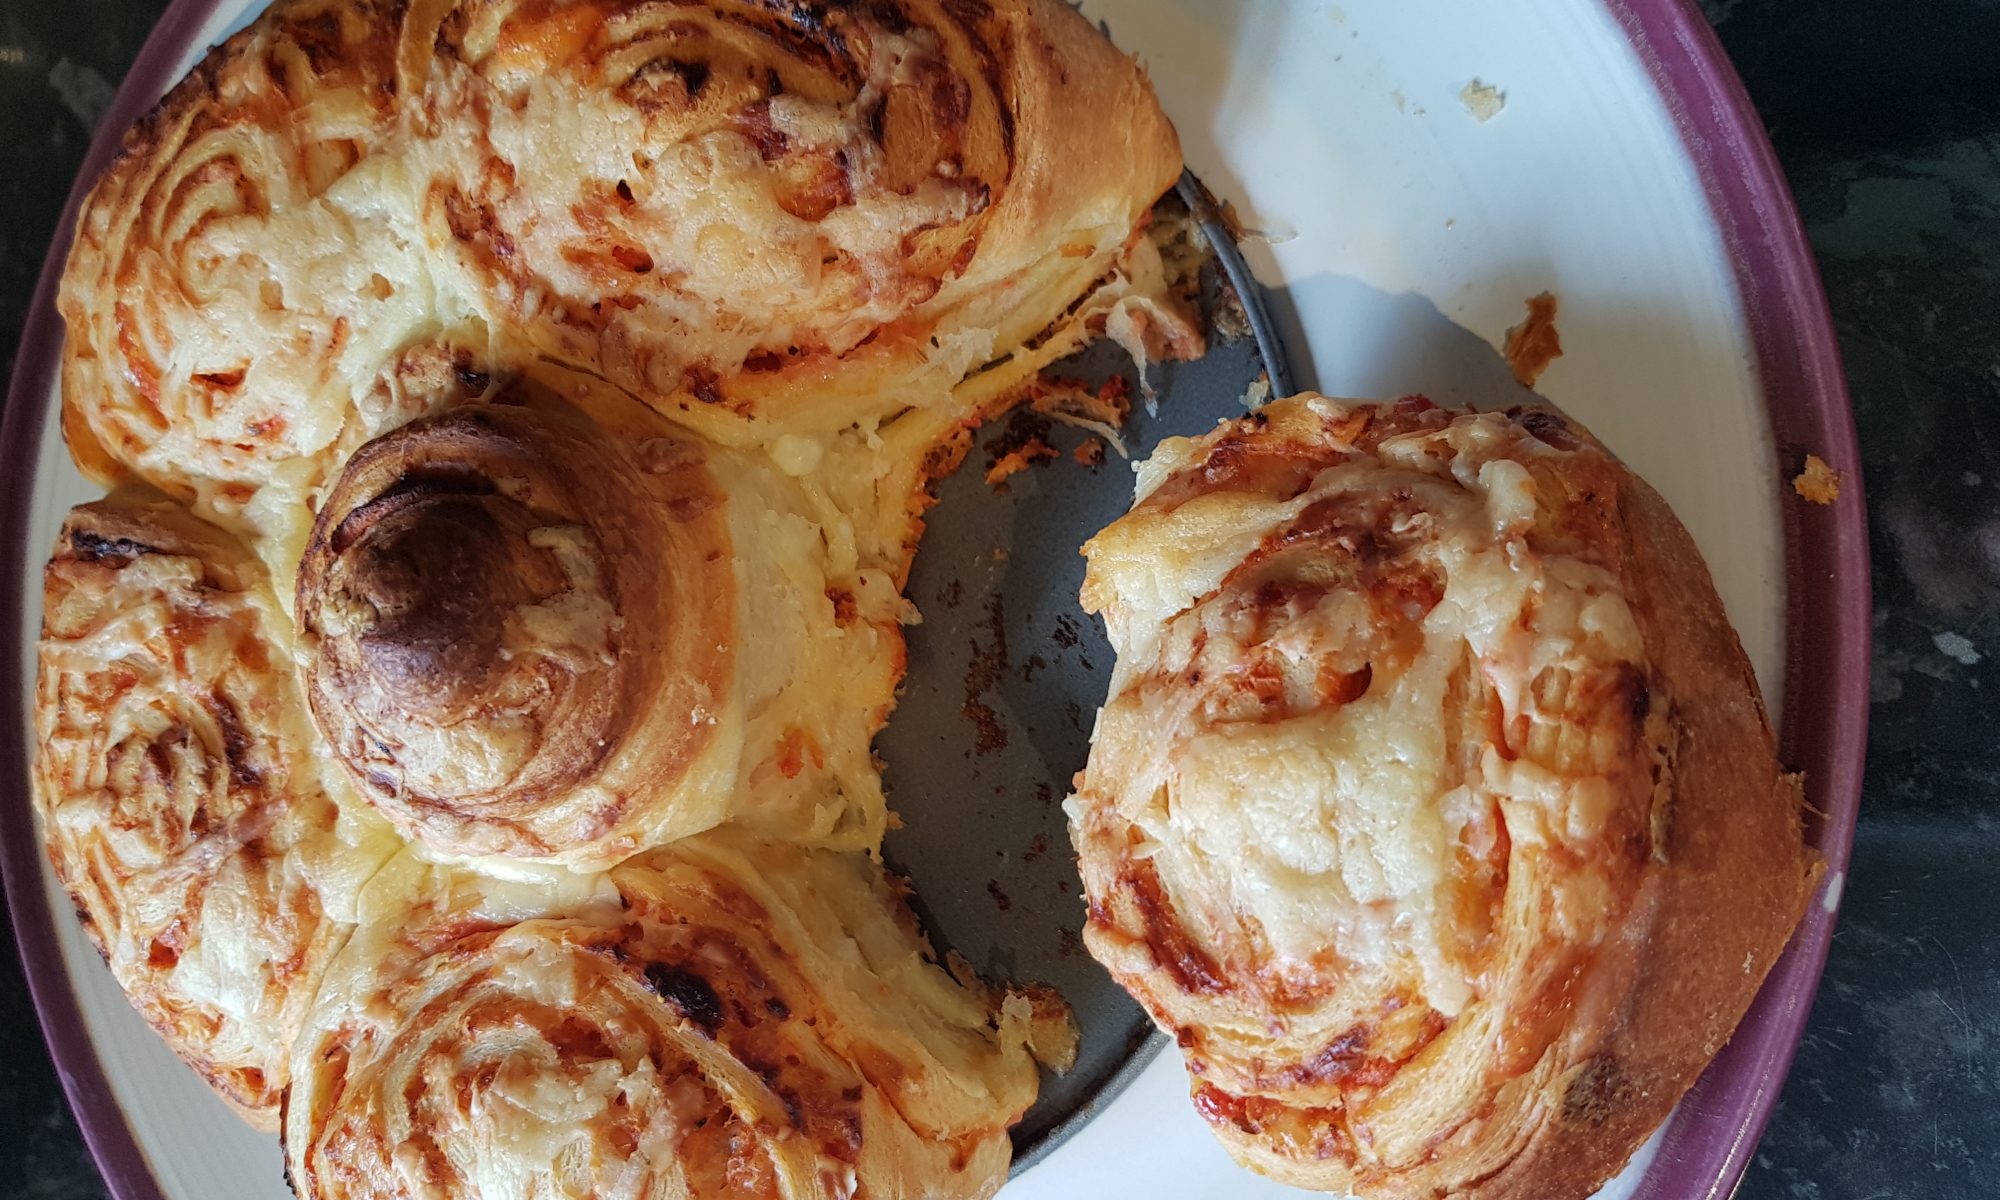
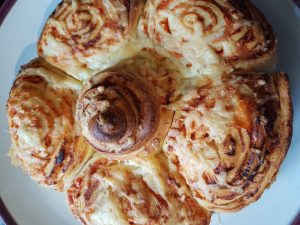
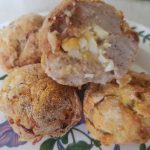
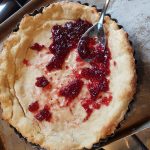
The cranberry sauce was also a new flavour to Atticus and he eagerly licked the spoon used to spread it after he had finished covering the case. Pour the bacon mixture into the pastry case and arrange the brie on top to cover it.
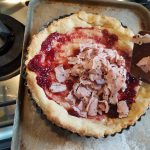
  6. Return to the oven and cook for 20 minutes. Remove from the oven and let stand for 5 minutes before slicing.

Sticky Toffee Pudding Biscuits

Sometimes I have a recipe idea in my head, but the road to creating it is paved with a few kitchen disasters and sometimes a sugary mess which tends to end up in my tummy! Luckily I now have the foresight to test a recipe before I even attempt it with the children or I would have three very disappointed little people when this happens!

Creating this recipe was enjoyable, calorific, but yes enjoyable.  Sticky Toffee pudding is one of our family’s favourite puddings and I wanted to create a biscuit which perfectly encompasses what we like about a good sticky toffee pudding.This recipe also takes considerably less time than making an actual sticky toffee pudding which means there is less time between starting the activity and enjoying the fruits of our labour!

The addition of oats and ground almonds to create flapjack-like biscuits means that they can be dolloped onto the baking tray rather than having to refrigerate biscuit dough before rolling and cutting it out. This is great for children who get frustrated when they can’t lift an intricate biscuit cutter design from the surface by themselves to put on the baking tray without it breaking. We have had tantrums from little people in our house when such an incident has occurred. Also as it is a biscuit, it could be an acceptable snack as a treat or pudding for hungry little tummies.

Ingredients

  • 1/4 cup of brown sugar
  • 1/4 cup of butter/margarine
  • 1 egg
  • 1/2 cup of chopped dates
  • 1/2 cup of raisins
  • 1tsp vanilla extract
  • 1tsp cinnamon
  • 1 cup of oats
  • 1/2 cup of self raising flour
  • 1/2 cup of ground almonds
  • 2tbsp golden syrup
  • 7 fudge pieces chopped into small pieces.

I have also made this recipe substituting the self raising flour and oats for gluten-free equivalents and used sunflower spread instead of butter and the results were also good, but you may need to cook them for a little less time. They do end up with more of a cakey texture with the gluten-free products, but they still taste good. If you require a nut free alternative you could just omit the ground almonds. I add them as I like my sticky toffee pudding to have a nutty flavour and texture.

For the icing

  • 200g icing sugar
  • 2tbsp of golden syrup
  • 2tbsp water
  • Cake decoration chopped toffee pieces

These quantities will make a very firm icing, you could make it runnier to resemble the toffee sauce that you have with sticky toffee pudding. This will make them messier to eat and if your little people are anything like mine, they may well need a bath after having one!

Method

  1. Preheat the oven to 180°c fan.
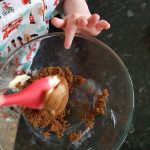
  2. Cream the sugar and the butter together in a bowl.
  3. Crack the egg, I tend to suggest that the child gently tap the egg on the surface and then hold the egg in two hands and pull the crack apart. Gently whisk the egg in a cup or bowl with a small whisk or a fork.
  4. Add the whisked egg, cinnamon and vanilla extract into the creamed sugar and butter and mix well. Add the 2tbsp of golden syrup and mix again until fully combined.
  5. Add the oats, self raising flour and ground almonds and mix again and then add the dried fruit to the batter and ensure they are spread as evenly as possible. 
  6. Chop the seven fudge pieces (my children enjoyed trying to chop the fudge pieces with a table knife, but they did need some help) and add them and mix for a final time.
  7. Dollop the biscuit mixture onto two baking trays and place in the oven. The biscuits will spread so don’t place them too close together. This recipe will make around 12 large biscuits or 20 smaller ones. If I am making them for grown ups I do tend to make them larger, but if little people will be eating them, I aim for smaller biscuits.
  8. Place in the oven cook for 8-10 minutes for smaller biscuits and 10-12 minutes for larger ones checking them and moving around in the oven if necessary.
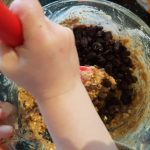
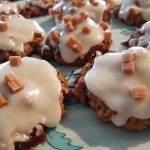
  9. While the biscuits are cooling make the icing. Measure out the ingredients for the icing and sift the icing sugar into a bowl. Add the golden syrup and water mix them all together thoroughly. You want quite a thick icing if you don’t want it to drip off the biscuits too easily. Spread the icing on the biscuits and add some of the cake 
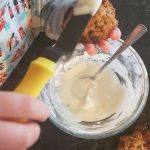
decoration toffee pieces. If you are unable to get toffee pieces, just chop some fudge and place on top of the icing.

These biscuits have become a firm favourite in our household as all the kids can help out. Even the youngest at 21 months enjoys trying to have a mix and dollop them onto the baking tray. I hope you enjoy them as much as we do!

A Loveliness of Ladybirds

My sister’s Christmas gift to us was tickets to see ‘What the Ladybird Heard’ at the Curve theatre in Leicester. Well the day finally arrived and we embarked upon our family outing with Buzz the class bear in tow. At the outset, I think I was the most excited, but by the time we had arrived at the theatre Seb could remember our previous trip and was getting excited too.

It was a well-honed production complete with catchy music and plenty of opportunities for excited children to join in. The whole family had a wonderful time and our big surprise was Ophelia (22 months) seemed to enjoy the show the most! We purchased the CD and have now listened to it several times and the children are already singing along when it goes on in the car! I am guessing it may start to grate after hearing it many times over, but we can always rotate it with the music from ‘Room on the Broom’ or ‘Hairy Maclary’ so that’s fine…

We did talk a lot about ladybirds in the car on the way back. Seb saying that they have symmetrical spots and Atticus mentioning they were red. That was when Simon turned to me and said maybe you can make ladybird biscuits with them. This made me exceptionally happy as it isn’t often that the husband of an avid baker actually suggests making more baked goods (we never seem to be short of them), but also he was thinking about a baking project before I had even considered it! It makes me smile just remembering it!

The boys enjoyed weighing out the ingredients and then sifting the dry ingredients to ‘make it snow’ and then rubbing in the butter. I do think their favourite part is licking the remnants of the mixture off their fingers before I insist they wash their hands!

After the biscuits were made and iced, the boys went on a ladybird hunt in the garden. They both managed to find where I had hidden their ladybird biscuits and then happily sat in the sort of sunshine eating them.

We did bake our biscuits, but if you want to do this with minimal effort you could use chocolate digestives as the ladybird, ready-made icing with a little red food colouring added, chocolate buttons as the spots, tubes of icing for eyes and a line down the middle . If you wanted to put more spots on the ladybird than just one each side, maybe consider using chocolate chips instead of buttons as the chocolate digestives would be slightly smaller than our biscuits.

We used the following recipe:

  • 125g plain flour
  • 25g cocoa powder
  • 1/4tsp salt
  • 50g caster sugar
  • 125g unsalted butter

For the icing:

I like to use a thick buttercream as I find it easier to ice biscuits with than glacé icing as it doesn’t drip off the biscuit as easily. I do tend to make buttercream by sight rather than use a recipe, but below you will find approximate measurements. Do add a little more icing sugar to make it more firm and more butter to loosen it if you need.

  • 40g butter
  • 125g icing sugar
  • Red food colouring (we use Wilton gels)

Method

  1. Preheat the oven to 150°c fan.
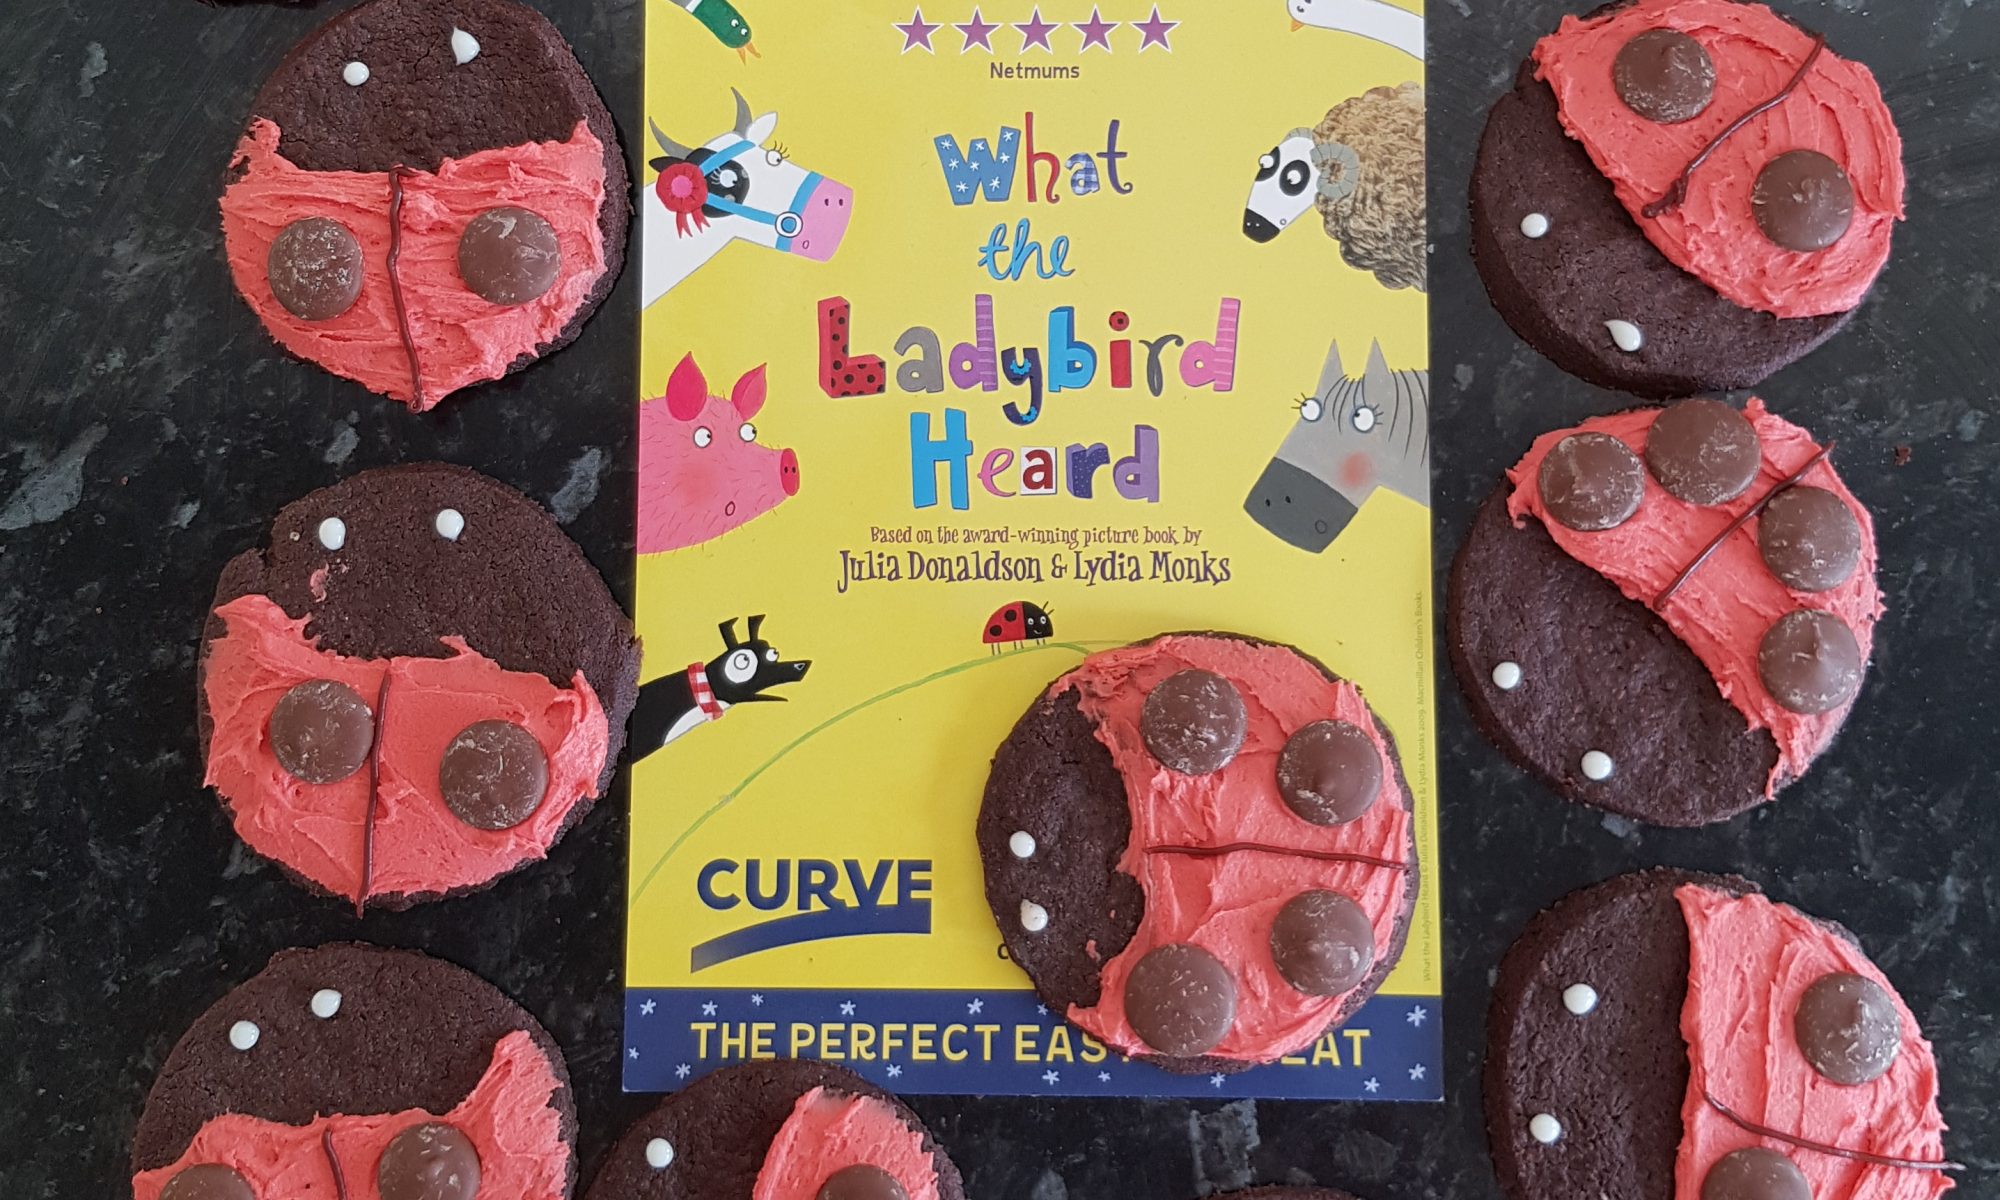
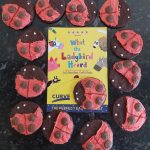
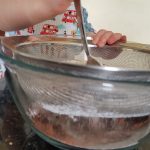
  2. Sift the flour, sugar, salt and cocoa powder into a bowl. Usually I give the kids a metal spoon each and get them to stir it through the sieve as they do seem unable to understand gently shake to get the flour through and we end up with flour everywhere. This way is more contained!
  3. Rub in the butter until the mixture combines.
  4. Wrap the shortbread in cling film and put it in the fridge for 30 minutes.
  5. Roll the biscuits out on a floured silicone baking mat or surface cutting out 
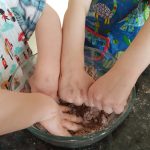
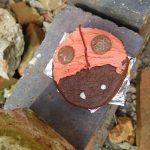
circles (we used 7.5cm diameter cutter). You will probably need to re-roll the shortbread in order to cut out all the biscuits. Depending on how thin you like your biscuits, this recipe will make around 12 biscuits. 
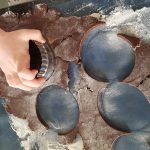
We did find the thicker biscuits cracked more easily when the boys were holding them to ice them.
  6. Place in the oven for 10-12 minutes. Remember: as these biscuits contain cocoa it is harder to see if they are burning. I tend to cook them for 5 minutes, rearrange them in the oven and then cook for another 5-7 minutes checking them to ensure they haven’t burnt.
  7. Leave the biscuits on the baking trays to cool for a while and then transfer them to a cooling rack.
  8. While the biscuits are cooling mix the buttercream ingredients with an electric mixer. This is the only bit the children didn’t help with as they were playing so nicely and I don’t really like them getting too close to food colouring (my fingers are still red!)
  9. Once the biscuits have cooled cover just over half of each one in the red buttercream. Draw a line down the middle of the buttercream with a dark coloured icing tube and add the chocolate buttons for the spots. Give the ladybirds eyes with a light coloured icing tube. I did have to help mine with the icing tubes as it can be difficult to get the icing out and get it where they want it.

Giant Picnic Eggs

Following the boys’ interest in the cinnamon brownie scotch egg recipe I decided to see if they would enjoy making picnic eggs. I find making savoury recipes with the children remarkably rewarding as not only can they be just as fun as their sweet counterparts, but by exposing children to more than just making cakes and biscuits they are learning the foundations of how to feed themselves once they have flown the nest. I am aware this is a long-term vision and I am not trying to wish my life away, but I truly believe that childhood dietary preferences prevail in adulthood. This is the reason behind my enthusiasm and dogged determination (some would say stubbornness!) to cook a variety of recipes with my children.

When I planned this recipe, I envisaged cute little picnic eggs like you can buy ready-made in supermarkets and I was enthusiastic to get started. What I failed to factor in was that little equates to fiddly and this is not a characteristic for a recipe which is generally successful with small children. So, I took a step back and re-evaluated my expectations of the recipe and I decided to go forward with it, but that we would make giant picnic eggs rather than little ones.

I must also add here that as both the boys handle raw meat frequently they understand there are some things they can lick their fingers after (such as melted chocolate), but never even try to when we cook with raw meat. This may be something that you need to remind children who have not tried this sort of recipe before. You may find that having a washing up bowl filled with warm soapy water to hand during the recipe is helpful.

Ingredients

  • 2 medium hard-boiled eggs (shells removed!)
  • 1/2tbsp-1tbsp mayonnaise
  • 1tbsp grated cheese (cheddar or parmesan would work well)
  • 500g sausage meat
  • 1 cup of plain flour
  • 1 egg (you may need another)
  • 2 cloves garlic, crushed
  • 2tsp grated ginger
  • 1 cup of fine cornmeal/polenta
  • 1tsp smoked paprika
  • Seasoning

Method

  1. Preheat the oven to 180°c fan and line a baking sheet with greaseproof paper or a silicone baking sheet.
  2. Slice 
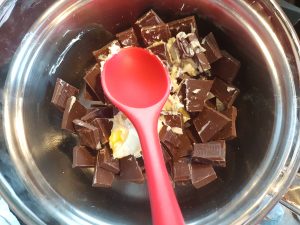
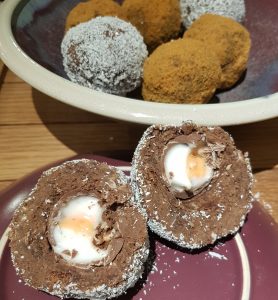
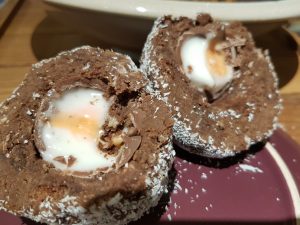
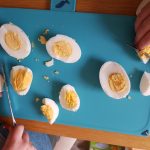
the hard-boiled eggs (we used table knives to do this) and place them into a bowl.
    1. Mash the eggs with the back of a fork and mix with the mayonnaise and cheese and season. You should be able 
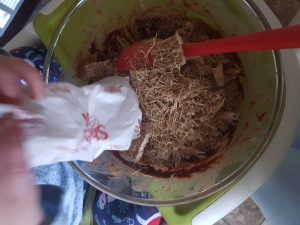
to get a tbsp of the mixture and be able to roll it into a sticky ball.  It does need to be quite sticky so it doesn’t dry out too much during cooking.
  3. Crack the egg in a bowl and add the ginger, garlic and seasoning and beat it well.
  4. Place about half a cup of the flour on a plate or bowl and put about half a cup of polenta mixed with seasoning and some of the smoked paprika on another plate/bowl.
  5. Take a tbsp of the hard-boiled egg mixture and cover it in sausage meat and roll it into a ball. Roll the ball in flour, dunk it in egg and then roll in the cornmeal. Place on the baking sheet. 
  6. Repeat step five, remembering to replenish the flour and cornmeal plates if they are running low. It is easier to put small amounts on at a time rather than all of it or you may well end up with flour and cornmeal all over your table! You may also need to beat another egg.
  7. Cook in the oven for 20-25 minutes until they are golden and the sausage meat is cooked.
  8. Enjoy either warm or cold.

The children enjoyed making and eating these for dinner one night and then in a packed lunch the following day. Grandma, Auntie Nicola and Daddy also enjoyed eating them. Special thanks go to Grandma for allowing us to use her kitchen to make these and being an extra pair of hands to fill up the flour and cornmeal plates.

Easter Pavlova

Easter baking is like Christmas baking in our house: I make a list of all the recipes I want to try and make and then start by prioritising what will get made according to available time, my budget and what I think the kids will enjoy most.

Easter nests make an appearance in some variation every year, but as I have been wanting to make meringues with the kids for a while and my dislike of cream prevents me from wanting to make a traditional pavlova, I decided that we would attempt a big chocolate meringue nest which could be decorated with chocolate-coated shredded wheat and a copious amount mini eggs.

I enjoy making meringues and chocolate meringues are even better, but that said mine do always end up cracked – this is generally because like an excited child I seem to lack the capacity to wait until the oven has completely cooled before opening it. That said, a crack here and there doesn’t alter the taste. It just gives it more of a rustic look, a homemade ‘we had a go and made some memories’ look which you can’t get from any shop bought pudding.

I made the meringue with Atticus. He had so much fun not having to share the electric mixer with his older brother! It also provided opportunities to discuss with him what was happening as the egg whites were whisked without Seb answering the question first. It was fabulous to hear him try using the word 
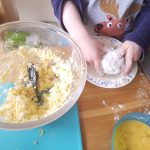
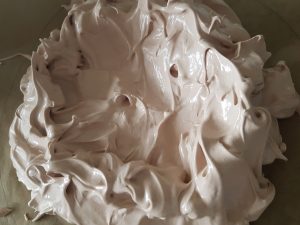
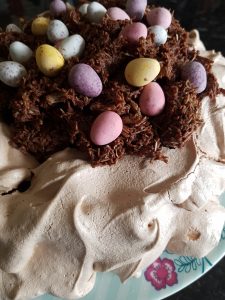
‘frothy’ and exclaim in delight as the egg whites expanded in size during whisking. Cooking is definitely a huge support for language as well as maths skills for  little mischief makers.  It was also lots of fun to dollop the meringue mixture onto the baking parchment and trying to make sure it stayed inside the circle we had drawn around a plate to mark out where it should be.

All the children, yes even Ophelia, helped to make the chocolate shredded wheat to put on top of the meringue. I am not at liberty to divulge how much chocolate (either melted or otherwise) was consumed during this process, but fun was had with very little bickering and my children all remained friends. The latter is of course of the utmost importance and I can happily report that I also managed to complete this activity with adequate levels of patience.

In order to make the big chocolate meringue you will need the following:

  • 4 egg whites
  • 250g caster sugar
  • 2tsp cocoa powder
  • 1tsp cornflour
  • 1tsp white wine vinegar
  • 1tsp vanilla extract

Method

  1. Heat the oven to 130°c fan. 
  2. Draw around a plate on baking parchment.
  3. Separate the eggs (I did this for Atticus as we don’t have an egg separator).
  4. Whisk the eggs until they form stiff peaks, sift in the 2tsp of cocoa powder and mix and then whisk in the sugar one tbsp at a time until the mixture is glossy.
  5. Whisk in the cornflour, white wine vinegar and vanilla extract.
  6. Dollop the meringue onto the baking parchment being careful to ensure that it stays inside the circle. Make the outside of the circle taller than the centre.
  7. Cook in the oven for 1 hour and then turn off the oven and leave the meringue in the oven until it is completely cool. If you are like me it will be a struggle to resist the temptation to open the oven door when the oven is still hot. But please fight against this urge as you are more likely to be rewarded with an intact meringue which has less of a rustic appearance!

For the topping

  • 300g milk chocolate
  • 30g margarine
  • 2tbsp golden syrup
  • 5 or 6 shredded wheat
  • Mini eggs

Method

  1. Melt the chocolate, margarine and golden syrup on the stove top. The boys did have a go at this under supervision.
  2. Crush the shredded wheat, we tend to do this while they are in the packet as it is less messy. Add the crushed shredded wheat to the melted chocolate mixture (you may not need all 6 shredded wheat). Mix very well.
  3. Carefully place the chocolate-coated shredded wheat on top of the cooled meringue and then add as many mini eggs as you would like.

This pudding was pretty much entirely decimated in a single sitting by my family of five and my sister-in-law and her family of four. The boys had lots of fun telling their cousins how they made it.

A snack fit for Paddington – Chocolate Chip Marmalade Scones

I love bears and Winnie the Pooh is my all time favourite and has been since I was a small girl. My children love bears too, but they will not be influenced by mummy’s preferences: they do seem to like Paddington more than Winnie the Pooh. It might be because they have seen Paddington at the cinema, the marmalade jar has Paddington on it or simply because he is such a mischievous character that appeals to their own mischievous natures.  Ophelia has some vests with Paddington on them and she takes great delight at trying to pronounce Paddington.  I must admit that the first time she said it, I had to really concentrate to understand what she was saying.  A couple of minutes later it occurred to me that she was trying to pronounce Paddington – quite a difficult word for a 18 month old! She was, understandably, very proud of herself.

Behind chocolate spread, marmalade is Seb’s favourite topping for toast and crumpets and we often have a ‘Paddington lunch’ which is essentially a lunch of a marmalade sandwich often reading Paddington stories. To keep my life interesting, I thought we would try something new. Before you ask, yes my life is already quite hectic managing the three kids, but I do love to see their delighted faces when engrossed in an activity – any stress its preparation may have caused immediately vanishes. For pudding one evening, we created Paddington Toast from images we found online.  For us, this comprised a slice of orange fruit loaf (the closest flavour to marmalade!) toasted and cut into a circle with a biscuit cutter, covered with chocolate spread marked with a fork to look like fur, a strawberry and jelly bean hat (why do we always run out of one particular colour of jelly beans?!), a couple of blackcurrants for eyes, a Toffifee sweet for the nose and an icing smile. The kids had fun making these and they disappeared pretty sharpish. To make this a healthier snack, you could substitute the fruit toast for a rice cake, use peanut butter and a slice of banana instead of the sweet. The example that I made for the boys to copy is the one at the top.

This in turn got me thinking what would we do if Paddington ever comes to tea? You never know, it may just happen – I bet Sophie and her mum weren’t expecting a tiger to turn up on their doorstep, so in the unlikely event that Paddington ever does come to tea, my kids can impress him with their chocolate chip marmalade scones! Just like Sophie’s mum bought a tin of tiger food, I may be prepared with the ingredients ready to make these yummy scones if the need arises.

Ingredients

The ingredients are in cups to make it easier for children who do not yet recognise their numbers, but are able to scoop out a cup.

  • 1/4 of cup of marmalade
  • Juice of a clementine or satsuma
  • 1/4 cup of milk
  • 35g butter or margarine
  • 2tbsp caster sugar
  • 1 1/2 cups of self raising flour
  • 4tbsp chocolate chips

Method

  1. Preheat the oven to 180ºc fan.
  2. Place the marmalade in a microwave-safe cup and heat for 20 seconds. Add it to the milk and clementine juice and mix thoroughly. There may still be a few lumps, but that is OK.
  3. Put the butter, flour and sugar into a bowl and rub them together.  Add the marmalade milk mixture to the flour and combine until they form a dough.  If the mixture is too dry add more milk and if it is too liquid more flour.
  4. Add the chocolate chips and knead.  Turn out onto a lightly floured surface and cut out small scones.  This recipe will make 12 mini scones (we used a 5cm diameter cutter).
  5. Put in the oven for 15 minutes or until golden.

We served these with chocolate spread as you can never really go wrong with chocolate, but marmalade and clotted cream would also work well.

Cinnamon Brownie Scotch Eggs

I love chocolate, I love eating it and cooking with it. I even have a hand cream that makes my hands smell of chocolate that sometimes tricks me into believing I have had my chocolate fix for the morning without actually consuming any – this is a bonus as it means that I can eat more chocolate later! So chocolate is always good, but when combined with any sort of cake it becomes better and I seem unable to put my finger on why this is. It is the reason I tend toward homemade edible gifts at Christmas and Easter. This year I have made ‘Easter Scotch Eggs’ for family and friends. I made these for the first time last year and they went down so well that they had to have an encore. I mean the Creme Eggs were practically begging from the pantry to be snuggled in a chocolate-rich mixture to keep them warm in the unseasonably cold weather we have been experiencing recently.

Essentially what they are is a mini Creme Egg or equivalents encased in brownie mixed with buttercream and covered in crushed ginger biscuit or desiccated coconut (or sprinkles if you like). You don’t even have to bake: if you really want to cheat you could buy shop-bought brownie and buttercream. Part of the attraction of these for me though is making the brownie and buttercream. Children could put them together. That said, my oldest is only 5 and I doubt he would be able to resist licking his fingers during the process and as these were destined to be gifts, the kids made Easter cards and received a running commentary of the process. Needless to say, the boys are both desperate to help make some so they are already on our list for next year, but in a smaller batch so they can help.

To make this recipe you will need:

For the brownie

  • 300g butter or margarine
  • 300g dark chocolate
  • 450g caster sugar
  • 5 eggs
  • 200g plain flour
  • 1tbsp vanilla extract
  • 1 or 2tsp of ground cinnamon – you could omit this or use another flavouring if you like.

For the buttercream: the below amounts are guidelines as I never measure exactly, it just goes in the mixer. However, the buttercream does need to be quite rigid to hold the crushed brownie together around the Creme Egg.

  •  175g butter or margarine
  • 350-400g icing sugar
  • 2tbsp Cocoa Powder
  • 2tsp cinnamon

For the coating

  • Crushed ginger biscuits, desiccated coconut, sprinkles or even plain cocoa powder

Method

  1. Preheat the oven to 180ºc fan and line a baking tin (I used 28cm x20cm) with greaseproof paper.
  2. Melt the butter and chocolate together in a saucepan over a low heat.
  3. Beat the eggs, sugar and vanilla extract together until they become thick and creamy.
  4. Once the chocolate mixture is fully melted, remove it from the heat and beat it into the egg mixture.
  5. Sift the flour, cinnamon and the salt together, add it to the chocolate, egg mixture and beat until smooth.
  6. Pour it into the tin and bake for 20-25 minutes. The top should have formed a crust and the brownie shouldn’t wobble when it is ready.
  7. Leave to cool completely while preparing the buttercream.
  8. Cream the butter/margarine with the icing sugar, cocoa and cinnamon until smooth.
  9. Crumble the cooled brownie and add it to the buttercream bowl and gently mix it together (I did this by hand). Place the crushed biscuit (or alternative) on a small plate.
  10. Unwrap the Creme Eggs and cover them in the brownie-buttercream mixture and roll into a ball. Then roll them in your covering of choice.
  11. Repeat until all the brownie-buttercream mixture is gone – for me it covered 2 large Creme Eggs and 18 mini ones.

For these I do recommend using mini Creme Eggs or Caramel Eggs because the large ones do make a very big scotch egg, especially if you want to cover them in a thick layer of brownie like I do. However, the larges one look good when sliced in half as it is easier to expose the fondant yolk and if you don’t intend to have any other calories that day, why not?!

Chocolate Cherry Flapjack Crumble Pie

Last week it was pie day (3.14 – well it was in America) and as Simon is a geek and I love baking, it is a day that I definitely enjoy.  This year, to celebrate the day I created a pie which combines one of Simon’s favourite deserts, the crumble, with my beloved flapjacks. I personally love a good flapjack: when eating a flapjack I can almost fool myself that I am eating a healthy snack which means the guilt I feel if (I should say when…) I manage to devour nearly a whole batch of them by myself nearly dissipates.  Nearly, I said nearly – please don’t judge me too harshly, there is still a thought in the back of my mind that I shouldn’t do it, but I can dismiss it with promises to myself that the next batch will be destined for sharing.  The term is ‘altruistic baking’ and I am a firm believer in spreading the calories around to prevent myself from scoffing the lot!

So back to the pie.  It had a chocolate coconut flapjack base, contained stewed cherries (harvested from cherry trees in our neighbourhood last summer) and a coconut crumble topping (before you ask, yes I do like coconut).  The more I think about it though, using a brownie as the filling would have made a truly decadent dessert.  Don’t get me wrong, the cherries were delightful, and did ensure that the pie sort of contained 1 of your 5 a day, but pudding is always better with chocolate! To finish it was covered in a coconut crumble topping.  We ate this pie both warm and cold and it went very well with a serving of ice cream.  The mere memory of the pie is starting to make me hungry…

To make this pie you will need the following ingredients:

Flapjack base

  • 150g butter or margarine
  • 5tbsp golden syrup
  • 3tbsp brown sugar
  • 2tbsp cocoa
  • 2tbsp desiccated coconut
  • 240g oats

For the filling

  • Stewed fruit – you could use cherries or raspberries as they go well with the chocolate flapjack.  I think the total volume of stewed fruit I used was around 150 grams.

Crumble topping

  • 120g plain flour
  • 60g butter/margarine
  • 60g caster or demerara sugar
  • 4tbsp of desiccated coconut

Method

  1. Preheat your oven to 180ºc fan and grease a pie dish.  I used a 23cm loose base fluted non stick pan (gosh what a mouthful).  I greased it using frylight, but butter or margarine would work too and then a small amount of flour.
  2. Melt the butter, golden syrup, sugar and cocoa powder over a low heat until dissolved.  Then add the oats and the coconut and mix until fully combined.
  3. This should be way more than enough flapjack to spread into your pie dish and all up the sides.  Gently flatten it being careful not to leave any holes.
  4. Bake for 20 minutes at 180ºc.  Keep an eye on it to make sure it doesn’t burn as being a dark flapjack, it is easy to miss.
  5. Stew your fruit in 1/4 to 1/2 a cup of water and add sugar to taste.  Make sure it isn’t too runny.
  6. Make the crumble topping by rubbing together the butter, sugar, flour and coconut until you have a breadcrumb texture.
  7. Remove the flapjack from the oven and place an even layer of the stewed fruit over the flapjack base and then cover with the crumble topping.
  8. Return to the oven for 20-25 minutes until the crumble topping is golden.
  9. Enjoy hot or cold or even with ice cream!

Continue reading “Chocolate Cherry Flapjack Crumble Pie”

Pizza Scrolls

Children love pizza. I know there are rare exceptions to the rule, but what is not to like?! A yummy doughy base with a rich tomato sauce and an avalanche of melted cheese… Just thinking about it transports me back to the part of my year abroad that I spent in Italy and reminds me of all the delicious pizzas I sampled in the name of improving my Italian to meet my degree requirements. My kids are firmly planted in the we love pizza camp and cheese on toast comes with tomato paste on the toast as standard in our house. I do, however, feel the need to keep my life interesting and the kids do enjoy making what we call pizza scrolls. What they actually are is cheese and tomato croissants but rolled up like a savoury Chelsea bun.

To make this recipe you will need:

⦁ 1 tin of Jus -Roll croissants
⦁ Cream cheese
⦁ Tomato paste
⦁ Grated cheese of choice (we tend to use cheddar or mozzarella)
⦁ Dried mixed herbs or basil
⦁ Butter/margarine for greasing
⦁ 20cm circular springform tin

Method

1. Start by preheating your oven to 180ºc fan and let your child grease the tin. We use a silicone pastry brush and I let the kids ‘paint’ the margarine or butter all over.

2. Put 5 tablespoons of cream cheese in a bowl and mix with a couple tablespoons of tomato paste and add 2tsp of herbs. Mix well. My kids always love commenting on how the cream cheese is no longer white and act terribly surprised when it turns pink.

3. On a lightly floured surface (we tend to use a floured silicone baking mat on our counter) unwrap the croissant tin and unravel the croissants. Very gently squeeze the perforations together to ensure there are no holes in the pastry.

4. With the back of a spoon evenly spread the cream cheese mixture all over the pastry making sure all the corners are covered.

5. Sprinkle grated cheese on top. You will need a couple of adult-sized handfuls for this.

6. Choose an end and role the pastry up into a big scroll. It is important to keep it as tight as possible. Cut it into 6 even slices and place one in the middle of the tin and the others around it. Apply a thin milk glaze and then sprinkle with some grated cheese.

7. Place in the oven for 20 minutes. Check on it at 15 minutes and if it is browning too quickly cover with a foil hat until completely cooked.

8. Remove from the oven and these can be enjoyed warm or cold.

I shouldn’t have been surprised when these came out the oven that Atticus instantly declared that he wanted the middle one. Luckily it is very easy to separate them without any structural issues!


Introduction

I don’t know about you, but I find I am easily distracted. It could be that having three kids (Sebastian, Atticus and Ophelia) just means I am always being interrupted whether it be while eating, sleeping or even trying to go to the loo. Or maybe I have spent too much time with young children in the past five years that I have assimilated their short attention span and am no longer able to conduct a proper adult discussion without reverting to a child-like manner of reasoning.

Simon has been suggesting I start a blog for at least a couple of years and it has been on my to do list, but has never quite made its way to the top until now. I have now finally got around to it and I am beyond excited to welcome you to Just Add Patience. Those of you who know me well, will be well acquainted with my patience levels: they are not great. Patience is a quality that I am always striving to master and acquire. Some days I have oodles of it and will bestow it upon all of the children and Simon (I know generous right?!). Other days it completely deserts me and I feel like it is an ingredient that I was convinced I had in the pantry, but it turns out I finished the previous day or it is far too past its sell by date to actually work.

I really hope that you enjoy my ramblings about trying to teach my little people how to cook and nurture their developing personalities with as much patience as I can muster!

Please note: while trying to write this post, I drafted a recipe for a toffee popcorn cheesecake as that seemed like an easier task than introducing myself. That post will follow once I have managed to test the recipe with my little mischief makers…

Happy reading.

Love Kat x