Almond Shortbread

Bringing the shortbread together. “I do it alone mummy”

Apologies for my lack of posts in the last week. I am undergoing a period of adjustment and for a creature of habit, it is hard to accept change. I find myself I torn between delight and the feeling that it is the beginning of the end. The reason for my current inability to decipher my own emotions is because my youngest, my baby, has started nursery. While it is true that for the time being she will only be going one morning a week, it seems to herald the true beginning of the end of my period as a full-time stay-at-home-mum. I am not quite yet rushing back into work, but I need to get my thinking cap on vis-à-vis paid employment and what I plan to do with my time. I wish that I possessed the ability to be truly decisive, but I am not ready for this new independent stage which I can no longer deny is occurring in my not so little littilest. So instead of researching what my next step should be, I thought I would tell you about the almond shortbread that Ophelia and I made together as the memory of making this with her makes me smile.

Gently press the almond in.

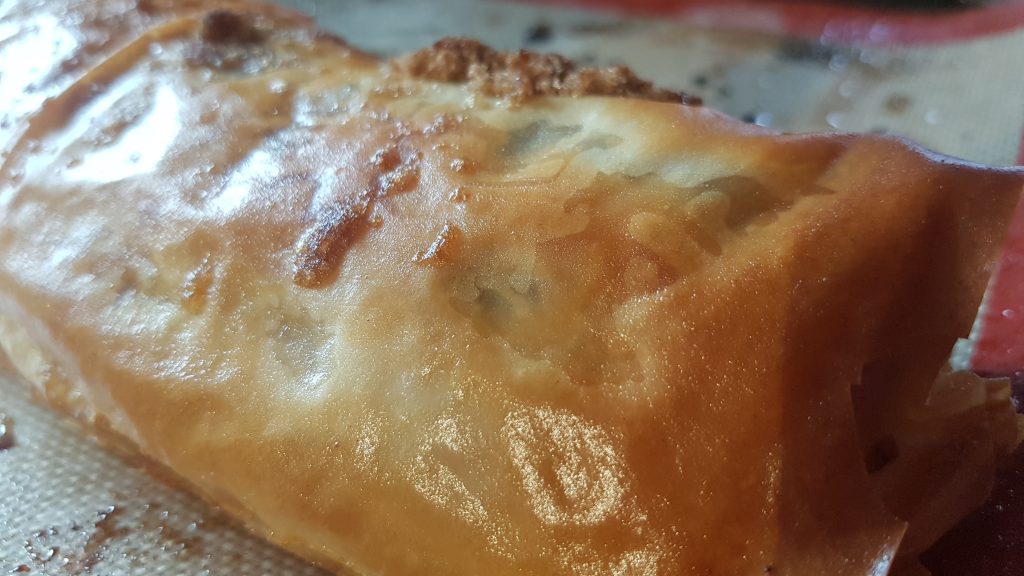
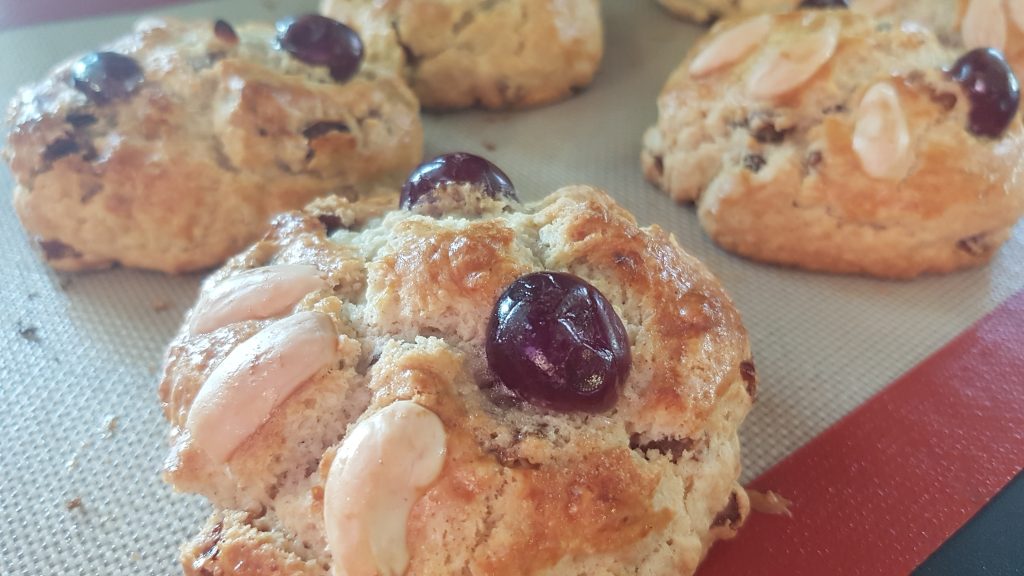
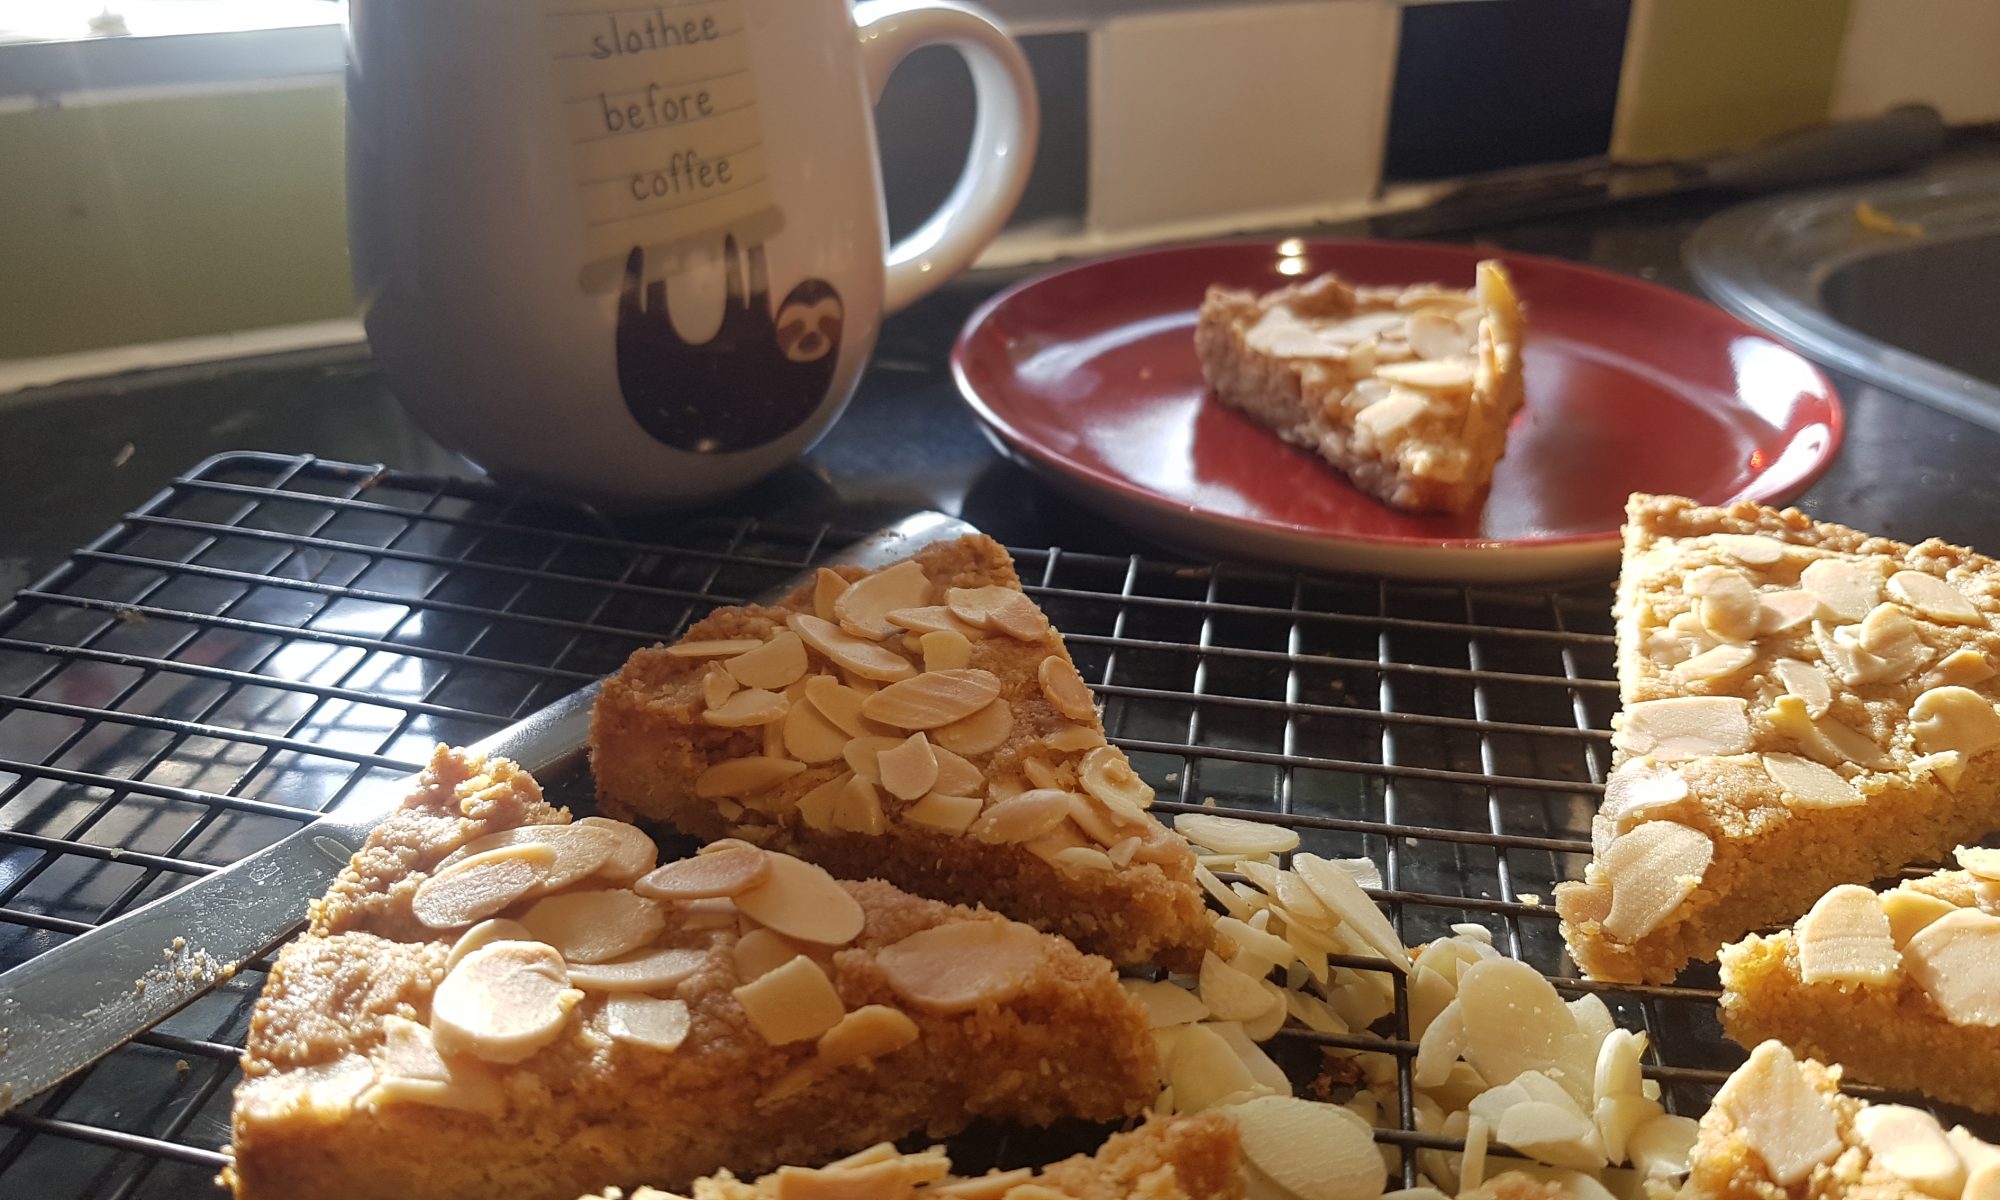
I don’t know about you, but I really love the depth of flavour and the texture that ground almonds bring to baking. We made this shortbread in a circular tin and adorned it with flaked almonds. It was a yummy, nutty shortbread which the kids absolutely loved. Yes, it is more crumbly that traditional shortbread, but I think the almonds make it special and truly yummy.

The aroma of this shortbread filled the kitchen for quite a while. It was such a temptation to eat it warm, but do let it cool fully in the tin as it has a very crumbly texture.

Ingredients

  • 125g butter or margarine (we used Flora Buttery) plus extra for greasing
  • 60g soft light brown sugar
  • 100g plain flour
  • 80g ground almonds
  • 25g flaked almonds to decorate

Method

  1. Preheat the oven to 170°c fan.
  2. Paint the baking tin (we used a 20cm circular one, you could use a square one or even a loaf tin).
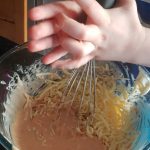
  3. Mix the sugar and the flour.
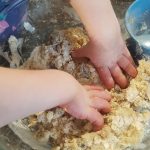
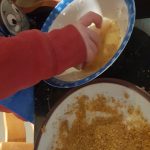
  4. Add the butter and rub in with your fingertips
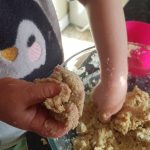
  5. Next add the ground almonds and bring together with your hands. The texture will be a bit grainy due to the ground almonds.
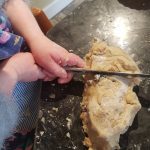
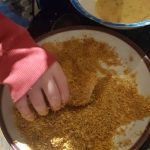
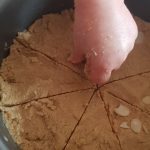
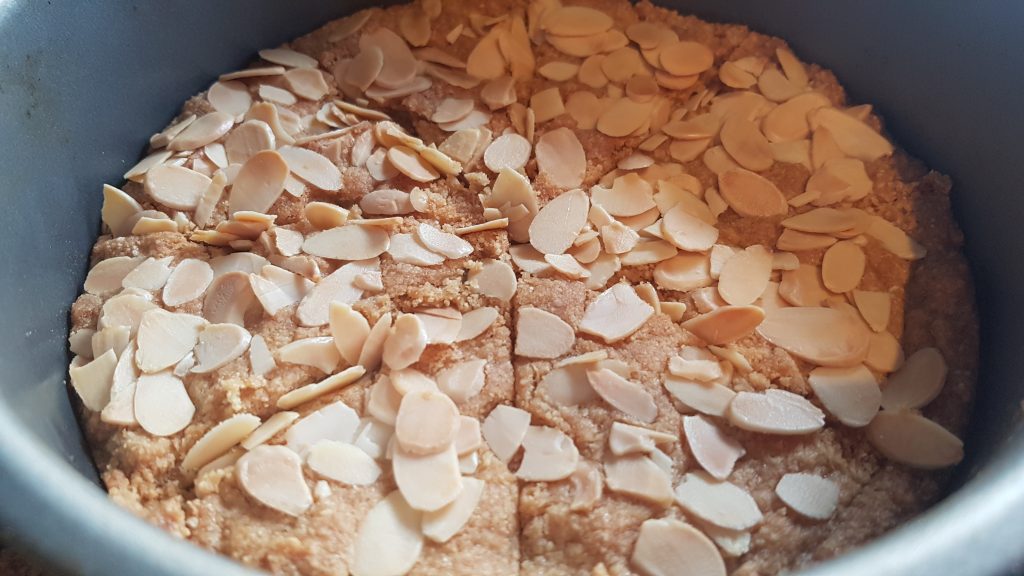
  6. Place in a tin and pat it down until flat and score out your pieces.
  7. Gently press the flaked almonds on the top of the shortbread.
  8. Bake for 25-30 minutes until firm to the touch and golden brown.
  9. Gently complete the slices while warm and leave to cool fully in the tin before removing it.
Ready to enjoy!

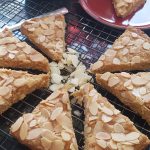
This shortbread was the perfect accompaniment to a calm afternoon cup of coffee. The kids also enjoyed munching on this on our walk home from school. I was rather sad when it was no more, but as it is really very simple to make it really isn’t a problem or a hardship to make another batch! I hope you enjoy this recipe and do let me know if you make it.

Chocolate Orange Strudel

What to do with the leftovers from a filo pastry packet!

Do you ever buy a packet of Filo pastry and use only a small amount of it only to be left what you are going to do with the rest of the packet?! Maybe it is just me. I made a Slimming World friendly pie for Simon and my mum and it only called for one sheet of Filo pastry. So I decided the kids and I would use the rest in a sweet recipe. As they are often reluctant to try crumble and recipes with stewed fruit (please read here, wouldn’t touch stewed fruit with a barge pole) I decided to try and alter the texture of the cooked fruit with masses of crushed bourbon biscuits, and a couple of tablespoons of Sweet Freedom Spiced Orange Choc Shot. The kitchen smelt amazing while we had this on the stove! I would have happily eaten the oranges, crushed biscuits and Choc Shot mixture straight from the pan. I was instead on my best behaviour as Seb was in charge of the pan and I didn’t want to be admonished by a six year old!

Orange slicing in full swing.

This recipe was so much fun to make; the kids had fun crushing biscuits and painting the filo pastry with melted butter. It’s true that the filo pasty sheets are fragile and they did need help moving single sheets before painting them, but we didn’t have any major mishaps! Also we put the melted butter in a wider based bowl than the last time we worked with filo pastry so I didn’t have any melted butter to clear up!

Dollop it on!
Roll it up!

Ingredients

  • 100g melted butter
  • 3 oranges, peeled
  • 4-5tbsp of light muscovado sugar
  • 100g bourbon biscuits (or any other chocolatey biscuits)
  • 100g walnuts
  • 2 tbsp. Sweet Freedom Spiced Orange Choc Shot
  • 50g chocolate chips
  • 1 pack of filo pastry
  • Icing sugar for dusting

Method

  1. Preheat the oven to 200°c and put a silicone baking sheet on a baking tray.
  2. Slice the oranges into bite-sized pieces, bash the walnuts and crush the chocolate biscuits.
  3. Put a couple of tbsp. of melted butter into a saucepan and add the oranges over a low heat.
  4. Add the walnuts, crushed biscuits and the Choc Shot and mix all well. You should have a sticky chocolatey mess. It should be thick and not runny.
  5. Lay a single sheet of filo pastry on the silicone baking mat and paint with melted butter and add a sprinkling of the muscovado sugar.
  6. Add another sheet of filo pastry and repeat step five. Continue until you have used all the sheets of filo pastry.
  7. Place the filling down one long side of the pastry and roll it up to make a long sausage, tucking the ends in as you role (I did this bit).
  8. Ensure the strudel is seam-side down and brush with melted butter and the remaining muscovado sugar.
  9. Bake in the oven for 35-40 minutes until golden and crisp and the pastry is cooked through. Leave to cool for 10-15 minutes before sprinkling with icing sugar and serving with ice cream and/or more Choc Shot.
Oh yum!

Two out of the three kids loved this recipe so I am counting it as a win. I thought it was yummy and would have happily scoffed the whole strudel all by myself. The only thing that stopped me is that I had had quite a cake-heavy day and I really thought I should lay off more sweet treats or I would have had a sugar rush all night!

Salmon and Soy Sauce Bake

Slicing hard boiled eggs and taking about fractions.

I am sure I have already said so before, but if there is a request to help in the kitchen, it is always granted no matter how inconvenient it may be at the time. This does mean that some evenings dinner is ready a lot later than originally planned or even the latter – too early as they didn’t want to help! It has to be said though, sometimes asking them for help can lead to them not wanting to. I have learnt that if I start making the food using their colourful knives and doing things they like such as chopping vegetables, cracking eggs, whisking and mixing they become eager to help and argue over whose turn it is next!

Measuring out the soy sauce. There was an intense look of concentration on his face as he completed this task!

We didn’t have any such scenario for this time around. This is because Seb has recently been invested into our local Beaver colony. He will tell anyone who will listen (including complete strangers) that he is a Beaver with a necker and woggle. This statement is sometimes met with looks of confusion, but most people who have had some contact with the Scouting or Guiding movement will show what he deems to be an appropriate response. I quickly realised that there is a cooks badge and I asked him if he wanted to make some items towards it. He was even more eager than I could have anticipated!

This meal was eaten by the whole family and was entirely put together by Seb. There is a small amount of adult preparation. You could use tinned potatoes if you want to reduce the amount of adult preparation. We used tinned salmon, but you could cook some pieces of salmon instead. We also were able to use this activity to reinforce Seb’s understanding of whole, half and quarter as he quartered the boiled eggs. I completely love it when cooking can help with multiple areas of the curriculum!

Time to mix it all around!

Ingredients

  • 500g new potatoes (or other small potatoes)
  • 4 medium eggs
  • 2 tins of skinless and boneless salmon (170g each) or 4 salmon fillets
  • 150g sugar snap peas
  • 150g sweetcorn (tinned or frozen)
  • 2 salad tomatoes
  • 8tbsp reduced salt soy sauce
  • 1 inch piece of fresh ginger, grated
  • 3 cloves of garlic
  • Seasoning

Adult preparation

  1. Boil the new potatoes for 15-20 minutes, drain and leave cool.
  2. Gentle lower the eggs into boiling water and simmer for 8-10 minutes. Run under cold water and remove shells.
  3. Grate the ginger

Older children could do all of the above, but as Seb was making this after school I did the three above steps for him.

Method

  1. Preheat the oven to 170°c and spray a large oven proof (we used Pyrex) dish with Frylight.
  2. Cut the potatoes, sugar snap peas and tomatoes into small pieces and add the large oven proof dish.
  3. Cut the eggs into quarters and add to the dish.
  4. Add the sweetcorn.
  5. Remove the salmon from the tins and gently squish with a fork to separate and add to the dish.
  6. In a small bowl, measure out the 8tbsp of soy sauce.
  7. Add the grated ginger.
  8. Gently bash the garlic cloves with a rolling pin and remove the skin and then crush with a garlic press. Add to the soy sauce.
  9. Mix the ginger and garlic into the soy sauce and pour over the dish with the rest of the ingredients and gently mix.
  10. Place in the oven for 20 minutes. Remove from the oven and serve immediately.

Simon and I really enjoyed this dish. Seb wasn’t keen on the tomatoes, but in fairness he never is. Our little potato-hater managed to eat at least one new potato, but was adamant that he would not eat any more. As usual Ophelia managed to eat pretty much her whole portion. It was a nice family meal and one I am eager to repeat. Do get in contact if you make this as we would love to hear from you!

Rugby Wraps

My family has never had a particular tradition or connection to one particular sport. When growing up, my dad would always, I mean without fail, watch the Grand Prix. But it was never a family activity. I believe it was a source of mild frustration for my dad that neither of his daughters showed any interest in watching the motor racing with him. As a teenager, I remember looking forward to Grand Prix weekends as it meant I could have a Sunday afternoon to myself as long as dad wasn’t disturbed!

I always knew that my husband was a rugby fan; when I first met him he was wearing a Leicester Tigers rugby shirt. Although, if truth be told, I would have been hard pushed to tell you that! Before we were married, it was very easy for me to avoid watching the rugby with him and make other plans. However, when we married, I realised that I wouldn’t be able to avoid the game my entire life. So I set about trying to understand the rules. I asked many, many questions. It may have actually been the same question over and over again and after over 10 years of marriage I am somewhat ashamed to admit my understanding of the rules hasn’t progressed!

Ready to fill the wraps.
Seb with his wrap shortly before it was demolished!

My interest in understanding rugby was dwindling and then Simon told me that the 2011 Rugby World Cup was taking place in New Zealand. He asked me if I would like to watch the matches with him. I was rather reluctant as they would all be taking place rather early and although I am an early bird, I like my time to myself in the mornings. He promised me he would make me breakfast and a deal was struck. This was when what were initially called Rugby Sandwiches were created. In their original form, we used partially baked baguettes filled with a combination of scrambled eggs, bacon and sausage and mushrooms. I had mine with vegetarian sausages. Fast forward to the present day (and the airing of the Six Nations 2019) and we are still making these. We have exchanged the partially baked baguettes for wraps as the kids eat them better and they work well if you are following Slimming World! Isn’t it funny how life changes?!

and cooking mushrooms.
Seb scrambling eggs

I was really impressed with my six year old during this process as he scrambled the eggs himself and kept an eye on the mushrooms and mixing them around while I sorted the bacon. He was so very proud of his efforts, and proudly told his dad how he cooked the eggs and the mushrooms! The kids demolished a couple of mini wraps each and the grown ups had these with potato wedges. Everyone was rather happy!

Ingredients

  • Wraps (in our house the grown ups used normal-sized wraps and the children had a couple of mini wraps each)
  • Eggs (we used one for each person)
  • Mushrooms (we used about 50-60g as not everyone likes them in this house)
  • Bacon (we allowed 2 pieces per adult and 1 piece per child) or vegetarian sausages
  • Butter Frylight or margarine

Method

  1. Chop the mushrooms and put to one side.
  2. Crack the eggs into a bowl and whisk (Seb called it this the ‘whizz mix’ which made me chuckle! Seb shows you how it is done in the video below.)
  3. Put the bacon onto grill.
  4. Spray a small saucepan with Butter Frylight and add the mushrooms to fry. Mix every so often to stop them sticking.
  5. Spray another small saucepan or frying pan with Butter Frylight and pour the beaten eggs into it. As the egg starts to set, mix it all around until the egg is fully cooked.
  6. Put the cooked mushrooms and scrambled eggs into individual little bowls with spoons to serve.
  7. Cut up the grilled bacon and place in another bowl.
  8. Give everyone a wrap on a plate and allow them to spoon in the fillings they want and roll up. If you are not eating them immediately, putting a cocktail stick in the keeps them wrapped.
  9. Enjoy in front of the rugby!

Squirrel Poo Biscuits

The winning jump at long jump.

Last week, Atticus’s homework was about measuring. The instruction sheet came with a couple of ideas and baking was one of them. In all fairness, I do not need any encouragement to bake with the kids. I will quite happily turn pretty much any homework, assignment or gift into something I can make with the kids. However, my husband suggested it might be nice if I planned to do something else with him as their extracurricular activities are rather saturated with cooking. After my initial reaction of how dare he ruin my fun? I began to see that he may well have a point. For once, I am really hoping that he doesn’t decide to read this article as I find it very difficult to admit to him in person that he was right! So to have material for Atticus’s homework the kids had a game of long jump in the hallway. It was loud and jumpy and thoroughly enjoyable until Seb and I collided heads. I tell you the truth, my head hurt for a good 3 days after that bump. Seb told me he was fine not long after the bump and insisted everyday when I asked him if his head hurt that it didn’t. Mine, however, was throbbing… It must be that I just don’t bounce back the way I used to in my younger years…

Measuring out a tablespoon of golden syrup.

Despite having enough material for the homework, I really couldn’t pass up an opportunity to cook with Atticus alone. When asked, he said he wanted to make some chocolate biscuits with raisins. So I was racking my brain and focused on these biscuits. When I was thinking about them and the ingredients, chocolate, dried fruit and nuts and it reminded me of when my dad told me he always used to call Topic Bars squirrel poo bars. I mentioned to Atticus as a joke that they could be called Squirrel Poo Biscuits because they were brown and contained fruit and nuts which would all likely be present in a squirrel’s poo. This was clearly the funniest thing I had said in along time and I should have guessed that he would be unwilling to call them Chocolate Fruit and Nut Clusters after that! Please don’t let the name of these put you off making them though, they are really yummy!

Ingredients

  • 100g dark chocolate
  • 100g milk chocolate
  • 60g butter or margarine
  • 1tbsp golden syrup
  • 200g nuts (we used a mixture of peanuts, walnuts and almonds). If you want you can toast the nuts before you start, but it isn’t absolutely necessary, it just adds a bit of depth to the flavour.
  • 150g dried fruit (we used half raisins and half dried cranberries)
  • 40g plain flour
  • 2tbsp unsweetened cocoa
  • Icing sugar for dusting

Method

Stir it all around!
Bashing the chocolate
  1. Preheat the oven to 170°c or 150°c fan and line two baking sheets with silicone baking mats or greaseproof paper.
  2. Put half of the chocolate (we put the milk in, but you could do the dark or half and half) in a heatproof bowl with the butter and golden syrup and put on a pan on gently simmering water until it has all melted and is smooth.
  3. Chop or bash (we bashed with the end of the rolling pin in a large bowl) the rest of the chocolate and place in a large bowl
  4. Bash the nuts into smaller pieces. You can do this in small batches with a pestle and mortar or in a bag or large sturdy bowl with the end of a rolling pin.
  5. Put the nuts into the same bowl as the chocolate and sieve the flour and cocoa into that bowl too and mix to combine.
  6. Add the melted chocolate mixture to the bowl and mix so that the flour mixture is completely coated with the melted chocolate.
  7. Take tablespoons of the mixture and put them onto the baking sheets ensuring there is a gap of at least 3cm between each one.
  8. Bake for 15 minutes and remove from the oven. Don’t be tempted to move these when they are warm as they will be very fragile. Allow them to cool for 30 minutes or so before transferring to a cooling rack and sprinkling with icing sugar.
All ready to eat!

These biscuits will last for 2-3 days in an airtight container. Ours lasted about half that time and were enjoyed by kids, parents and grandparents alike. My note to myself from this baking experience is that baking with just one of the kids is a thoroughly enjoyable activity as they get to do everything and I get to talk to just them and hear more about their day without a sibling interrupting them. This was so very precious to me in a busy week where I nearly missed out on the opportunity of hearing his perspective on life.

Apricot and Pistachio Energy Balls

We are nearly at the end of January and I am taking big breathes to relax as we have made it. It really can be a really dreary and depressing month weather wise and with everyone trying to be good it can seem like the fun is sucked out of it. Let me tell you this though, it isn’t all bad as when life gets overly stressful, when the kids drive me round the bend, my wonderful husband sends me off to a café on my own, with my laptop so I can write a blog post in the day and he instructs me to eat cake. Yes my lovely readers, my gem of a husband sends me out to eat cake. Some of you may well struggle to believe that I have to be told to eat cake with all the things we make, but it turns out I do… I have just ordered my second slice and I am not feeling one bit guilty. Why? Because it has been a stressful day month and I have been really good since I devoured practically a whole batch of meringue topped mince pies – and that was last year! Please don’t remind me that that was only last month! Yes the second slice of cake may well cancel out the rest of the good in the month, but for my sanity I was ordered to eat cake, so I have. It is one thing I can tick of my list without any trouble. And I will vow to work with even greater dedication at the exercise classes I attend during the week. So if any of my instructors are reading this yes you may yell at me to work harder next week and I won’t roll my eyes at you or grimace at you. I promise. Well I promise to endeavour not to!

Ophelia deciding I had taken enough time photographing the snack and wanting to dive right in!

So before I went out to eat loads of cake, last week the boys made these delectable Apricot and Pistachio Energy Balls. We seem to get through kilos of dried fruit in cereal, cakes and snacks during the year, but looking back over the things we have made, I realised energy balls had never featured. The main reason is due to the nut content and me being super paranoid about another child getting hold of them in the school grounds. But when they have these, I herd the children out of the school grounds questioning where their snacks are, (it is after all a long walk or trek in their eyes home) and then distribute them to the eager recipients. I would maybe say though, they are probably better as a pack up snack in the winter months as they do need to be stored in the fridge.

Rolling the energy balls without licking their fingers!

I promise they couldn’t be easier to make. My children made them one evening after school and enjoyed the fruits of their labour the rest of the week and over the weekend. They are literally one of the easiest thing to make with your little chefs. We also made it a game to see who could go the longest while rolling them into balls without licking their fingers. I have to say even I was sorely tempted to lick my fingers as they were so truly scrummy and at the end we all sat there eating the remains off our fingers before hand washing! We truly must have looked a sight! Poor Ophelia though, watched from the other end of the counter as she had a particularly bad cold I that was one thing I was not eager for her to share. She was given a little spoon to lick to feel included while she chatted along to grandma.

Ingredients

  • 275g dried apricots
  • 85g shelled pistachios
  • 2tbsp runny honey (or use maple syrup to make vegan)
  • 50g oats

Method

  1. Place all the ingredients in a food processor and put the lid on.
  2. Turn it on at a medium speed. You may need switch off and scrape the sides a bit.
  3. Blend together until the ingredients form a big thick clump.
  4. Remove the lid and the blade from the food processor and take pieces of the mixture and roll into balls. Ours were all slightly different slices, but mainly around the half a tbsp. mark.
  5. Refrigerate for a couple of hours and the return to the fridge in a tub. These will store in the fridge for a week or so.
Challenge completed!

It has to be said that the boys were more fond of these than Ophelia. I do think that the no finger licking contest that they had going made this activity even more fun and made them want to eat even more of them! There were many happy sounds from them when I said I had energy balls for snacks. I think we shall be trying some different flavours next time. I am dreaming of chocolate and ginger… I shall leave that one out there and hopefully they will come around at some point!

Fat Rascals

I was never a particularly rebellious teenager. That said, I do remember being told off by my dad when I was thirteen for reading a book in the back of the car as we drove across the Grand Canyon National Park. I remember having looked out the window and seen the astonishing beauty of the scenery, feeling overwhelmed and then delving back into my historical fiction book about the area that I had bought earlier that day. Language and books have always held a spot very close to my heart. While translating I used to spend hours procrastinating with Roget’s Thesaurus to try and find the perfect word to convey the meaning of the text. This may seem to have no connection whatsoever to the Fat Rascals that I made with Ophelia last week, but the word rascal got me thinking of what other words I could use for them. So, drum roll please… we made Massive Scoundrels! It made me chuckle so much to myself that I had to share!

No mummy I don’t want help cutting the dough, I do it myself!

For those of you who haven’t heard of Fat Rascals before, they are a rich scone and rock cake hybrid from Yorkshire. I don’t come from Yorkshire, but my sister and I had a lovely mini break there before I had the kids, when I was between jobs. We went to the iconic Betty’s Tearooms and had a Fat Rascal and tea. It was exquisite and I still hold very fond memories of that trip and the Fat Rascal all these years later. So when I was hunting for something I could make with Ophelia and was thinking of scones, I decided we would try and replicate Betty’s yummy Fat Rascals. The exact recipe Betty’s Tearooms use is a closely guarded secret, but I did some research and drew elements from a couple of recipes I found in my cookbook collection and online. They did also resemble my memories so I was happy.

Making faces.

These are excellent to make with children as they can get involved in pretty much every stage from rubbing in butter, pouring cream, squishing and squashing to form the dough and counting out and tearing the glacé cherries and counting out the almonds to make faces on top of them.

Ingredients

For the dough

  • 125g plain flour
  • 125g self raising flour
  • 1tsp baking powder
  • 100g unsalted butter
  • 75g caster sugar
  • 150g dried fruit (we use a mixture of raisins and sultanas)
  • 1tsp cinnamon
  • 1/8tsp nutmeg
  • Zest of half a lemon
  • 1 egg
  • 60ml double cream

For decoration

  • 6 cherries halved
  • 18 whole almonds
  • 1 beaten egg

Method

  1. Preheat the oven to 200°c or 180°c fan. Line a baking tray with a silicone baking mat or greaseproof paper.
  2. Sieve the flowers into a large bowl. I tend to let the children alternate between gently tapping the side of the sieve and gently stirring the flours in the sieve.
  3. Stir in the baking powder.
  4. Add the butter and ‘tickle’ it into the flours until it looks like fine breadcrumbs.
  5. Add the sugar, lemon zest, cinnamon, nutmeg and dried fruit and mix until fully combined.
  6. Pour in the cream and the beaten egg and mix gently before bringing together with your hands. Knead until a dough has formed.
  7. Divide the dough into two equal pieces and then make three equally-sized pieces from each of the two pieces of dough. You should have 6 lumps.
  8. Shape each lump with your hands until they look like large rounds.
  9. Brush the second beaten egg over the Fat Rascals.
  10. Tear the 6 cherries in half and use two pieces on each for eyes.
  11. Use three almonds on each to make a smile.
  12. Place in the oven for between 15 and 20 minutes. They are done when golden brown. Leave to cool on the tray for 5-10 minutes before moving them.
Imagine them with long thin tails to look like the gulper eels like my daughter did or just look at the yummy Fat Rascals and decide when to make them!

When these came out of the oven and Ophelia had a look at her handiwork and she exclaimed: ‘They look like gulper eels!’ In case you are not as familiar with sea creatures as my Octonaut-loving two year old, a gulper eel is an eel with a mouth which looks disproportionate to the size of its thin tail. It’s animation in the show portrays a creature with beady eyes and small, but very prominent pointy teeth. So I suppose she was right, they do look a bit like gulper eels in their own little way…

Fish Fingers

We are only a week into the new term and I am already having to coax the kids out of bed in the mornings all the while trying to convince them that it is morning despite the darkness. It seems to be one of my eternal frustrations in my parenting expedition. I use the word expedition as I most certainly do want to conjure up the image of the sheer volume of allegedly necessary paraphernalia that the kids, and therefore me by default, accumulate and need to have on hand at any given time.

Dunking the fish in the egg mixture

Having just read the above, I think it is abundantly clear why parents tend to favour quick and easy evening meals. I know for me that by Friday all my intentions of well balanced, homemade and nutritious meals is abandoned and the kids eat ready made pizza and garlic bread and I heave a sigh of relief while they happily chatter and gobble it up. Fish and chips always used to be my go to meal for Friday evenings. However, this started becoming an issue when Seb started school and it turns out they serve a fish meal on a Friday at lunch. This made him reluctant to have fish and chips for a second time in the day so Friday food then became pizza and we now rarely buy fish fingers.

Covering with crushed cornflakes.

Lucky for me, my kids seem to like fish. I know for some parents the only way that their children will even contemplate eating fish is if it comes breaded and served with chips. But not all fish fingers are created equal. We like the ones made out of 100% fish fillet, they just taste nicer. And if that makes me a fish finger snob, so be it… Anyway back to our recipe. We decided to use crushed cornflakes (so much more than a breakfast cereal!) instead of breadcrumbs, some dried mixed herbs and garlic granules for added flavour and the result was really yummy fish fingers!

Ingredients

For the three children, we used 2 fillets of cod. I sliced them into ‘finger-sized’ pieces before starting cooking with the kids.

  • 2 fillets of cod
  • 75g cornflakes
  • 1tsp dried mixed herbs
  • 1/2tsp garlic granules
  • 1 egg
  • 1tbsp milk

Method

  1. Preheat the oven to 180°c and put a silicone baking mat on a baking tray.
  2. Put the cornflakes, mixed herbs and garlic granules into the food processor and blitz until fine and place on a plate.
  3. Crack the egg and gently whisk in a small bowl. Add the tablespoon of milk and mix.
  4. Dip the fish fingers in the egg and ensure all sides have been coated.
  5. Roll the fish fingers in the blitzed cornflakes to ensure that all sides are covered.
  6. Place on the baking tray and put in the oven for 15-20 minutes until golden and fully cooked. We turned ours half way through cooking time.
I was quite impressed at how contained the mess was at the end! Normally we have more spillages!

My kids had a lot of fun making these and there were no leftovers. If I am honest, I should have made more as I would have liked to have some too! I should also say that, my kids are generally quite messy in the kitchen, but this last photo shows the extent of the damage and this time around it was limited. I can’t express my surprise that they had managed to keep most of the crushed cornflakes on the plate! Maybe this is the start of less messy cooking sessions? Nope, who I am kidding there is no chance that this was anything more than a fluke! Do let me know if you make this recipe.

Slow Cooker Steamed Lemon Sponge

And just like that the Christmas holidays are over for another year. Part of me is rather looking forward to having a bit more time to get everything done, but the other part of me is mourning the end of the holiday time and the fact that the boys are returning to school. As a last fun activity for the holidays I thought it would be fun to experiment in the kitchen with a steamed sponge. If the thought of having to watch the pan and continuously top up the water puts you off making a steamed sponge, we cooked ours in the slow cooker.

You could make this with any flavour jam or curd that you have leftover in the fridge or even some gift jars like we did. As we made lemon sponge we put in lemon zest and juice, but altering the flavours would be really easy. For a vanilla sponge, use 1tsp of vanilla extract and your jam flavour of choice. For a chocolate sponge, remove a tbsp of the flour and add a tbsp of cocoa powder and 100g of chocolate chips and use chocolate spread instead of jam or curd. I am sure a chocolate-based pudding is pretty much a firm favourite in most households!

Atticus zesting. Shortly before he tried to eat the lemon without the skin!

Since starting cooking with the kids regularly, I have learnt that asking small hand to hold a citrus fruit and have a go at zesting invariably ends up with somewhat grumpy children. They want to complete the task, but as yet are unable to hold such a large fruit and operate the zester at the same time. To enable them to complete more of recipes using zest on their own, we tend to use a tub grater with the small grater attachment to achieve fine zest. Atticus managed this admirably for this recipe and was quite sad when he had done it all! It may seem obvious, but maybe this tip will help someone. It took longer than it probably should have for the penny to drop for me!

In the slow cooker on high for 3 hours.

The one bit of this recipe the kids didn’t do by themselves, was folding the lid and tying the string around the pudding basin. This can be a bit of a tricky process. I had Seb lay the foil down first and then the baking parchment over it. We folded it in half and then he painted the greaseproof paper with butter. I tied the string round in a double knot while he held on to the edges of the paper to ensure it all went under the string. I did also let Atticus pour the water into the slow cooker. Yes we did have a bit of a puddle on the surface and the floor as the jug was too full for him to accurately gauge the angle and say splish splosh at the same time!

Ingredients

  • Butter/margarine for greasing the pudding basin and parchment
  • 5tbsp of lemon curd
  • 175g butter/margarine (remove from the fridge early to soften if using butter)
  • 175g golden caster sugar
  • 3 eggs
  • 175g self raising flour
  • 1tbsp milk
  • Zest of 1 lemon
  • Juice of half a lemon
The entire lemon sponge in all its yummy glory!

Method

  1. Grease a 1.2 litre pudding basin with lots of butter or margarine. We always use silicone brushes to do this and the kids have fun painting the surface.
  2. Put the 5tbsp of lemon curd in the bottom of the basin and put to one side while making the sponge.
  3. Put all the ingredients for the sponge in a large bowl and mix together until fully combined. We used electric beaters to do this.
  4. Pour or dollop the cake mixture into the pudding basin over the lemon curd.
  5. Lay out a bit of foil which is large enough to cover the pudding basin with a bit extra and then a piece of baking parchment on top of it. Put a fold vertically down the middle and grease the baking parchment with butter.
  6. Put the baking parchment (butter side down) over the pudding basin and tie the string round in with a knot. You could also fashion a handle from the string, but I don’t tend to.
  7. Pour water into your slow cooker so that it reaches half way up your pudding basin. We used cold water so the kids could decant the water.
  8. Put the slow cooker on high for 3 hours. I checked the progress of ours by peaking under or poking a skewer through the wrapping at 2 hours. The pudding is ready when a skewer comes out clean.
  9. When out of the slow cooker, uncover and turn the pudding out onto a plate. Serve immediately with custard or ice cream or even plain.

You could also make this on the stove in a large pan allowing it to simmer for 2 1/2 hours. I have found that this is a wonderfully adaptable and versatile pudding. We made ours after lunch and served it for pudding at our evening meal after afternoon when it was ready.

Cheesy Popcorn Squares

A very happy new year to all my lovely readers wherever you are. Like most people, I find it so very easy to get lost in the random period between Christmas and New Year. At the end of boxing day, I feel as if the Christmas celebrations should be drawing to a close, but my pantry and kitchen indicate otherwise. I wouldn’t be exaggerating much by saying that we still have a small mountain of chocolate left over despite our best efforts to make it shrink. I don’t think we shall need to buy any more chocolate until Easter. I have even found some new places in our messy pantry to hide chocolate from myself and everyone else to save for when everything and everyone are driving me around the bend and I need a chocolate fix. I am sure you will agree that this isn’t selfish, but merely survival!

In a desperate attempt to move away from sweet recipes with the kids after a wonderfully sugary build up to Christmas, I managed to entice the boys to make their lunch. I am completely convinced that the only reason that I succeeded in doing this is because I said the recipe included popcorn. This baffled them somewhat as they normally have unflavoured popcorn with some raisins or nuts for film snacks and made them all the more eager to get stuck in. The other reason for using popcorn is the pure sound of joy that comes from the children when the popcorn machine starts whirring and popping and the popcorn comes jumping out.

Flattening it with the spatula – shortly before the spatula got licked!

Ingredients

  • 75g popped plain popcorn
  • 100ml garlic and herb cream cheese
  • 80ml crème fraiche
  • 150g grated cheese
  • 2 eggs
  • 2tbsp tomato paste
  • 3 slices ham (or omit to make vegetarian)
  • Seasoning

Method

  1. Preheat the oven to 180ºc fan and grease and line a brownie tin or a square or rectangular cake tin.
  2. Crack the eggs into a large bowl and whisk.
  3. Add the cream cheese, crème fraiche, tomato paste and seasoning and mix well.
  4. Put the grated cheese, ham (if using) and popcorn into the mixture and mix until fully combined.
  5. Transfer the mixture to the tin and bake in the oven for 15 minutes. Remove from the oven when golden and the cheese is all lovely and melty. Leave for 15-20 minutes to cool before slicing into squares.
  6. Enjoy!
Atticus decided he couldn’t wait for me to finish taking some pictures of their creations before trying them!

Simon and the kids had this for lunch one day. I was expecting them to leave some so the kids could have some the following day. This didn’t happen as all the pieces were gobbled up at lunch! I suppose this is an accurate indication of their opinion of the bake! Do get in touch if you have a chance to make these Cheesy Popcorn Squares.